In This Guide:
Related Guides:
Contracting
eContracting from a DSP/DMS Import
RouteOne’s eContracting platform provides integration with key DMS platforms in the market. RouteOne is currently integrated with 15 DMS platforms including CDK, Dealertrack and Reynolds & Reynolds.
A complete list of our DMS integrations can be found here.
Accessing a DSP/DMS Import
To access deals from a DSP/DMS integration, hover over the ‘Deals’ tab and go to ‘Contract Manager.’
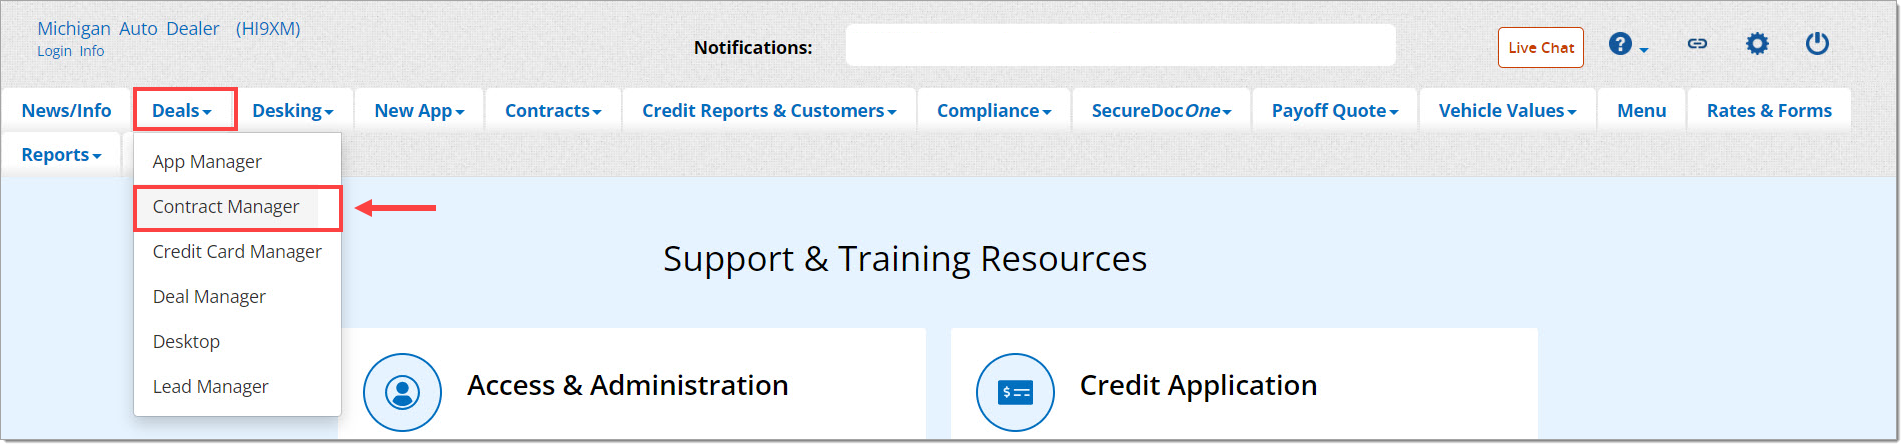
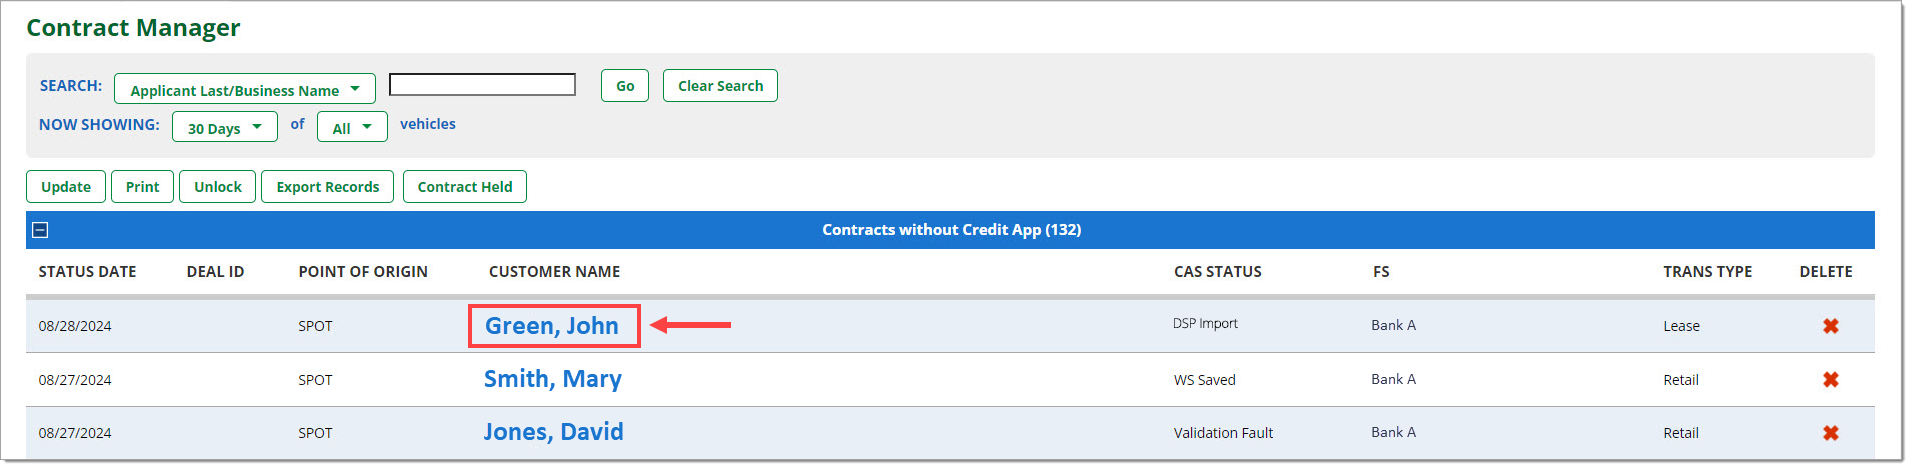
DSP/DMS integrations are indicated in the RouteOne system by a ‘CAS Status’ of ‘DSP import.’
At this point, the DSP/DMS import will be listed under ‘Contracts without a Credit App,’ because it is not yet affiliated with a saved or approved Credit Application.
Next, you will need to pair the DSP/DMS import with a Credit Application in the system or create a new Credit Application.
Pairing a DSP/DMS Import with a Credit Application
Pairing a DSP/DMS import with a Credit Application in the system allows available deal information to be automatically populated into the RouteOne system and minimizes rekeying and manual entry.
Click the ‘Customer Name’ of the DSP/DMS import you want to create an eContract for.
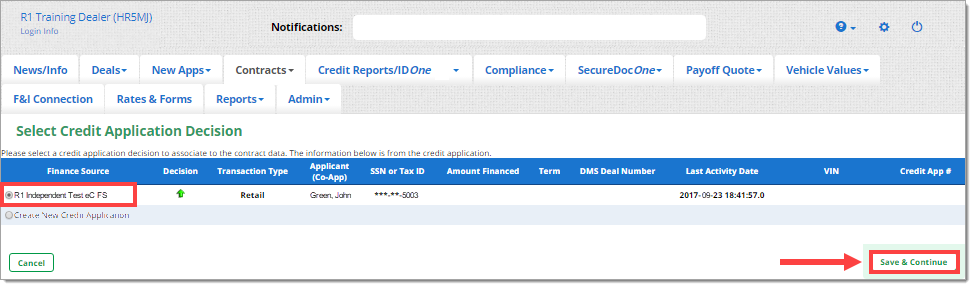
You will be directed to the ‘Select Credit Application’ page.
If there is a Credit Application/Credit Bureau with a Social Security Number or customer name that matches the DSP/DMS import, it will show up in the ‘Select Credit Application’ page.
On the ‘Select Credit Application’ page you can pair the DSP/DMS import with either:
- A previously submitted and approved Credit Application that received a decision.
- A Credit Application or Credit Bureau that was previously saved and imported, but not submitted for a decision.
OR
- Create a new Credit Application during the eContracting process that will be paired with the deal.
Once you have made your selection, click ‘Save & Continue.’
After clicking 'Save & Continue' you will be directed to 'DMS Custom Mapping' if you need to map any fields from the DMS import onto the Contract Worksheet or directed to the 'Contract Worksheet' if no additional mapping is needed. If you elected to pair the deal with a previously approved or a previously saved Credit Application, some fields (e.g. Contract Header, Buyer Info, Vehicle Info, etc.) will be pre-populated.
If you elected to create a new ‘Credit Application,’ you generally will have to input the information manually. In some instances, certain customer information, vehicle information, and contract terms may be populated in the Contract Worksheet.
Adjusting the Monthly Payment Amount
In order to improve functionality, RouteOne allows dealers to adjust the Monthly Payment Amount to match their DMS system, while remaining within the acceptable tolerance APR limit.
The payment schedule will be populated with values directly from the DMS. If there is a discrepancy between the RouteOne calculated monthly payment, and the payment amount from the DMS, type the DMS payment into the ‘DMS Calculated Monthly Payment’ field and click ‘Verify and Apply’
If the monthly payment amount does not match the DSP, and an error message opens, enter a new payment within the ‘DMS Calculated Monthly Payment’ field, and click the ‘Verify and Apply’ button again.


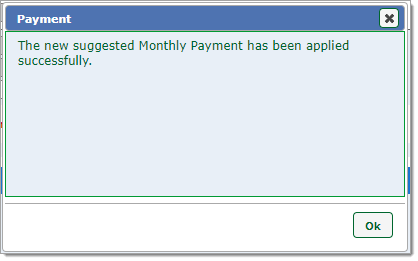
Once an acceptable amount is submitted, the system will respond back with a reminder text at the bottom of the TIL section and a pop-up alerting the user that the DMS Calculated Monthly Payment has been applied successfully.

Submitting the eContract
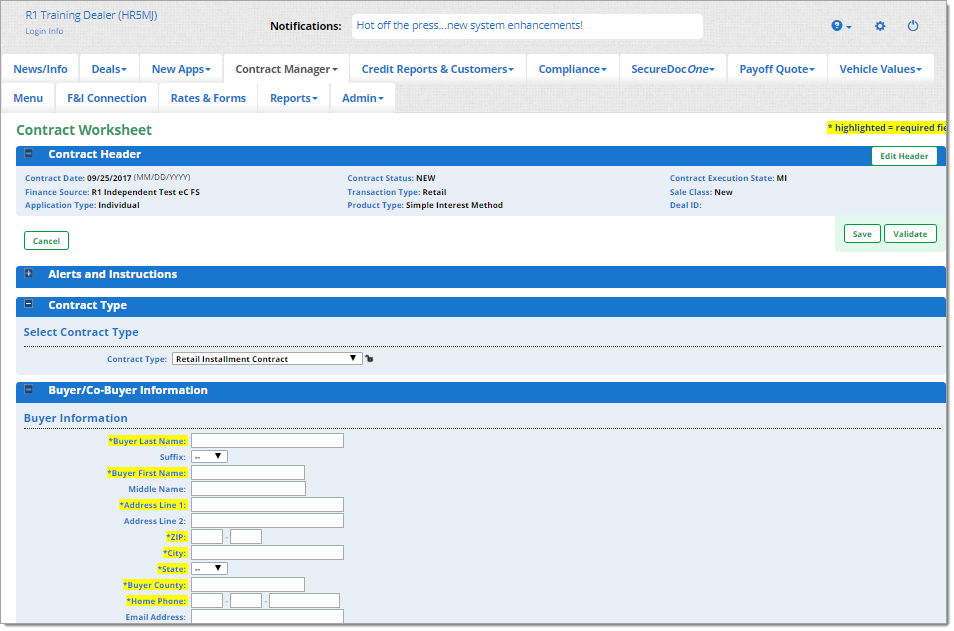
Complete all the required information in the Contract Worksheet, and proceed to ‘Save,’ ‘Validate,’ or ‘Generate the Contract’ as you normally would.
If the finance source you are using requires validation, you may also be able to take advantage of the Required Form List functionality. More information on Required Form List for funding can be found here.
Once you generate the contract, you will be directed to the ‘Contract Package’ page. Complete the eContracting steps (eDocuments, if needed, Review, Sign, Print, Assign and Distribute) as you would a standard eContract.
Submitting a Credit Application
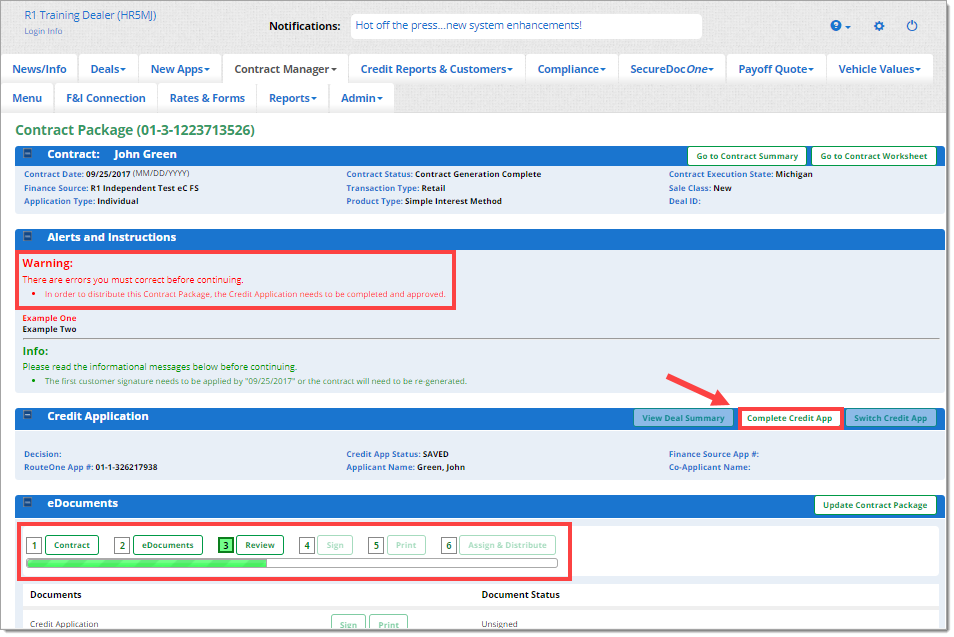
You can complete the Credit Application at any time in these steps, but you cannot progress past the ‘Print’ step until you complete the Credit Application, as an approved Credit Application is required to distribute the Contract Package.
To access an uncompleted Credit Application for the contract, click the ‘Complete Credit App’ button.
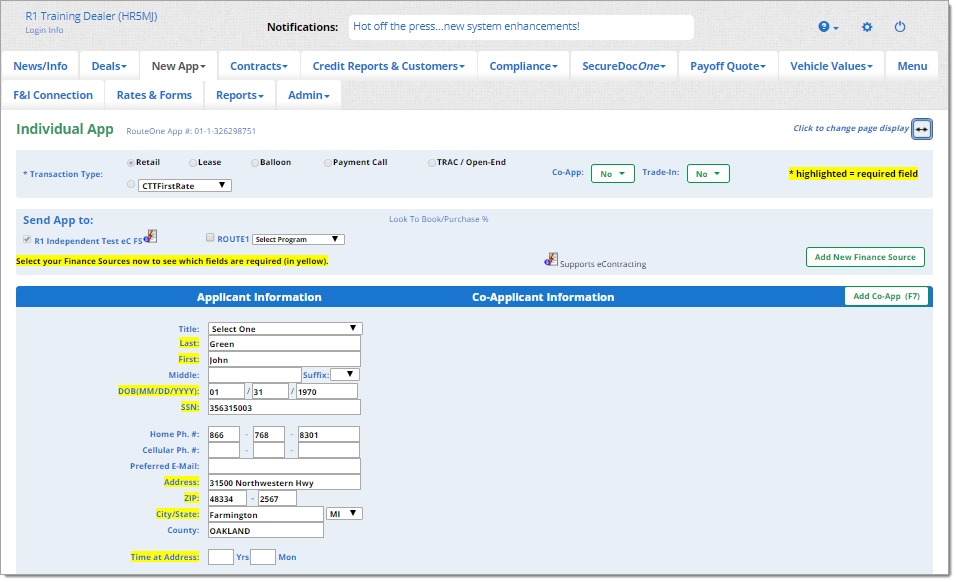
If you needed to complete the Credit Application and clicked ‘Complete Credit App’ from the ‘Contract Package’ page, you will be directed to the ‘Individual App’ page. This is where you can input or complete the required information for the Credit Application.
When you are finished, ‘Sign’ and ‘Submit’ the Credit Application in the bottom right-hand corner of the page.
You will have to wait for the application to be approved before you can assign and distribute the contract.
You can check the status of the Credit Application in the ‘Deal Manager’ page.
To complete the eContract, you will need to return to the customer’s ‘Contract Package’ page. To do so, return to the Contract Manager page, and click on the customer name you want to complete the eContract for.
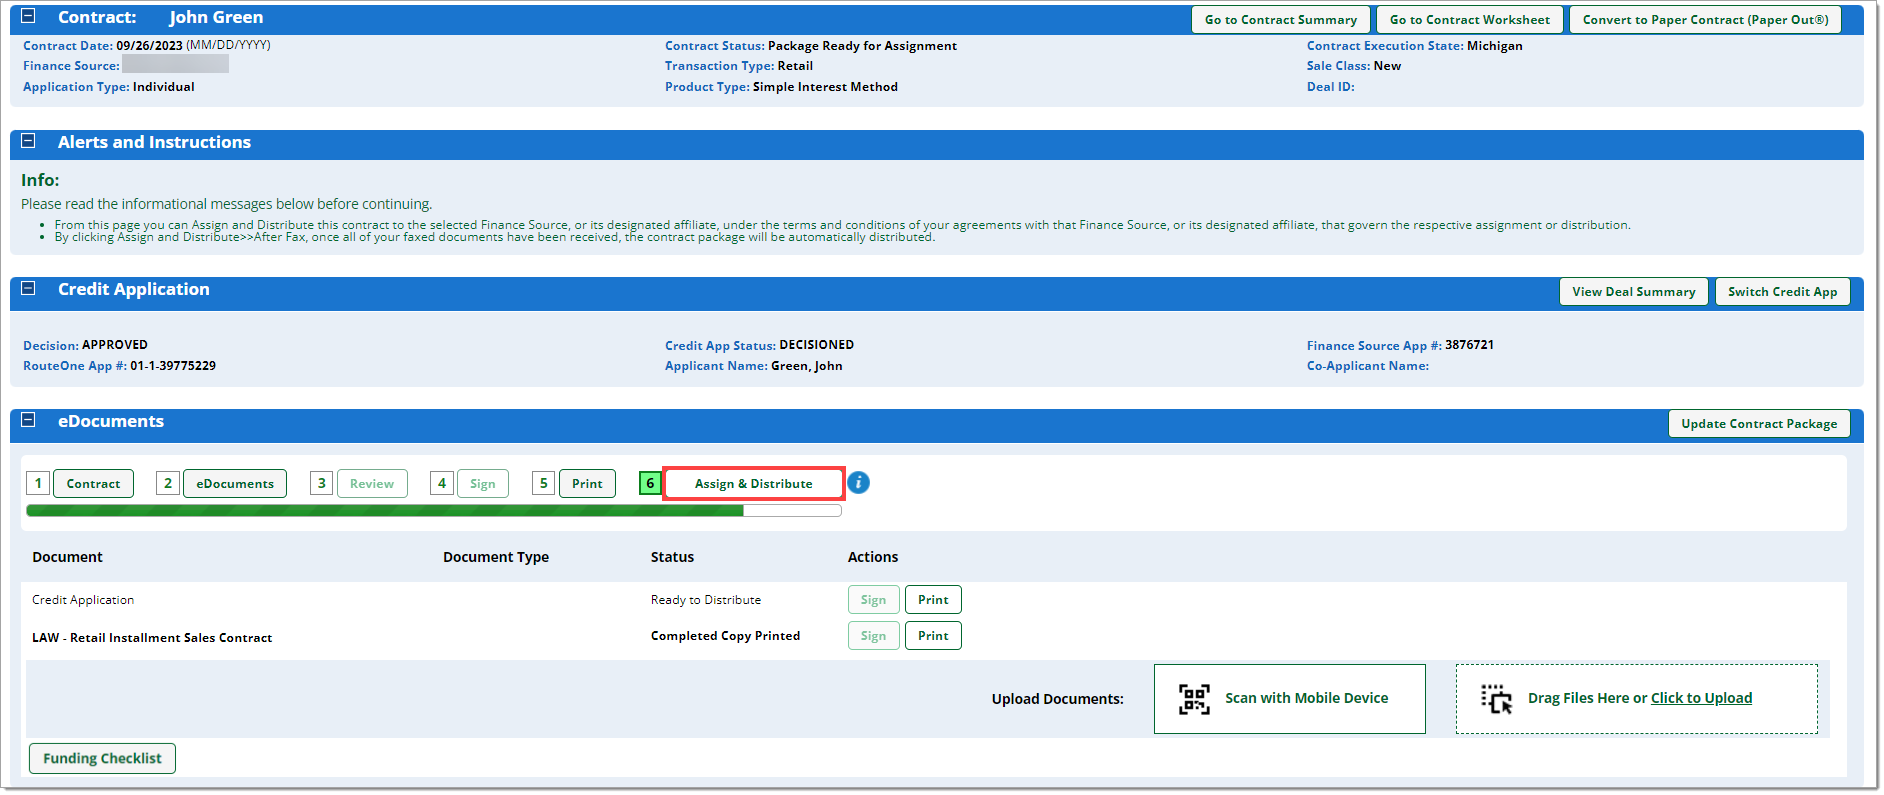
Once you have an approved Credit Application, you can assign and distribute the contract.
From the customer’s ‘Contract Package’ page, click the ‘Assign & Distribute’ button to send the contract to the finance source.
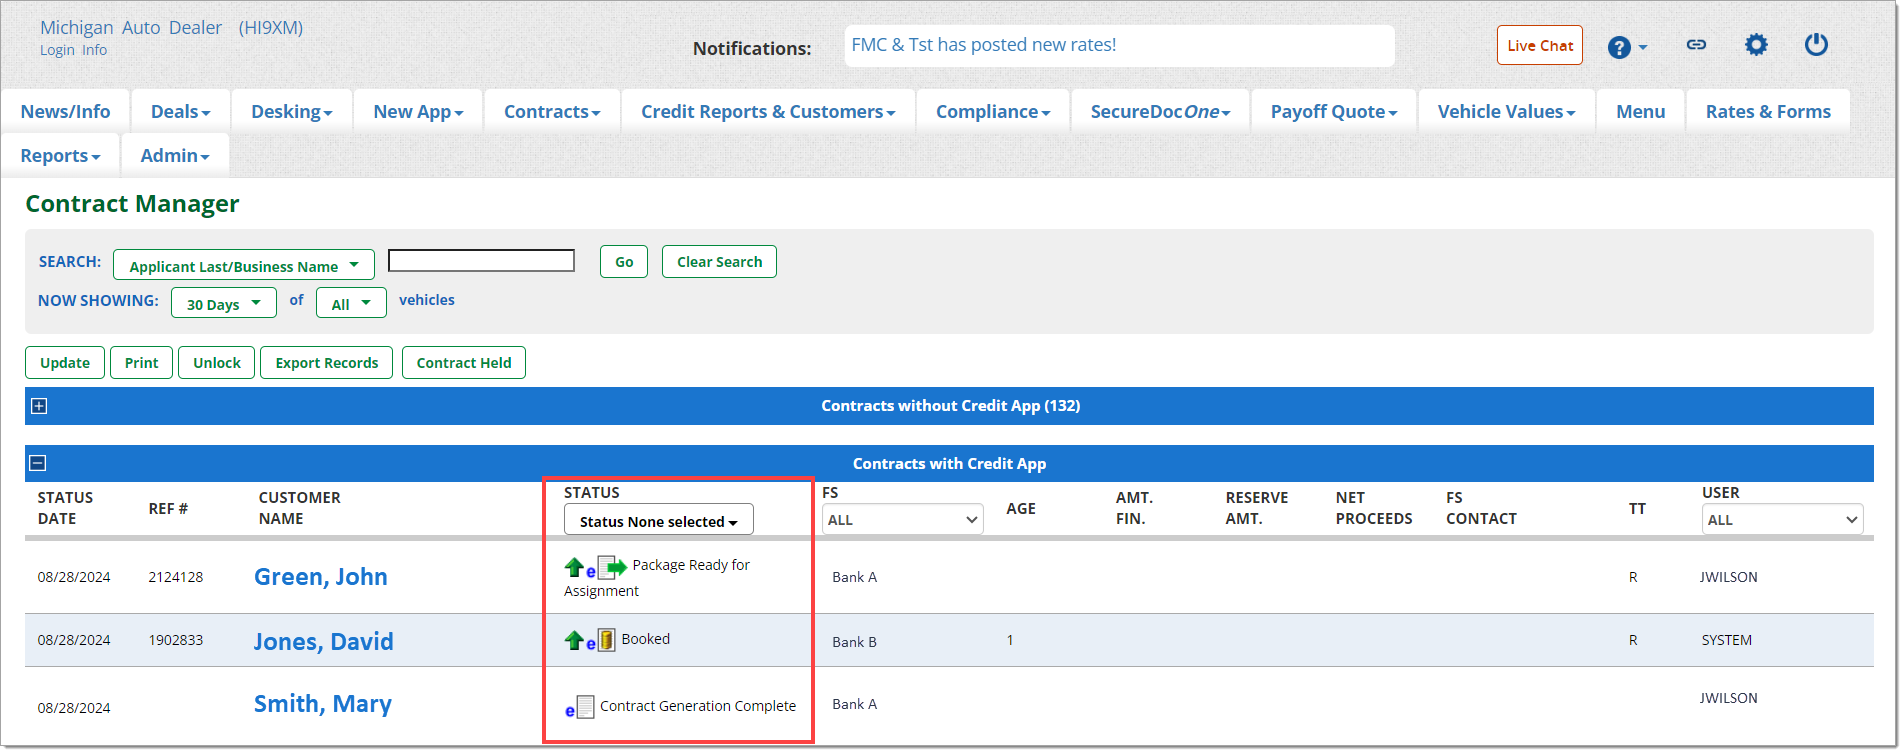
Checking the Status of the eContract
Once you have assigned and distributed the eContract, you can check its status in the ‘Contract Manager’ page. The status can be found under the ‘STATUS’ column. More information about contract statuses, as well as common eContracting terms and icons, can be found here.
ROUTEONE SUPPORT
Hours (EST)
Monday - Friday: 6:00am – Midnight
Saturday: 9am – 9pm
Can’t find what you need?
Try our search
