In This Guide:
Related Guides:
Contracting
Custom DMS Mapping
The eContracting DMS Custom Mapping page will appear each time a DMS imported deal with unrecognized worksheet fields has been selected for eContracting. Any unrecognized elements will be available for the dealer to custom map, following the steps below. Once the custom mappings have been saved, the dealer will not be prompted to map those fields again in the future.
Adding Custom Mapping to an Imported Contract
After importing a contract from the DMS, locate and click on the contract from the ‘Contract Manager’ page.
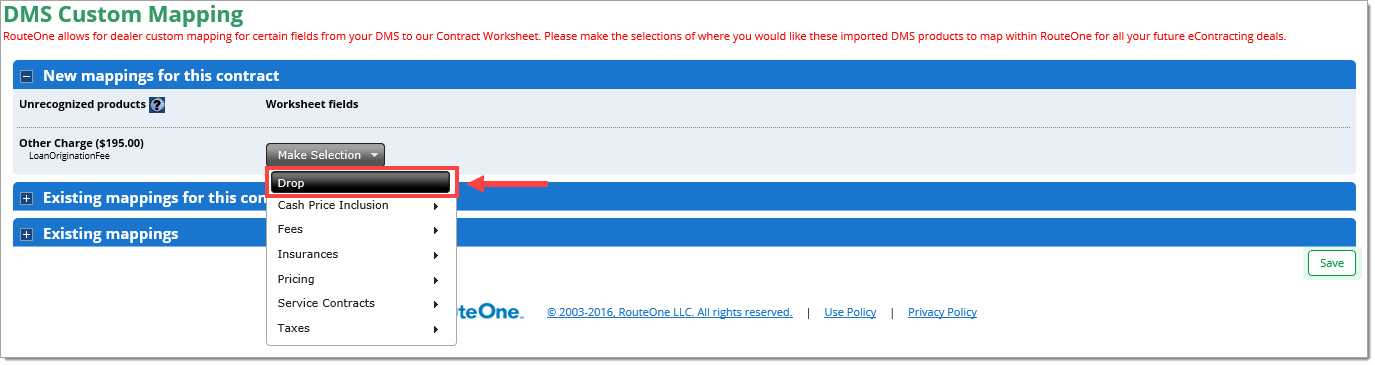
Any unrecognized products will appear on the DMS Custom Mapping page.
Click the ‘Make Selection’ drop-down under the ‘Worksheet fields’ column and select the field to which you would like to map the item.

To remove custom mappings for data that is not required to complete the contract, choose the ‘Drop’ option.
Selections may differ per state and per finance source.
Once the mapping selections have been made, click the ‘Save’ button. The worksheet will then open.
Once saved, the dealer will not be prompted to map those fields again in the future.
Locating Custom Mapping
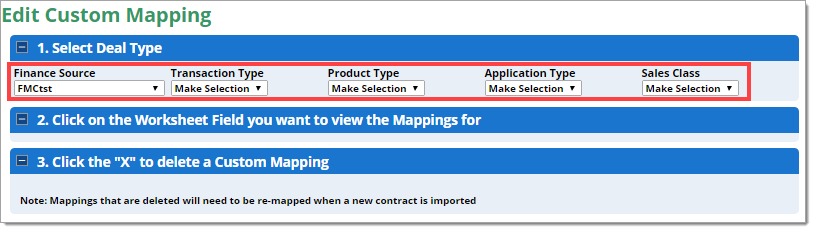
To view or edit a DMS import custom mapping on an individual basis, select the ‘Edit Custom Mapping’ option within the ‘Contracts’ tab.
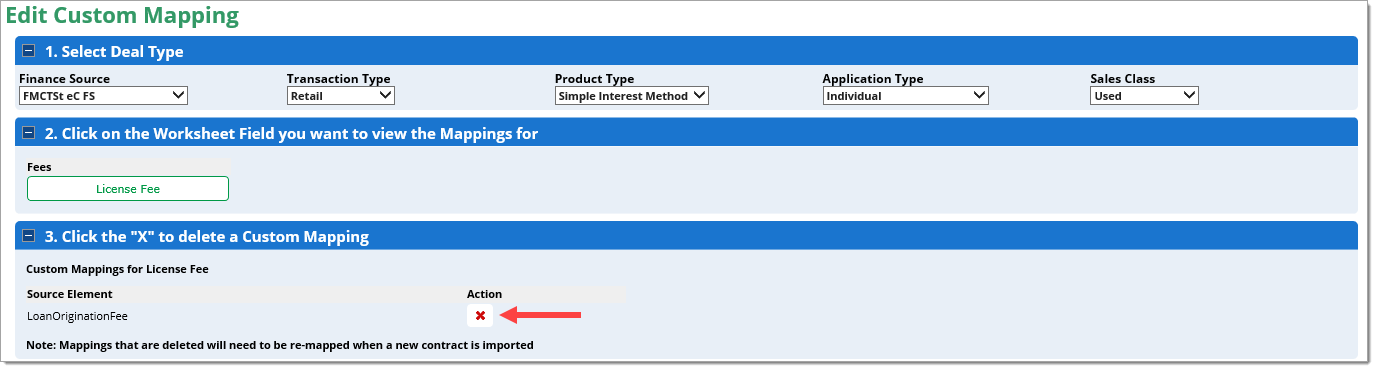
Select the Finance Source, Transaction Type, Product Type, Application Type, and Sales Class.
Once the deal type fields have been selected, you will be presented with any custom mappings that are available for that specific deal type combination.
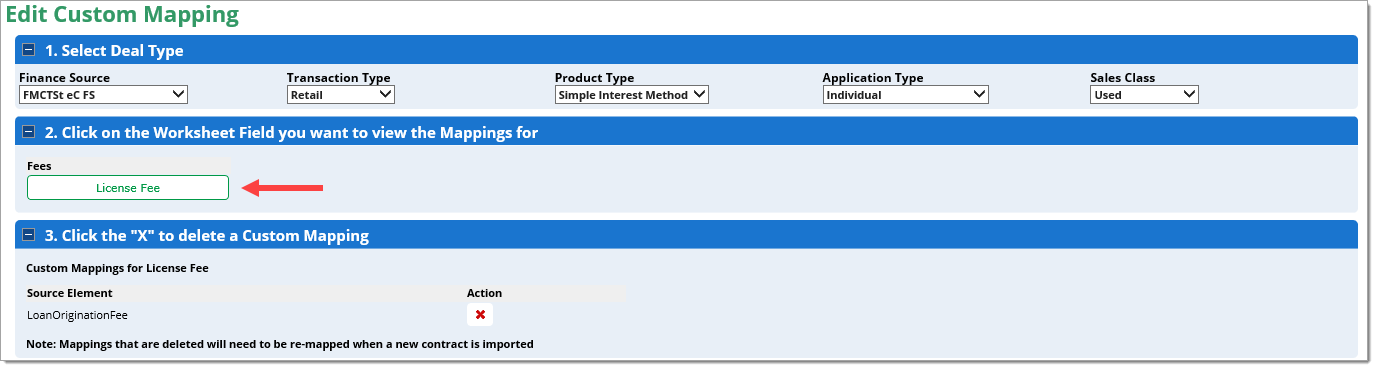
Click on the field for which you want to view the existing custom mappings.
Removing Custom Mapping
Any custom fields that are deleted will need to be re-mapped upon the next DMS import.
Removing Individual Custom Mappings
Once the custom mapping has been located on the ‘Edit Custom Mapping’ page, click the ‘X’ next to the contract. A pop-up window will display, stating ‘Delete this custom mapping?’ Click ‘OK’ to delete the mapping.
Removing All Custom DMS Import Mappings
Follow these instructions only if you plan to remove all custom DMS import mapping and re-map all the custom fields on your next import.
Within the ‘Admin’ tab, select the ‘Dealer Info’ option.
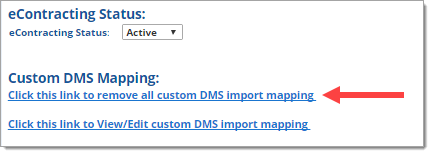
Scroll to the eContracting section and click the ‘Maintain eContracting Information’ link.

Click on the ‘Click this link to remove all custom DMS Import mapping’ link.
Editing Custom DMS Import Mappings
To edit a Custom DMS Import Mapping, you can get to the ‘Edit Custom Mapping’ page by:
- Selecting the ‘Edit Custom Mapping’ option within the ‘Contracts’ tab, or by
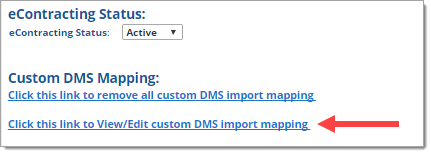
- Selecting the ‘Dealer Info’ option within the ‘Admin’ tab. Scroll to the eContracting section and click the ‘Maintain eContracting Information’ link. Then click the ‘Click this link to View/Edit custom DMS Import Mapping’ link.
Once on the ‘Edit Custom Mapping’ page, use the drop-down menus to select the criteria of the deal type for which you want to edit the custom mapping.
You will then be presented with any custom mappings that are available for that specific deal type combination.
Click on the worksheet field for which you want to view the custom mappings.
Any custom fields that are deleted will need to be re-mapped upon the next DMS import.
Once all steps have been completed, click the ‘Save’ button and return to the Deal Manager page to re-import an eContract from your DMS.
Once editing is completed and saved for RETAIL and LEASE, it will be saved across all other product, application, and sales class types.
Within the ‘Deal Manager’ page, import an eContract from your DMS that contains the items which you just deleted from the custom mapping. When you open the eContract in RouteOne, you will be prompted to tell the system where to custom map the specific item that was just deleted.
Check to ensure mapping is now correct. If not, repeat the above steps to again delete custom mapping and re-map items to desired field.
Importing an eContract back from your DMS
To import an eContract from your DMS that requires the worksheet fields for which you just deleted the custom mapping, locate and select the contract on the Contract Manager page within RouteOne.
You will be prompted to tell the system where to custom map the specific field that was just deleted.

Check to ensure mapping is now correct. If not, repeat the above steps again to delete custom mapping and re-map items to desired field.
Once editing is complete and saved, it will be saved across all other product, application, and sales class types.
ROUTEONE SUPPORT
Hours (EST)
Monday - Friday: 6:00am – Midnight
Saturday: 9am – 9pm
Can’t find what you need?
Try our search
