In This Guide:
Related Guides:
Contracting
Required Form List for Funding
What is the Required Form List?
The Required Form List functionality is part of the eContracting workflow, and indicates which documents are required by a finance source in order to fund the deal.
This allows you to include all required funding documents in the Contract Package before sending it to the finance source, reducing the risk of held offerings.
The Required Form List functionality is not available with all finance sources.
Important: If the Required Form List functionality is available with your selected finance source, you will be required to complete the validation process for the contract.
The documents that appear on the Required Form List will depend on which finance source you have selected.
Using the Required Form List
For more information about the full eContracting workflow, and the steps leading up to using the Required Form List, refer to ‘eContracting From a Credit Application’ or ‘eContracting From a DSP/DMS Import.’
Validation and Contract Generation
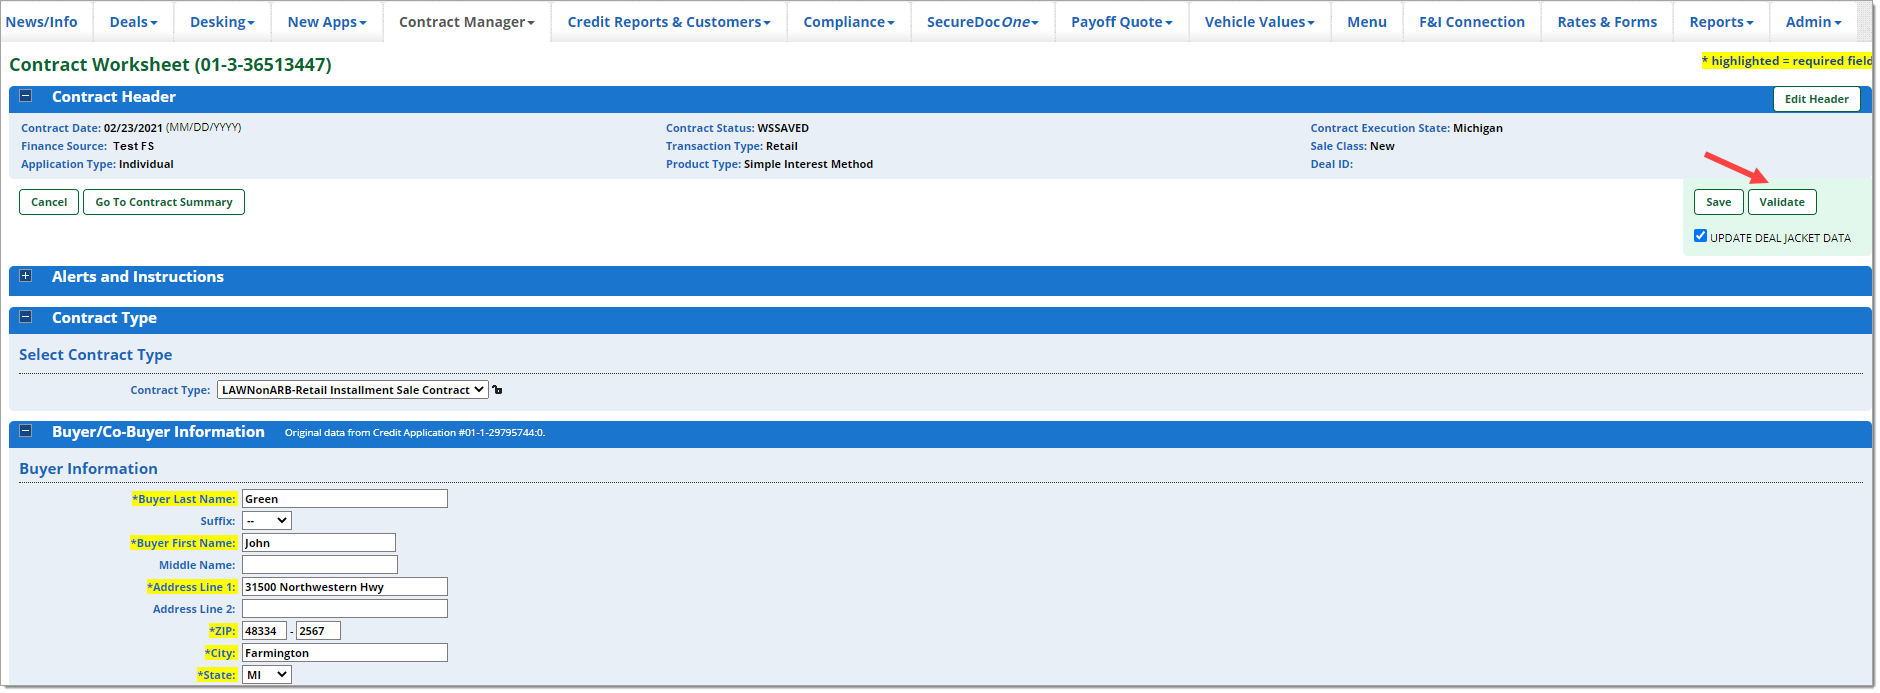
On the ‘Contract Worksheet’ page, click the ‘Validate’ button.
Note: If the Required Form List functionality is available with your selected finance source, you will be required to complete the validation process for the contract.
The ‘Validate’ button will be available, and you must first click and proceed through the validation process. The ‘Generate Contract’ button will not be visible until validation is either successful or returns a warning message.
For more information on validation and validation results, click here.
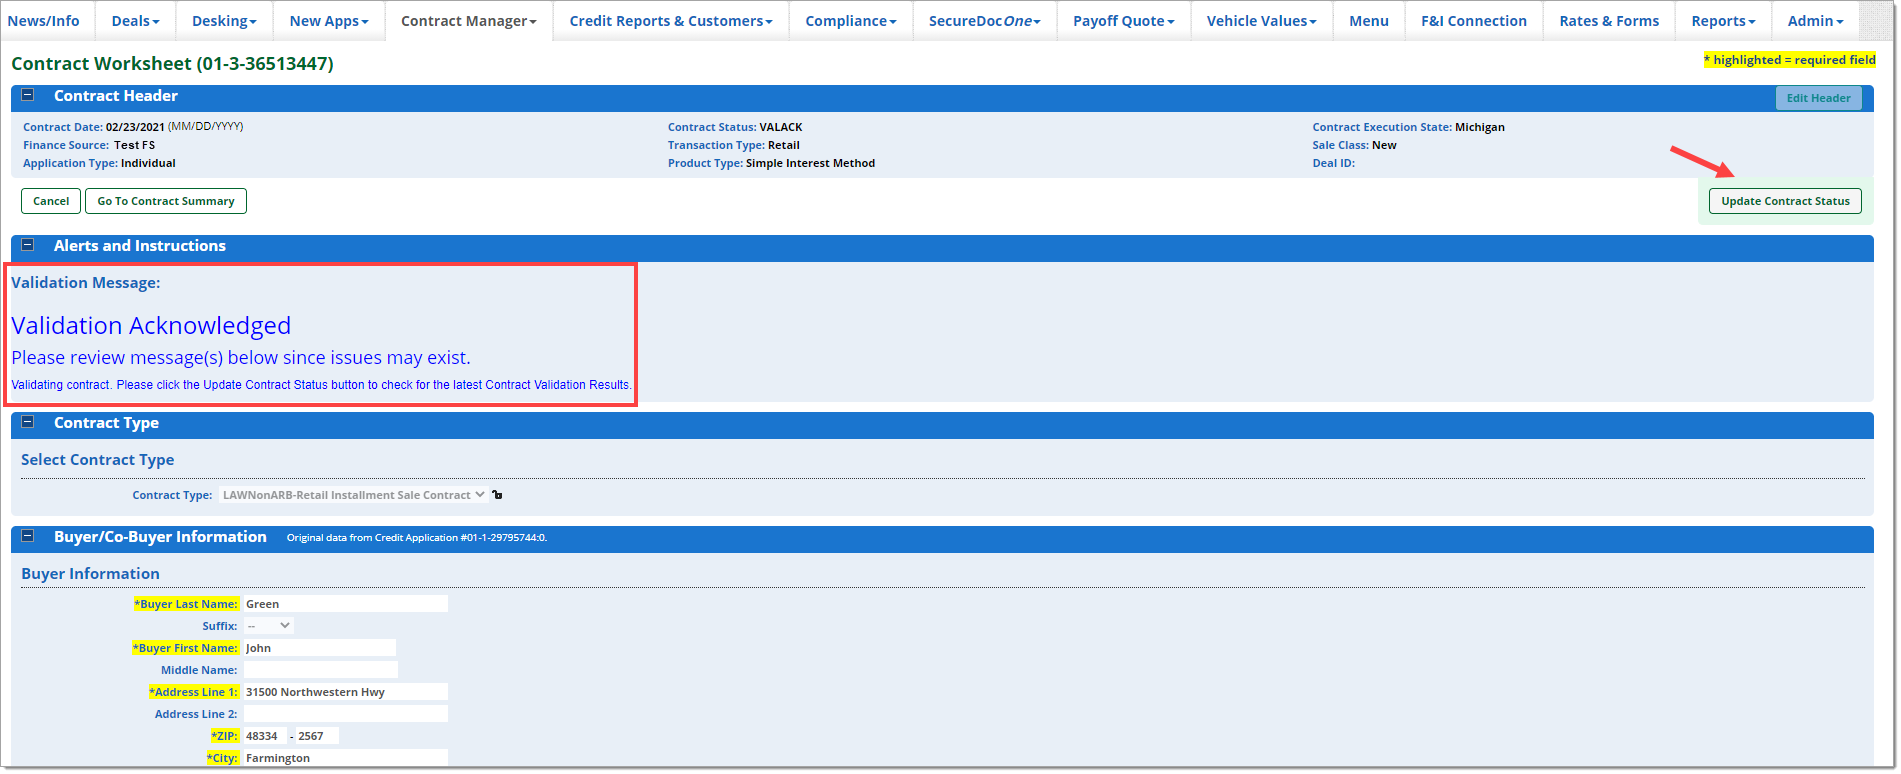
The validation process will begin. Click the ‘Update Contract Status’ button to view the validation results in the ‘Alerts and Instructions’ section.
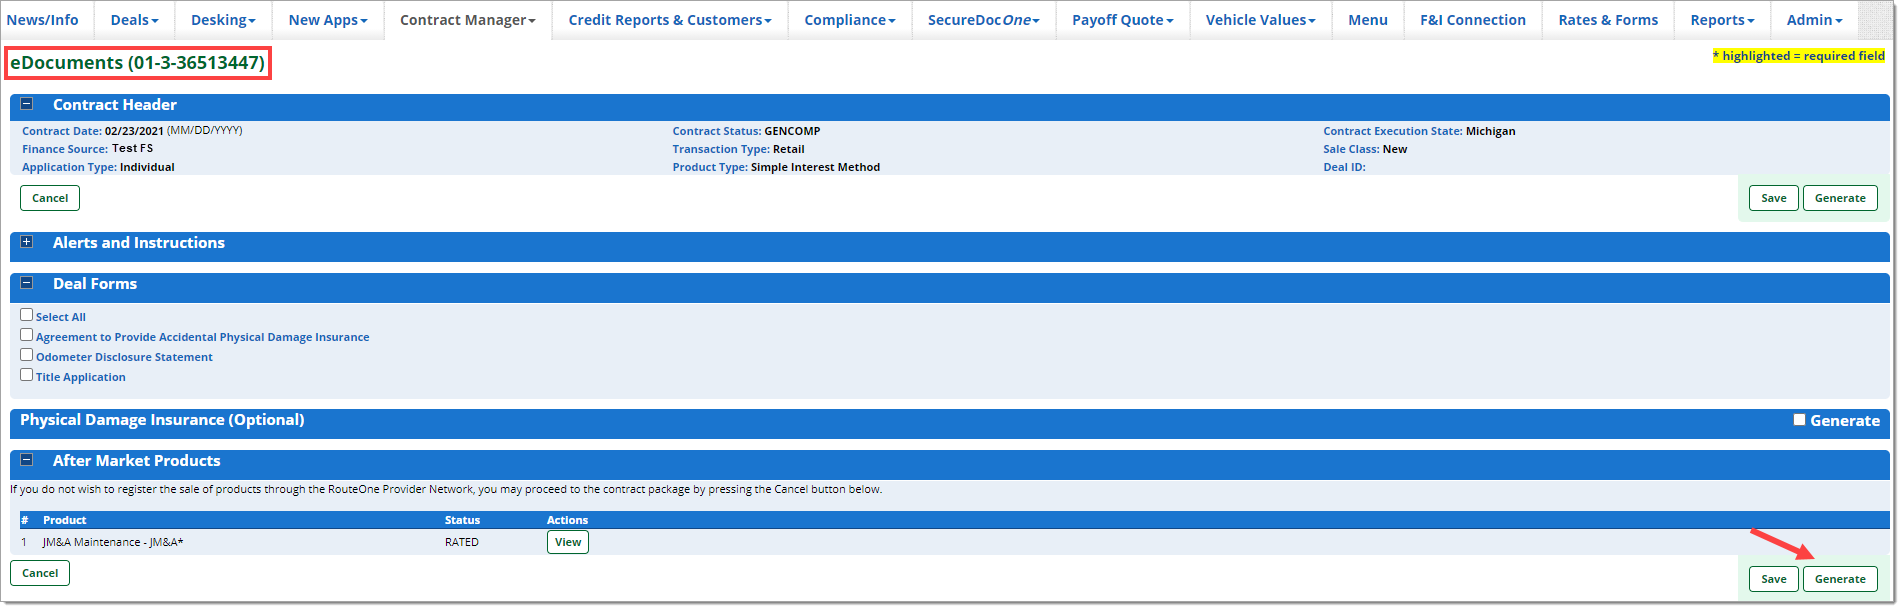
When validation is complete and successful, click the ‘Generate Contract’ button to navigate to the ‘eDocuments’ page.
For more information on validation and validation results, click here.

On the ‘eDocuments’ page, click the ‘Generate’ button to navigate to ‘Contract Package’ page.
Completing the Required Form List
On the ‘Contract Package’ page, you will see the Required Forms List sent by the finance source under the ‘eDocuments’ section.
The forms that the finance source requires are listed in the ‘Required Forms’ column. Each required form will need to have a corresponding document linked for the finance source to review.
In the ‘Attached Documents’ column you will need to ensure that documents are selected for each item in the Required Form List.
- RouteOne will automatically attach and preselect any matching documents that are already available in the system (e.g., electronically generated documents):
- The Contract document will be preselected and locked from any editing.
- The Credit Application will be preselected if it has been signed electronically. If you have a paper version of the signed credit application, you will need to upload it by clicking the ‘Upload Document’ button and completing the upload process.
- Electronically generated ancillary documents, such as the Mechanical Service Agreement, will be preselected and locked from any editing.
- Other uploaded documents will be preselected if the ‘Document Type’ was identified while uploading the documents.
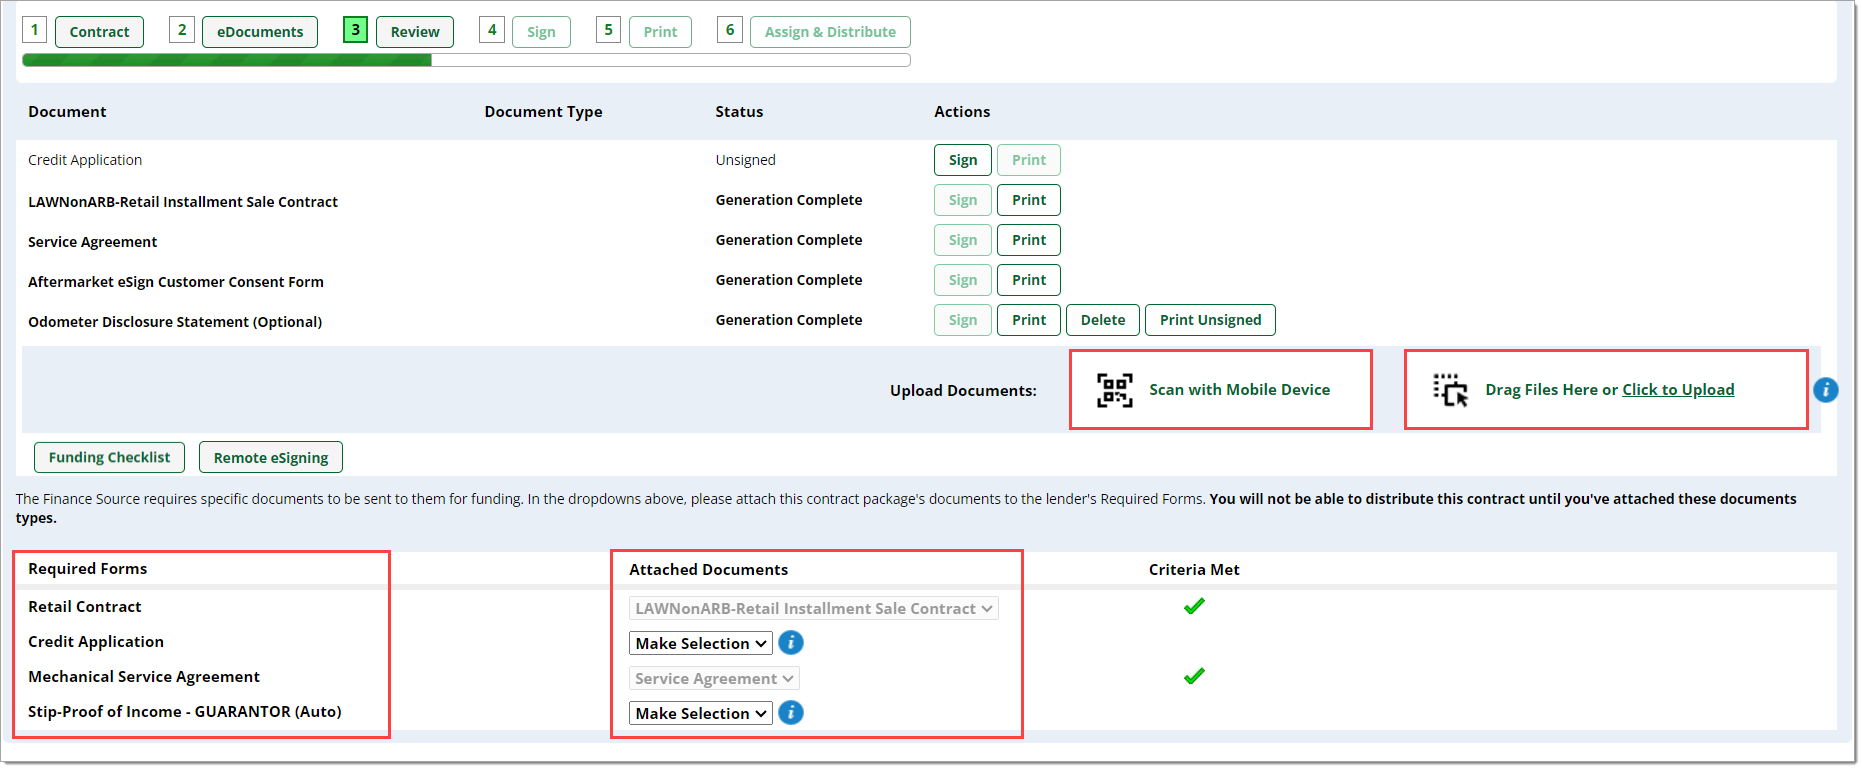
For any documents that have not been automatically preselected by the RouteOne system, you will see ‘Make Selection’ in the dropdown lists. For each, select the corresponding document.
If the document is not in the dropdown list, you will need to upload it by dragging/dropping documents to the eDocuments section, via Mobile Document Capture, or by clicking the ‘Click to Upload’ link.
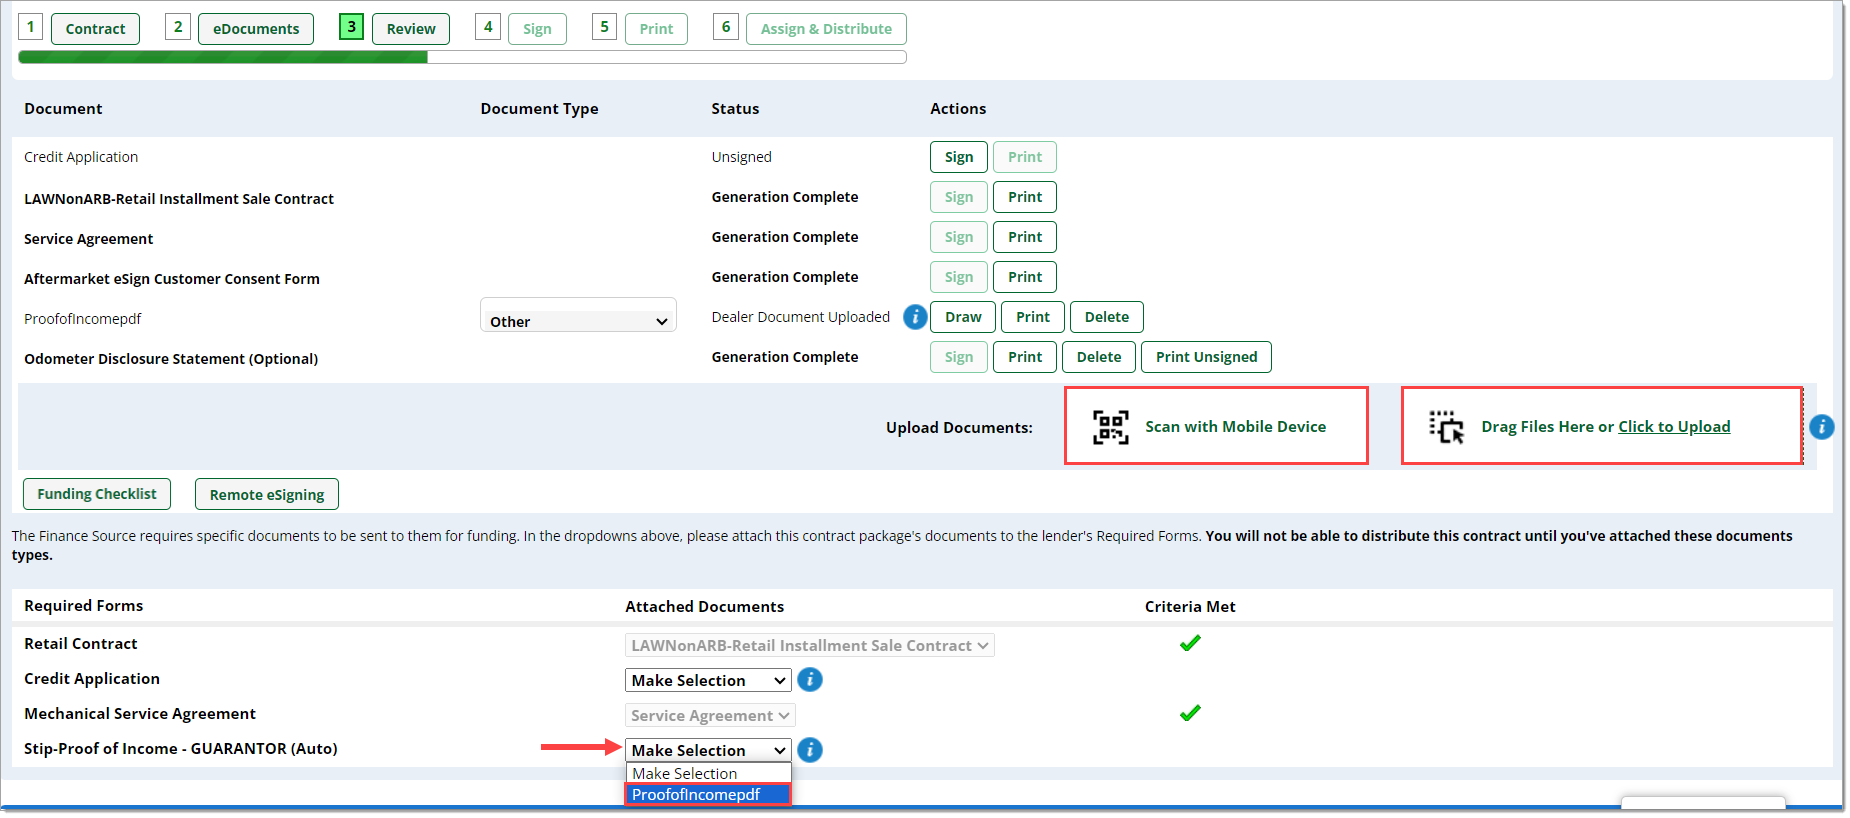
Under the ‘Criteria Met’ column, you will see a green check mark next to each item that has a selected document.
Important: The RouteOne system only assesses if a document has been selected. It is the user’s responsibility to ensure that the correct documents have been selected for each item in the Required Form List.
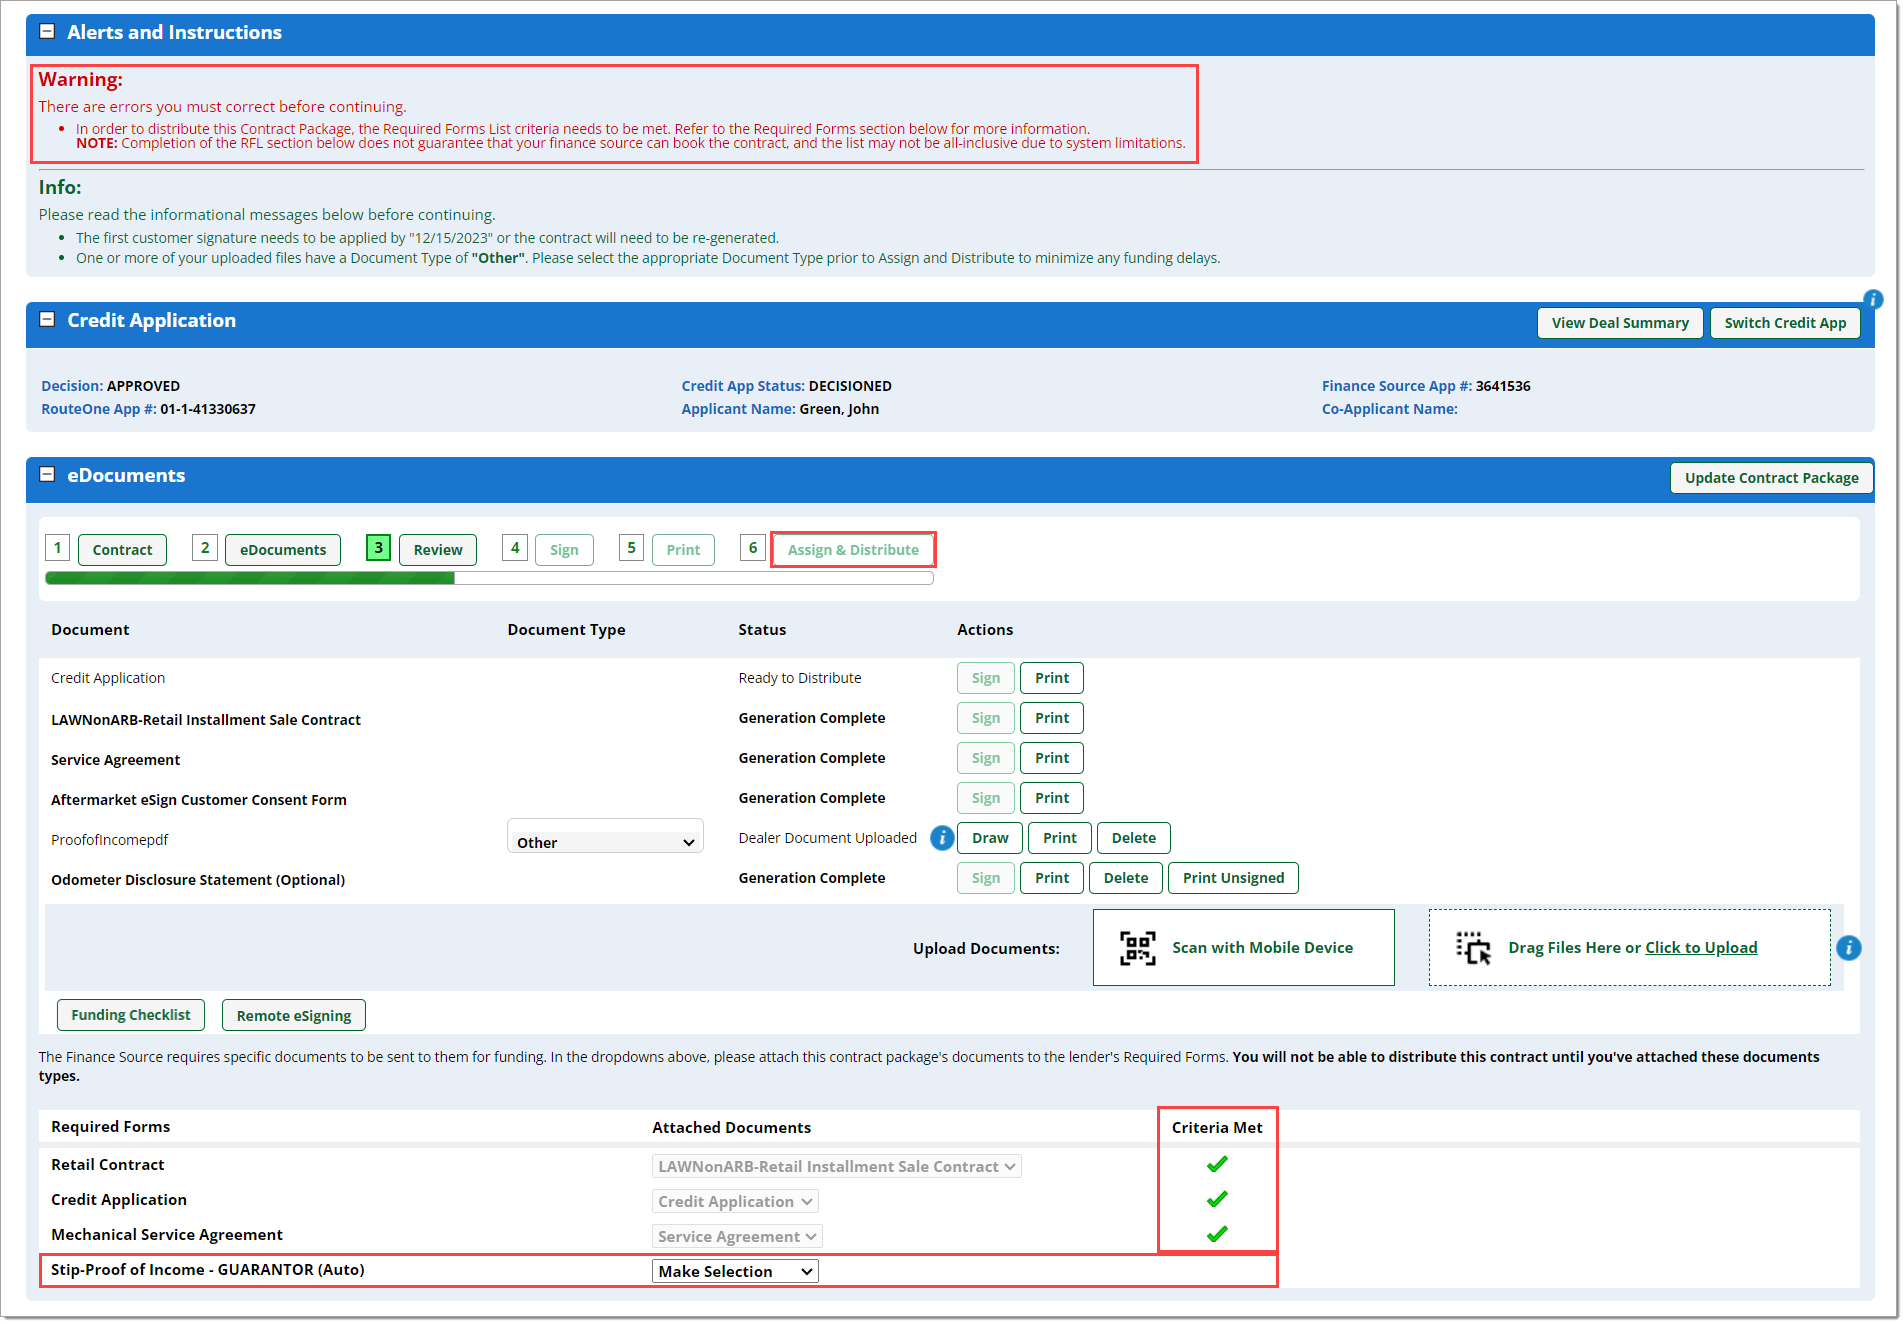
The ‘Assign & Distribute’ button will remain disabled until each item in the Required Form List has a corresponding green check mark under the ‘Criteria Met’ column.
The ‘Alerts and Instructions’ section will also display a warning message until all selections have been made. When all selections have been made, the ‘Assign and Distribute’ button will be enabled, and the warning message will disappear
Assigning and Distributing
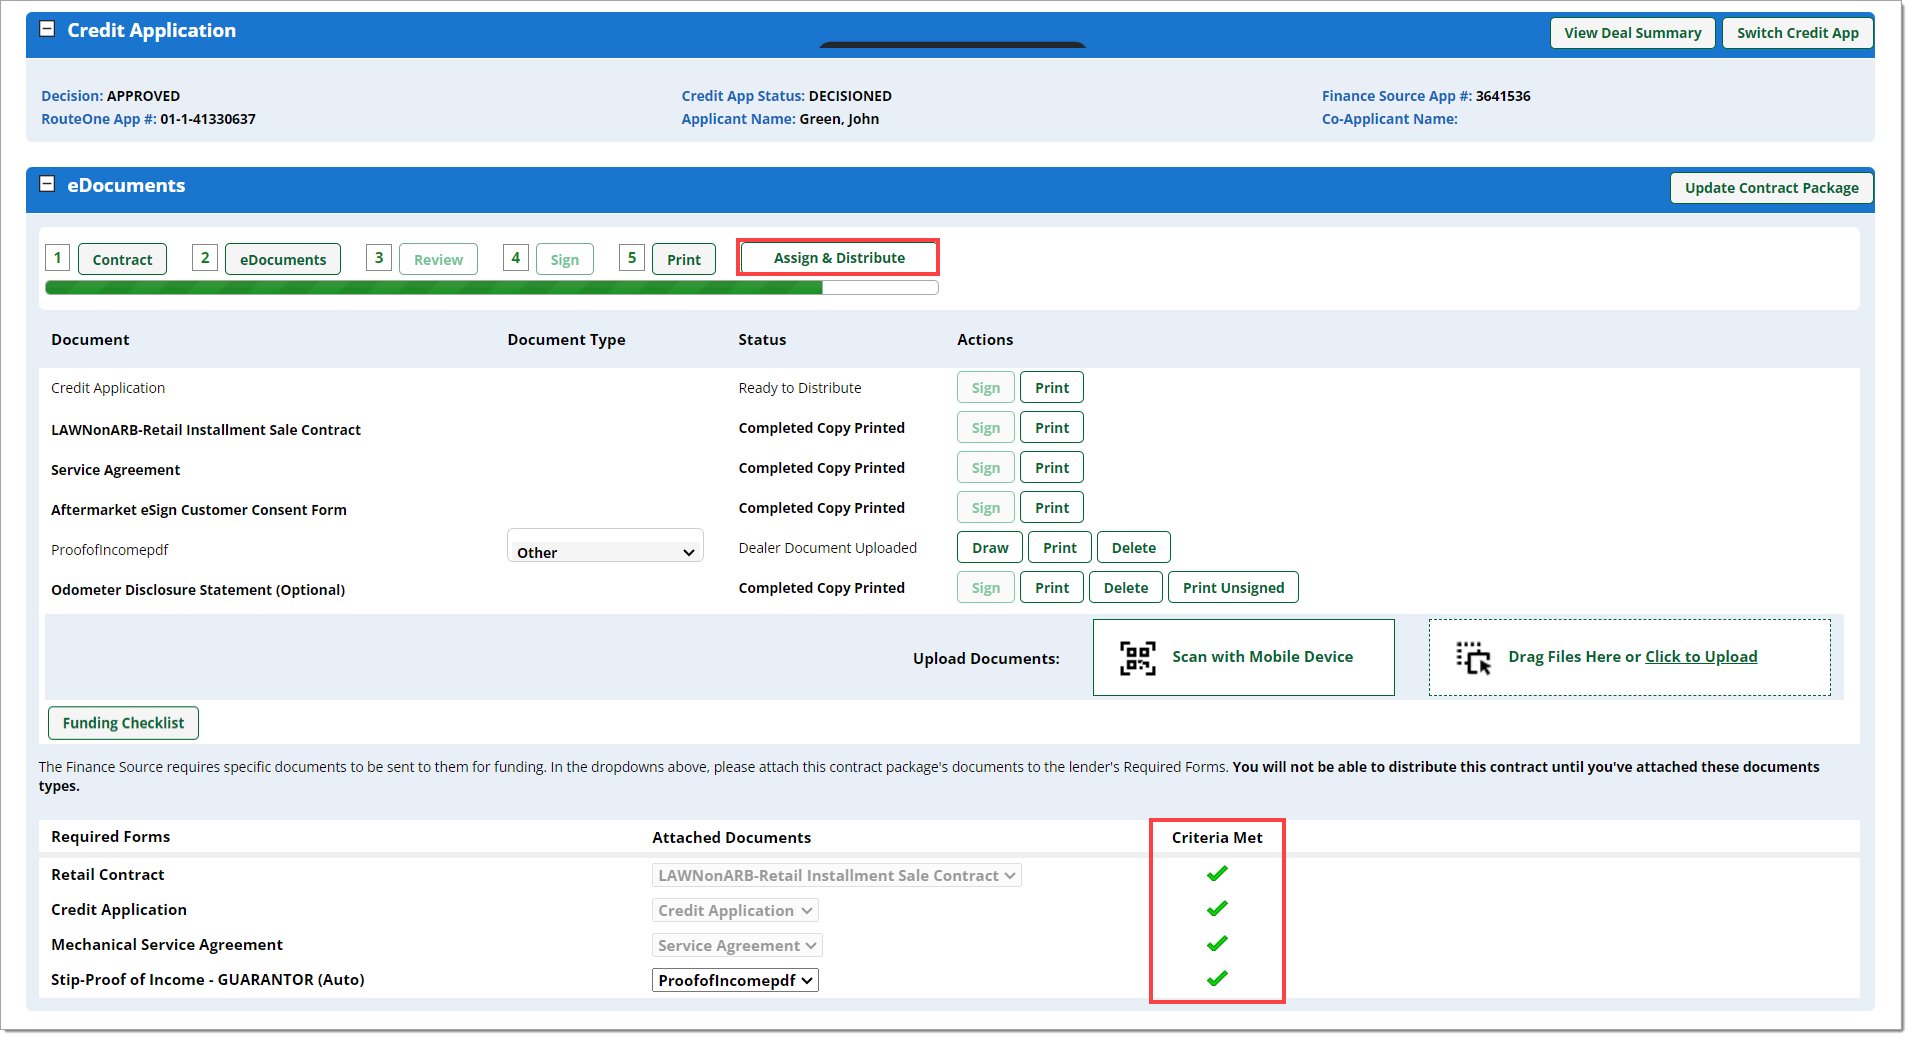
Once each item in the Required Form List has a corresponding green check mark under the ‘Criteria Met’ column, the ‘Assign & Distribute’ button will be enabled.
If the ‘Assign & Distribute’ button remains disabled, ensure that the credit application is decisioned, and review any other warning messages in the ‘Alerts and Instructions’ section.
Clicking Assign & Distribute will cause the ‘Assign & Distribute’ window to display.
Required forms will be selected and locked for editing. Any additional documents that were not in the Required Forms List can be selected here to distribute to the finance source along with the Contract Package.

FAQs
eContracting dealers who select finance sources that support the Required Form List functionality. The Required Form List functionality is not available with all finance sources.
Please contact RouteOne Support at 866.768.8301.
ROUTEONE SUPPORT
Hours (EST)
Monday - Friday: 6:00am – Midnight
Saturday: 9am – 9pm
Can’t find what you need?
Try our search
