In This Guide:
Related Guides:
Access and Administration
RouteOne Fusion - Customizing the Application
What is Fusion?
RouteOne Fusion is an all-inclusive suite of products that allows your customers to begin their vehicle purchase directly from your dealership’s website. Fusion allows customers to receive finance, lease, and cash payment estimates and further refine the estimates by pre-qualifying and/or filling out a full credit application. Fusion also allows customers to value their trade-in, add aftermarket products to their deal, schedule an appointment to see the car in person at the dealership, and remotely upload relevant documents to expedite the process when they arrive at the dealership.
If your dealership is not yet subscribed to Fusion, click here to view the Subscribing to Digital Retail Services user guide.
In this guide, you will find details on the various Fusion settings, including configuring the customer experience. In order to modify these settings, you must be a Dealership System Administrator (DSA). Click here for more information on locating your dealership’s DSA(s).
Click here to view our user guide on the Fusion Customer Experience.
Click here to view our user guide on the Fusion Dealership Experience.
Locating your Fusion Lead Identifier
When Fusion was first set up for your dealership, a lead identifier was created to track leads that originate from the Fusion product. For information on locating and utilizing this lead identifier, click here to view our ‘Customizing and Using Lead Management’ user guide.
Configuring the Fusion Application Settings
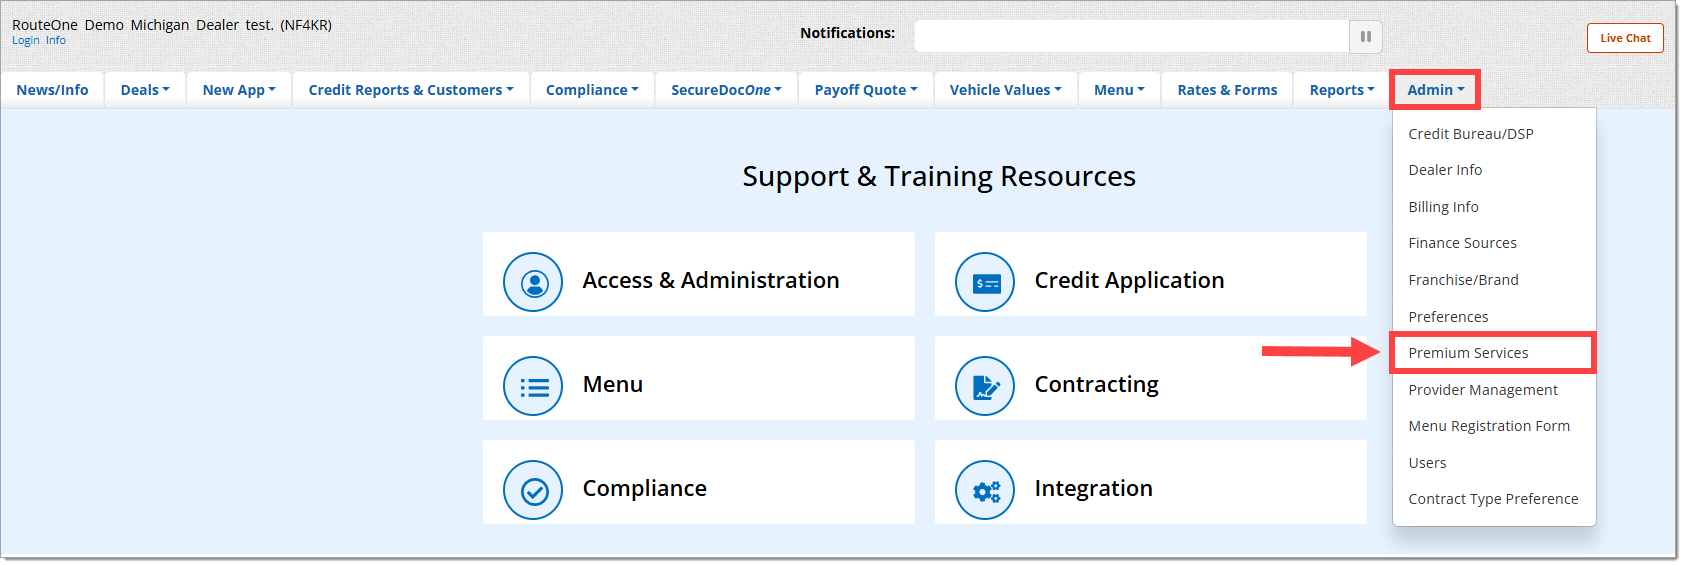
To access the settings for the Fusion application, hover over the ‘Admin’ tab and select the ‘Premium Services’ option.
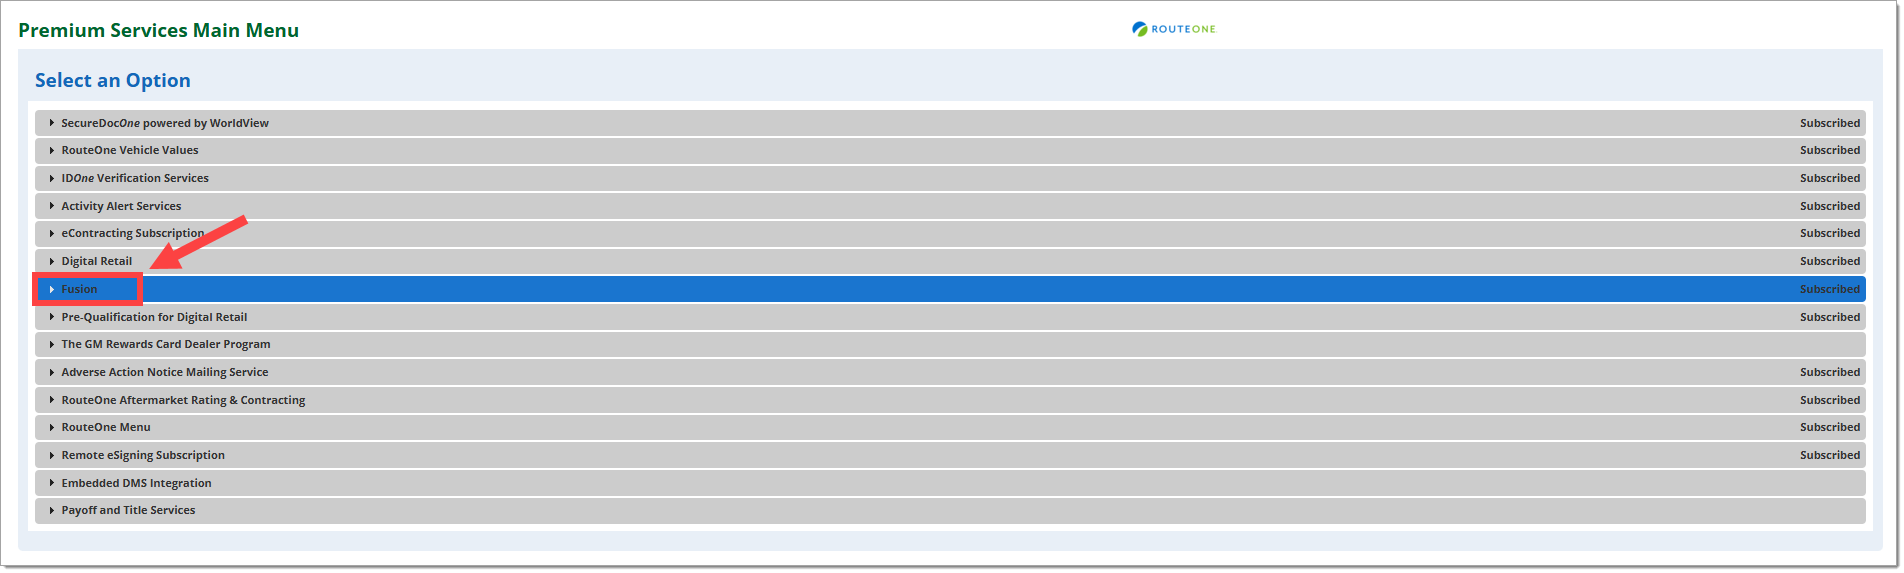
Click on ‘Fusion' to expand the section.
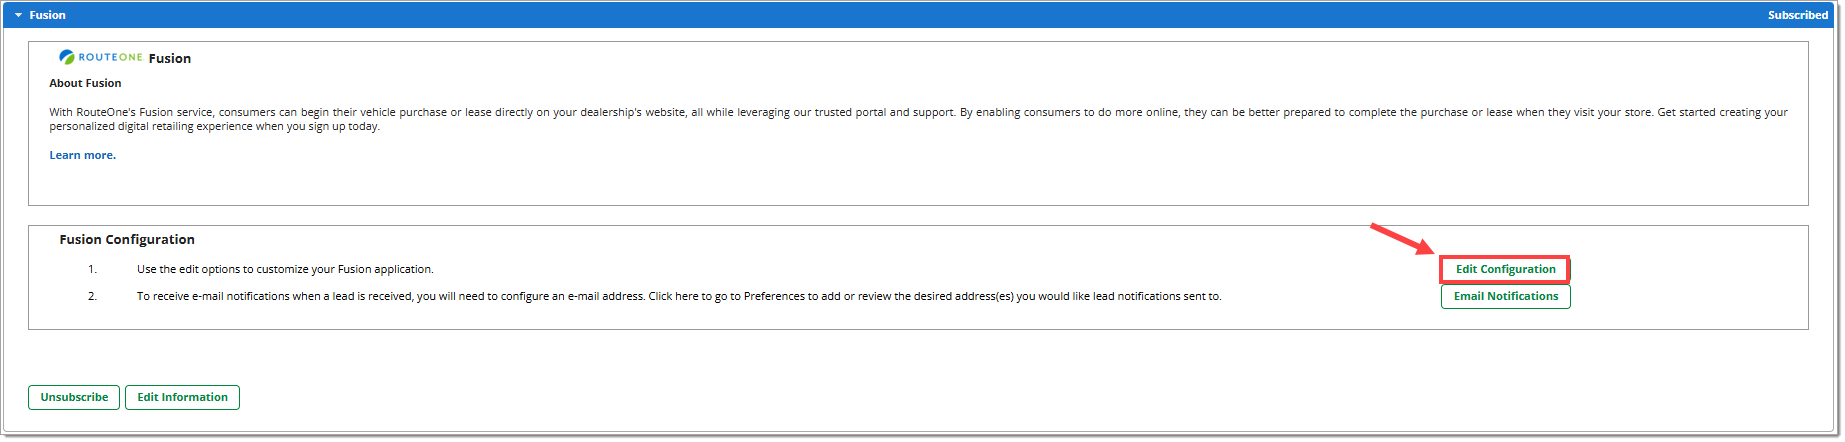
In the ‘Fusion Application Configuration’ section, click ‘Edit Configuration.’
If you cannot view this section, please contact your RouteOne Fusion representative.
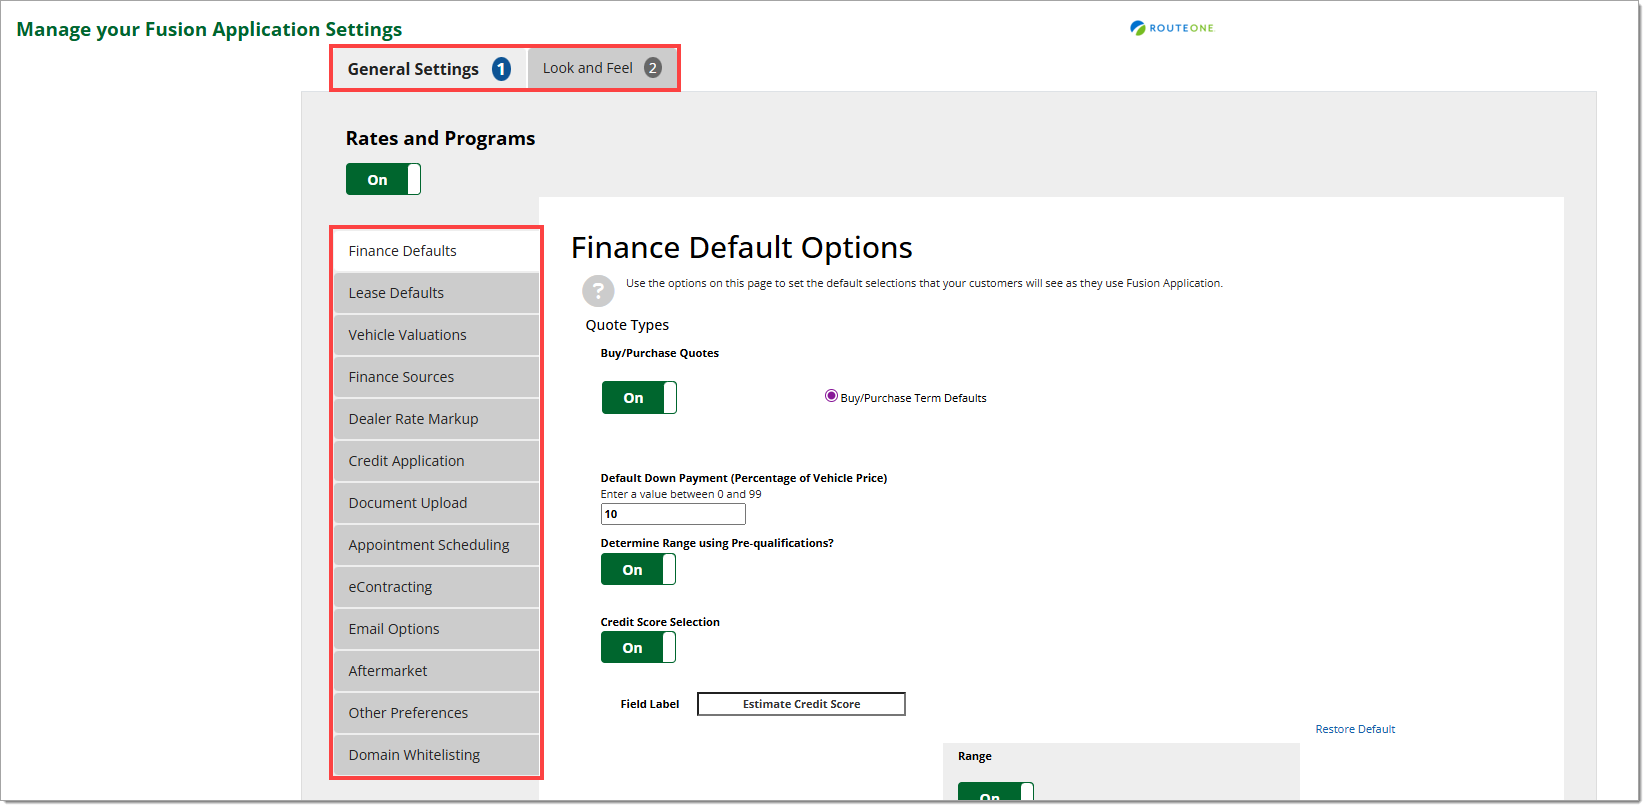
From here, you can navigate through the various settings using the tabs along the top and left sides of the screen.
Rates and Programs
To allow rates and terms from configured finance sources to be displayed in the Fusion application, set the ‘Rates and Programs’ toggle in the upper left-hand corner to “On.” If the Rates and Programs toggle is set to “Off,” only dealer-configured rates and terms will be presented in the Fusion application.
Finance sources are configured on the ‘Finance Sources’ tab. For more information, click here to skip to the ‘Finance Sources’ section of this guide.
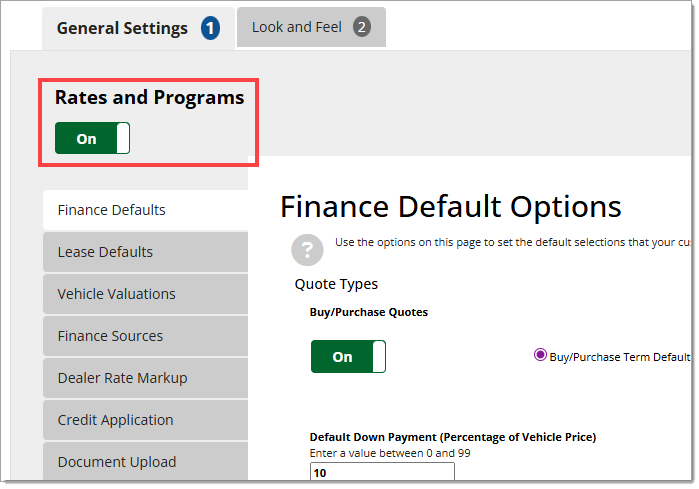
Finance Defaults
In the Finance Defaults tab, you can enable buy/purchase quotes, set the default down payment, enable the use of pre-qualification, set buy/purchase term defaults, and manage credit score tiers.
To enable buy/purchase quotes for Fusion, set the ‘Buy/Purchase Quotes’ toggle to “On,” and enter the default down payment as a percentage of the vehicle price.
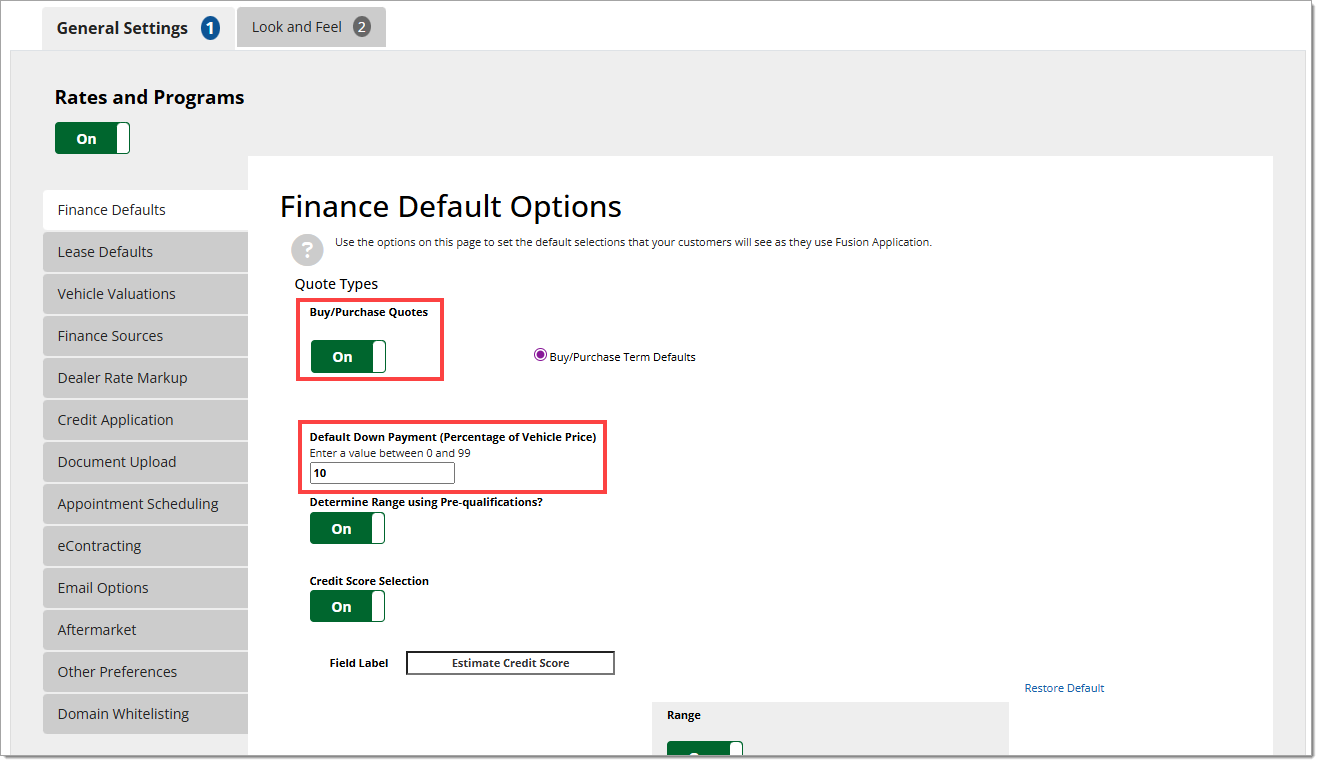
To enable customer pre-qualification, set the ‘Determine Range using Pre-qualification?’ slider to “On.”
This option is only available to users with an active 700Credit pre-qualification subscription.
Important Note: This setting will apply to both finance and lease transactions.

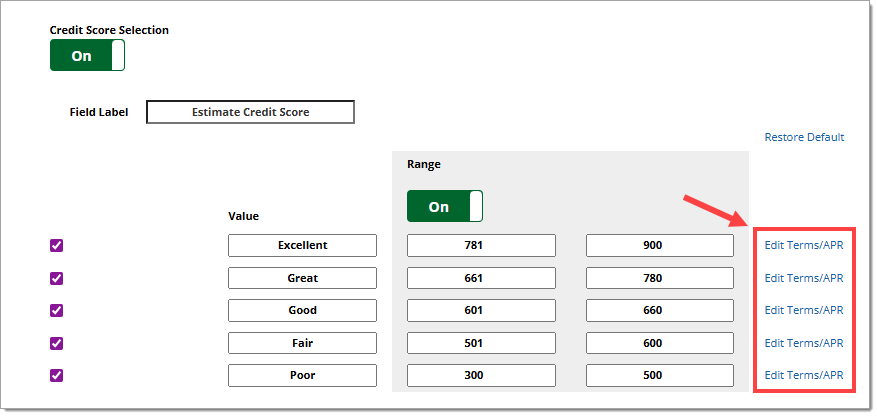
To enable customers to receive dealer-configured terms and rates according to the credit score tier they select, set the ‘Credit Score Selection’ toggle to “On.”
The name of the field where the customer enters their credit score can be changed in the ‘Field Label’ field.
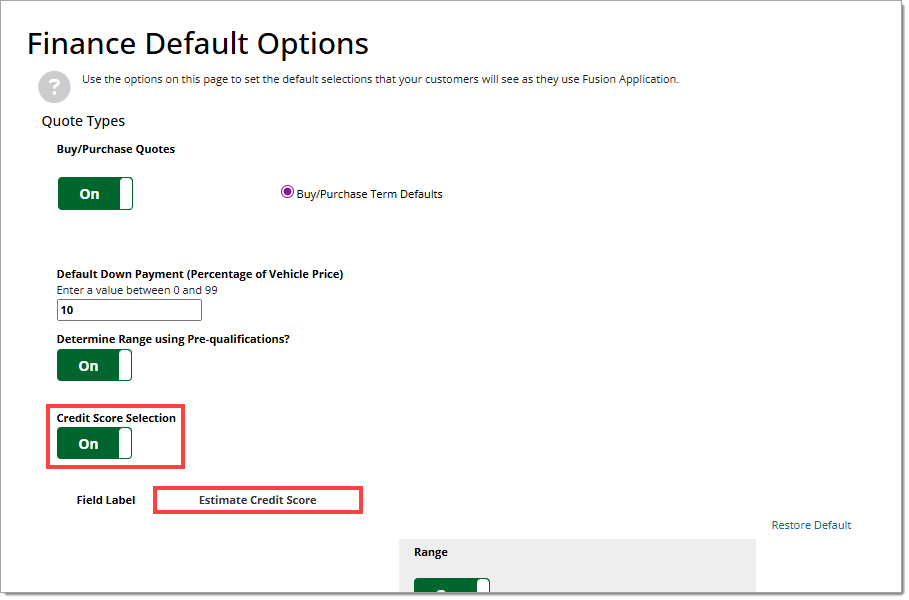
Set the ‘Range’ toggle to “On” to view and edit the range of each credit score tier. When set to “Off,” the tiers will use default credit score ranges.
Use the checkboxes to enable/disable tiers as desired.
A minimum of 3 credit tier ranges must be enabled.
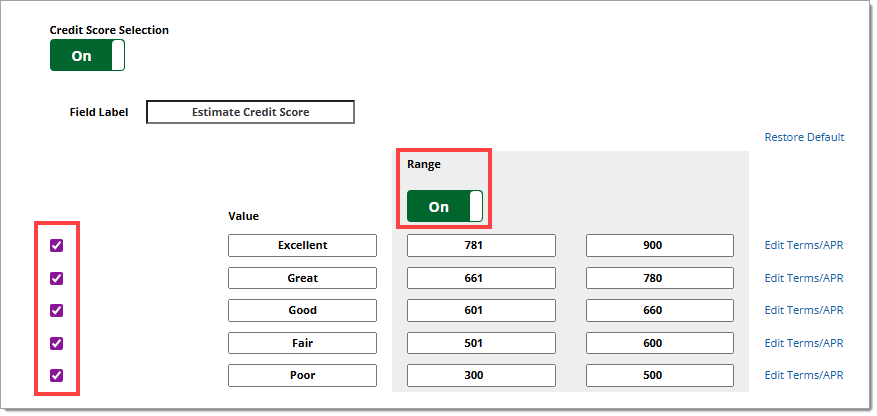
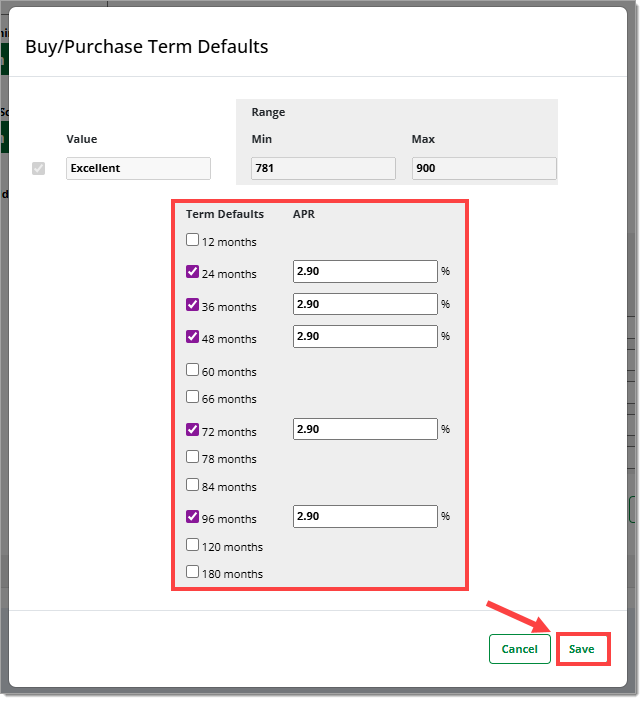
For each enabled tier, click ‘Edit Terms/APR’ to view and edit the corresponding default terms.
Use the checkboxes to select the default terms and enter the APR for each selected term. Click ‘Save.’
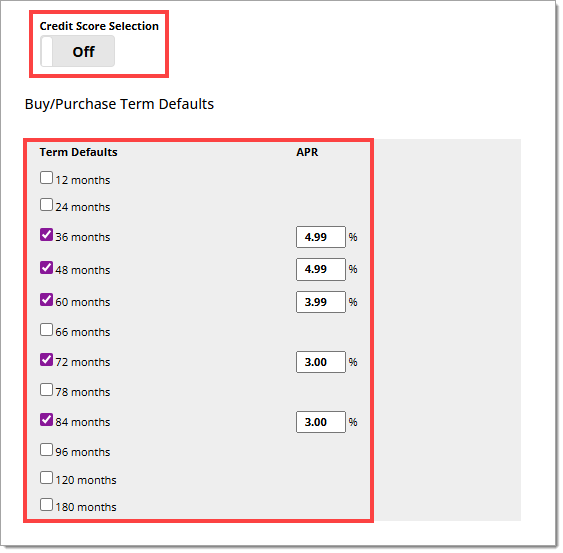
To have the same dealer-configured rates and terms presented to all customers, set the ‘Credit Score Selection’ toggle to “Off.” Use the checkboxes to select the default terms and enter the APR for each selected term.
Lease Defaults
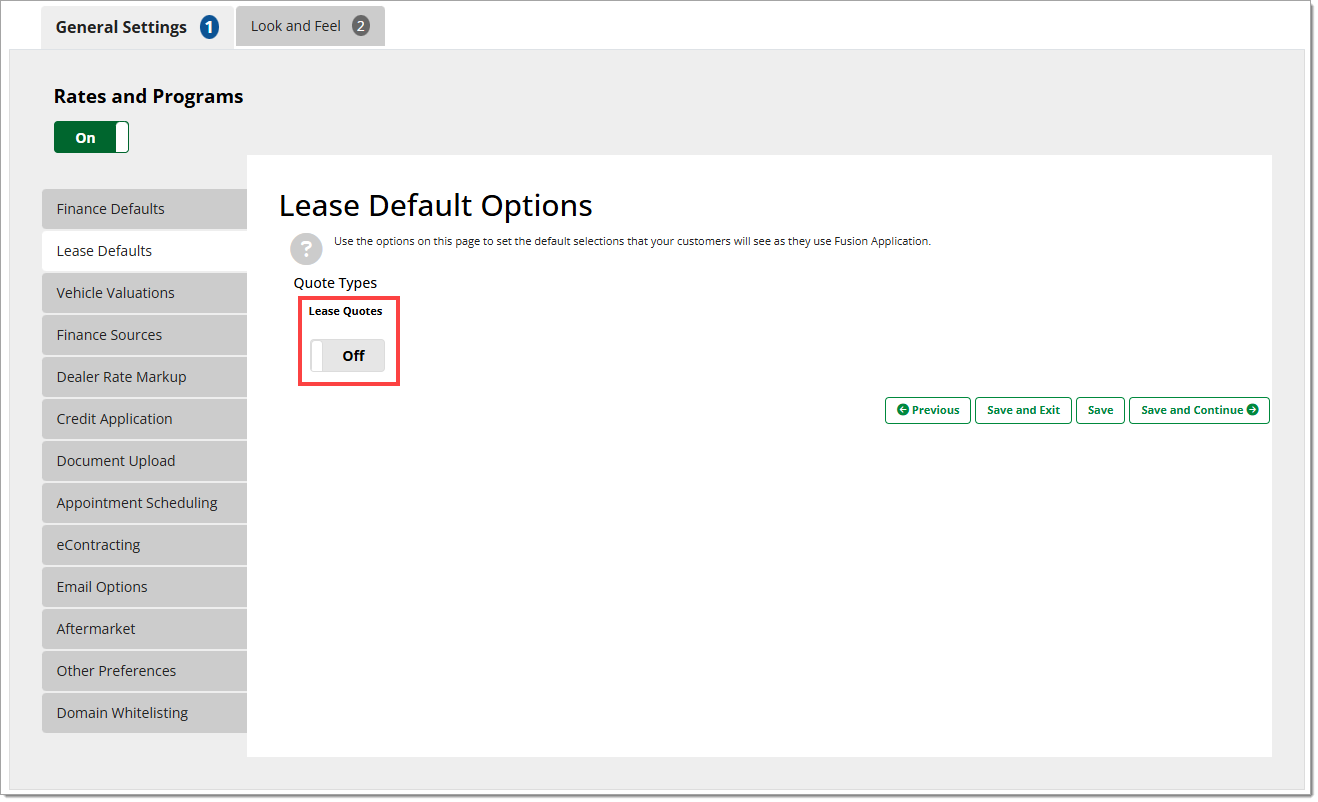
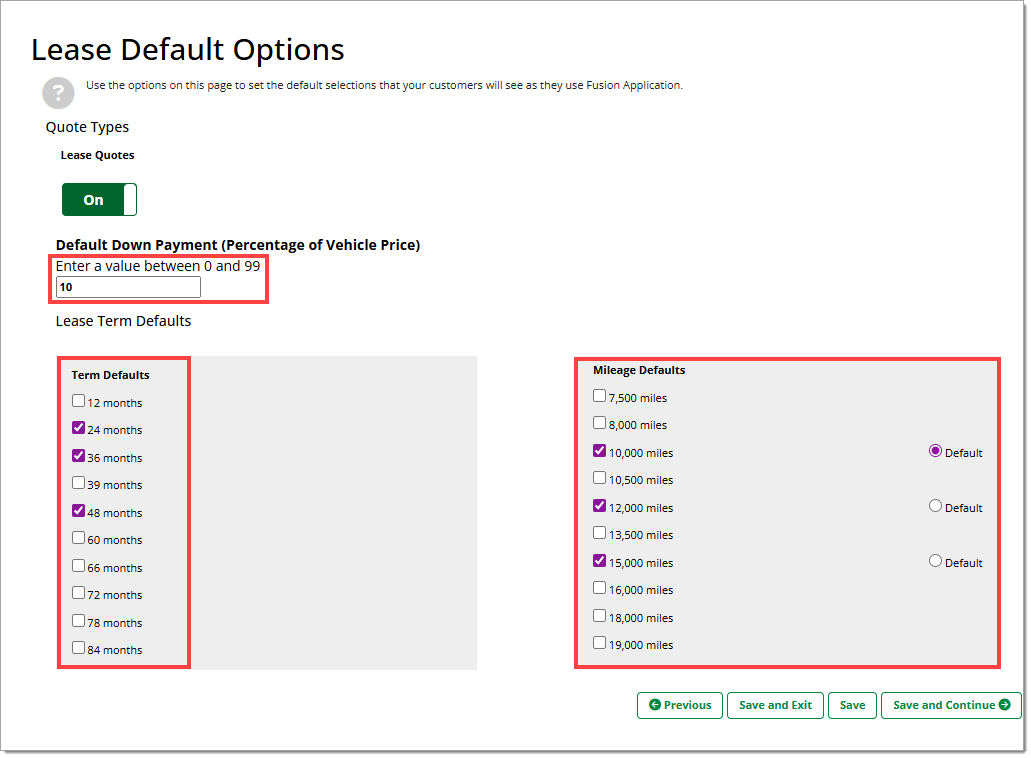
In the Lease Defaults tab, you can enable lease quotes and set the lease terms and mileage that will appear by default in the Fusion application.
To enable lease quotes to be presented in the Fusion application, set the ‘Lease Quotes’ toggle to “On.”
Enter the default down payment as a percentage of the vehicle price in the corresponding field.
Use the checkboxes to select up to 5 term and mileage options to present and use the ‘Default’ radio buttons to indicate the default mileage selection.
Vehicle Valuations
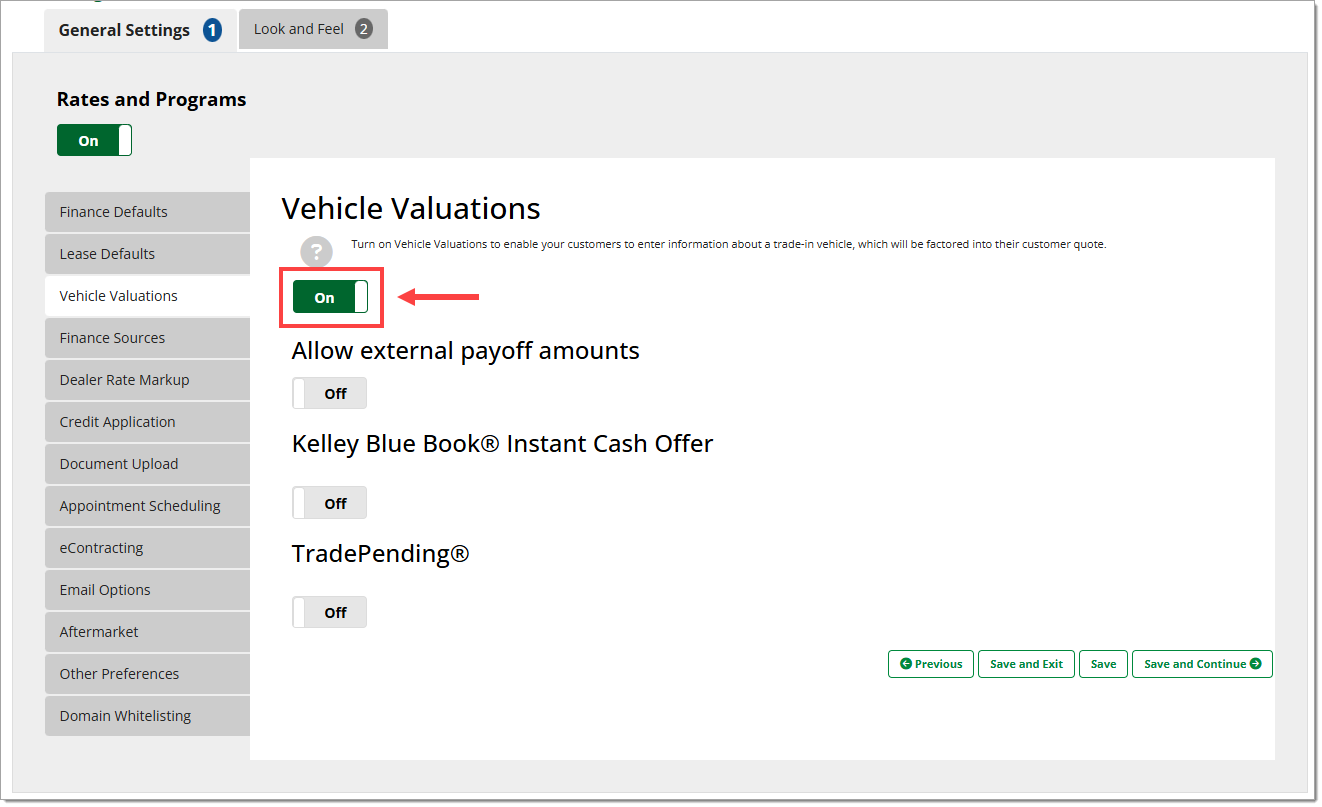
In the ‘Vehicle Valuations’ tab you can configure options to support and process trade-ins within Fusion.
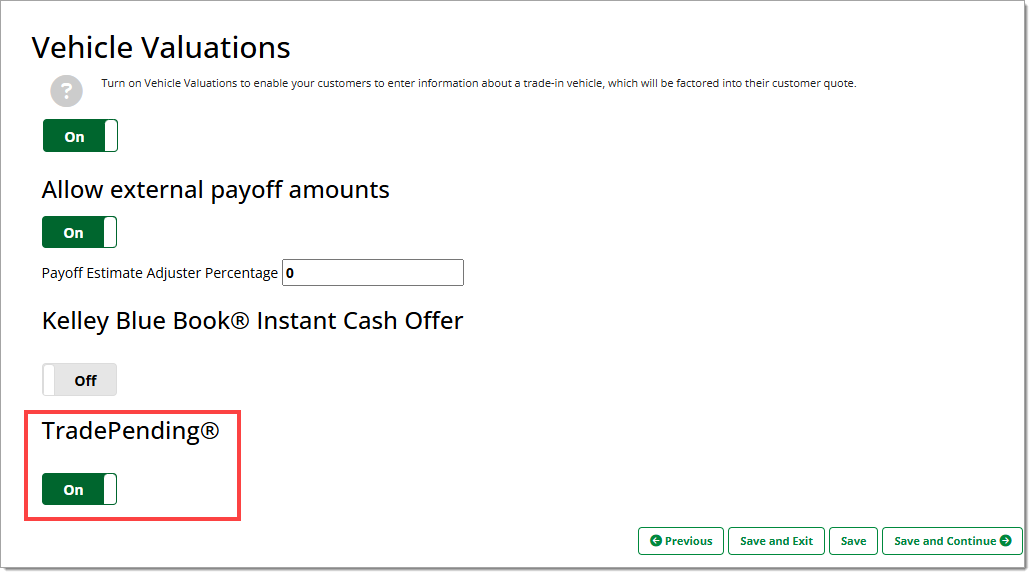
To enable trade-in support for Fusion, set the toggle to “On.”
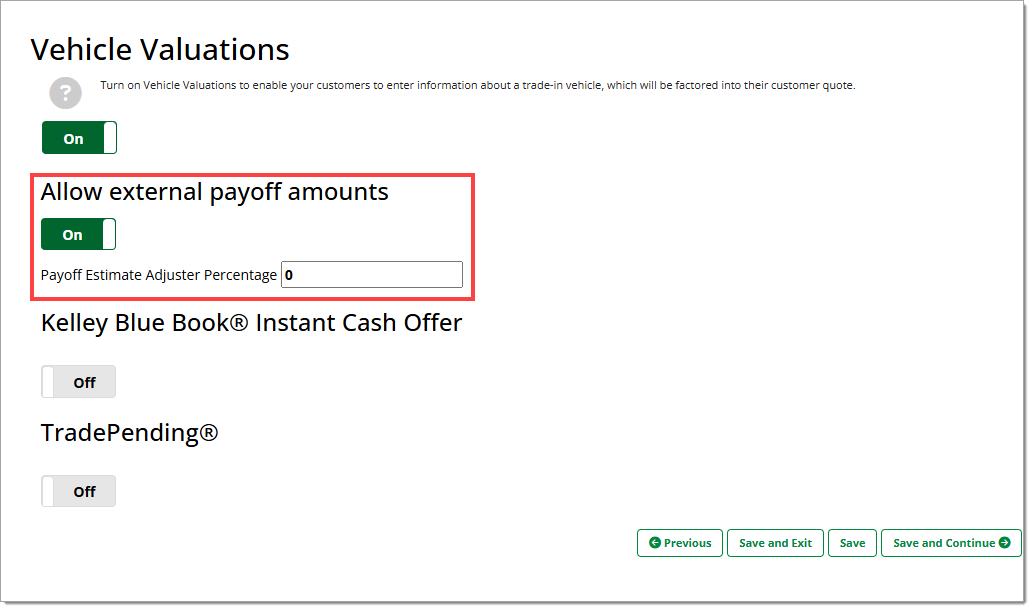
To allow open trade lines from a prequalification to be displayed, set the ‘Allow external payoff amounts’ toggle to “On.”
By default, the adjuster percentage is set to 0. If desired, you can edit the percentage in the ‘Payoff Estimate Adjuster Percentage’ field.
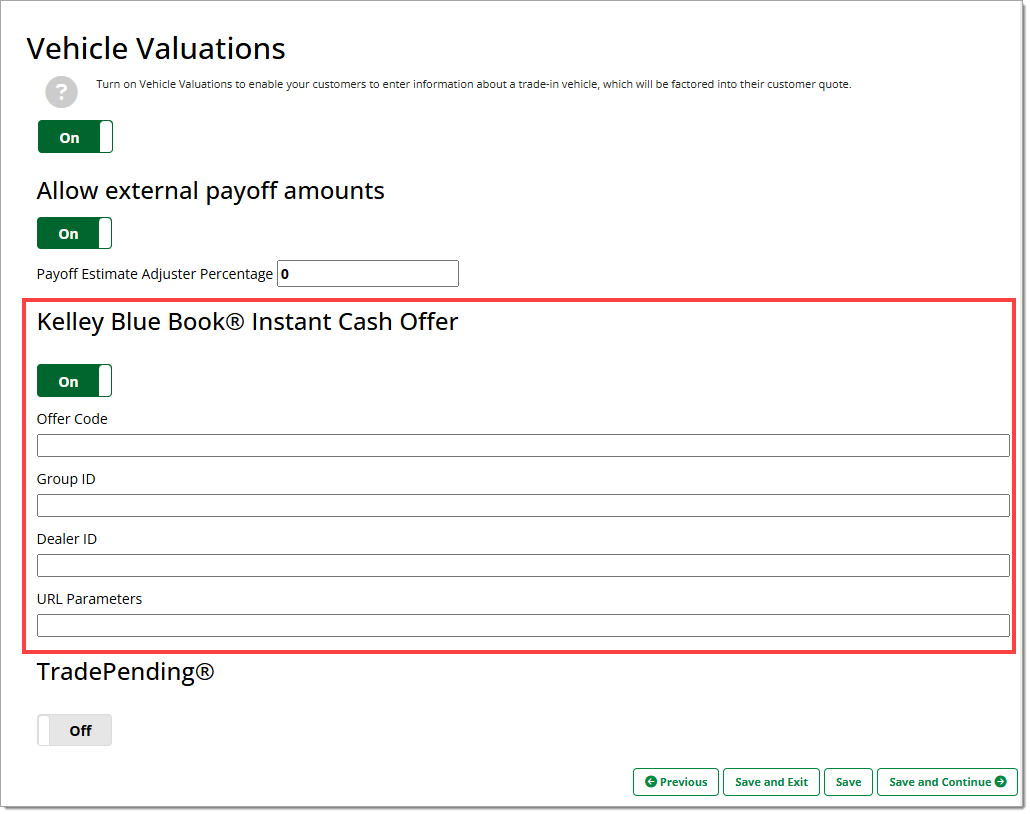
If you are using a provider to estimate trade-in values, set the appropriate toggle to “On.” If applicable, enter your offer code, Group ID, and Dealer ID in the respective fields. The ‘URL Parameters’ field is optional.
Only one provider may be active at a time.
Finance Sources
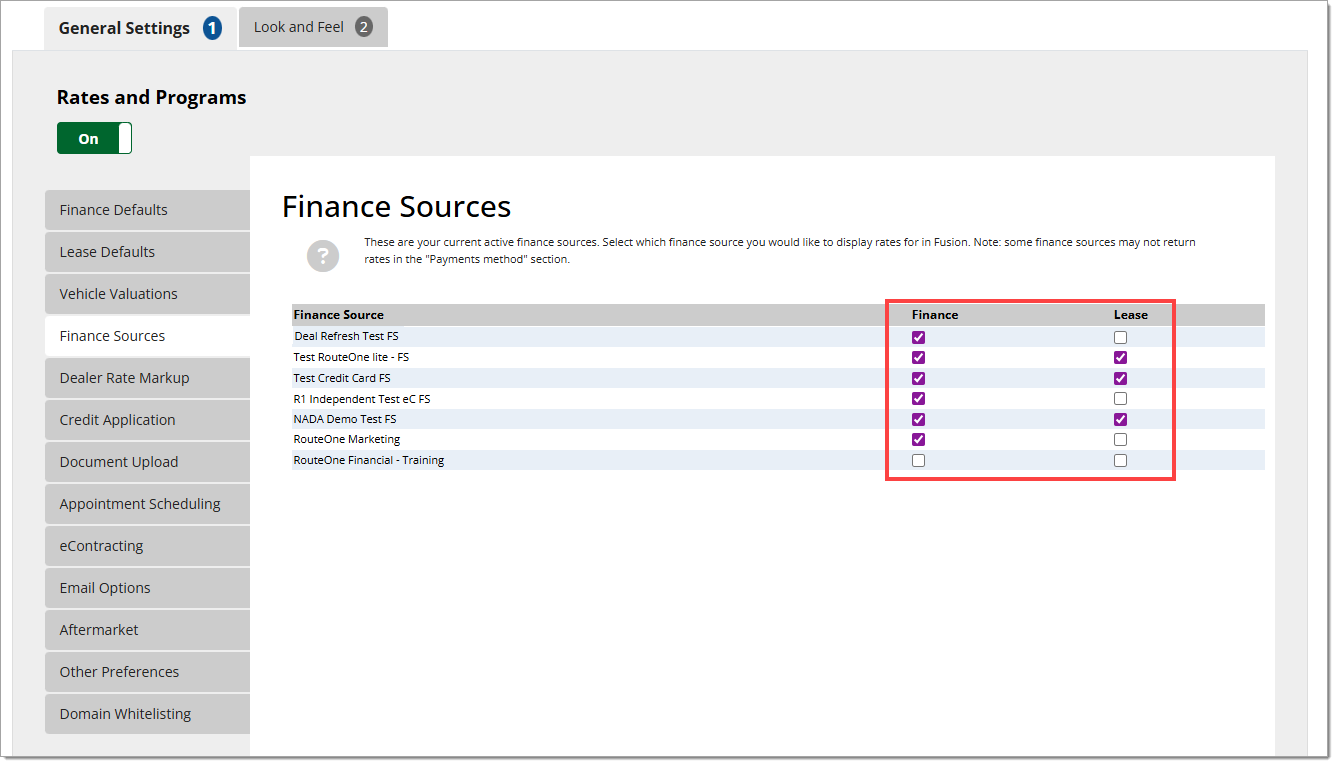
In the ‘Finance Sources’ tab you can configure which finance sources and types you would like to display in Fusion.
All finance sources active with your dealership will be shown.
The availability of rates varies based on finance source, vehicle, and sales class. Not all listed finance sources have rates available.
Use the checkboxes to select whether you want to display finance and/or lease rates for each finance source.
Dealer Rate Markup
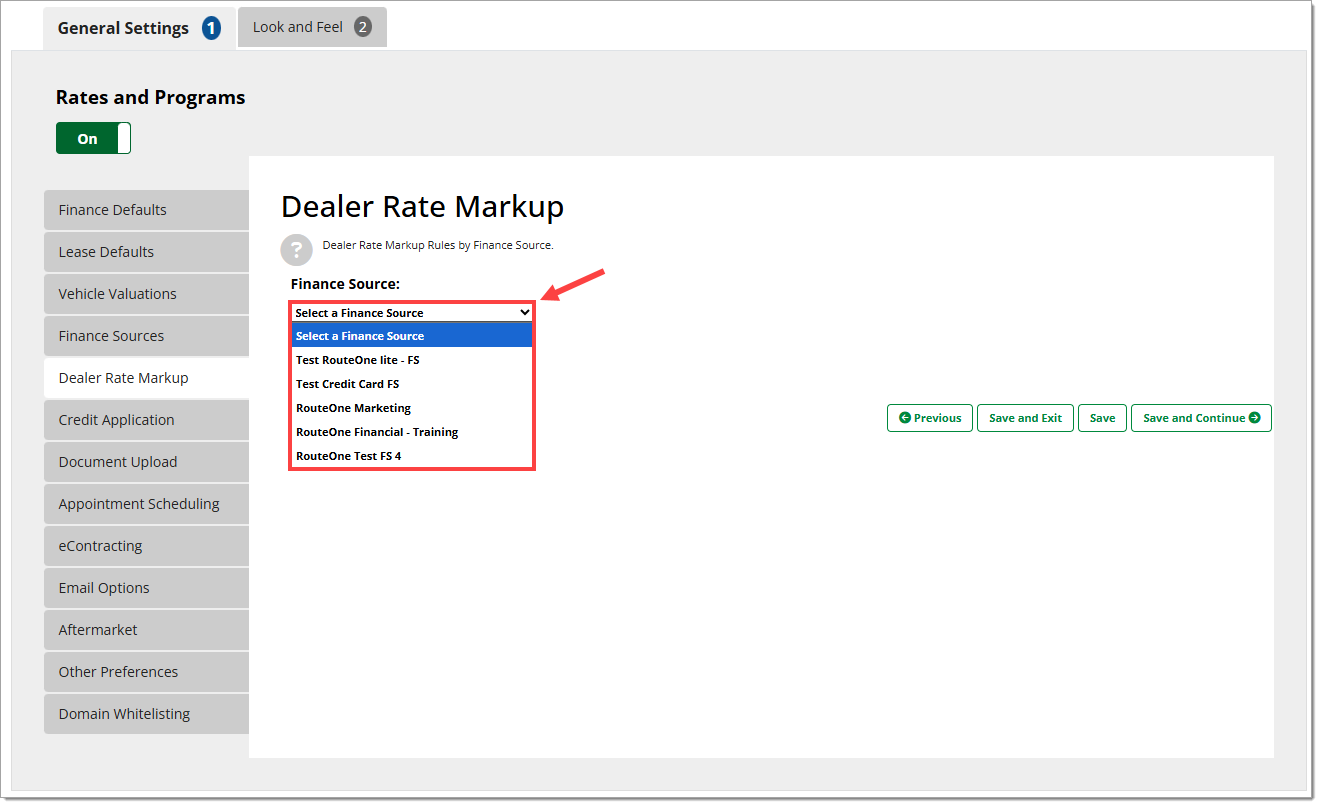
In the ‘Dealer Rate Markup’ tab you can apply rate markups for the finance source rates presented in the Fusion application.
Use the ‘Finance Source’ dropdown menu to select the finance source whose rates you would like to adjust.
Only finance sources that have been configured in the previous section will appear.
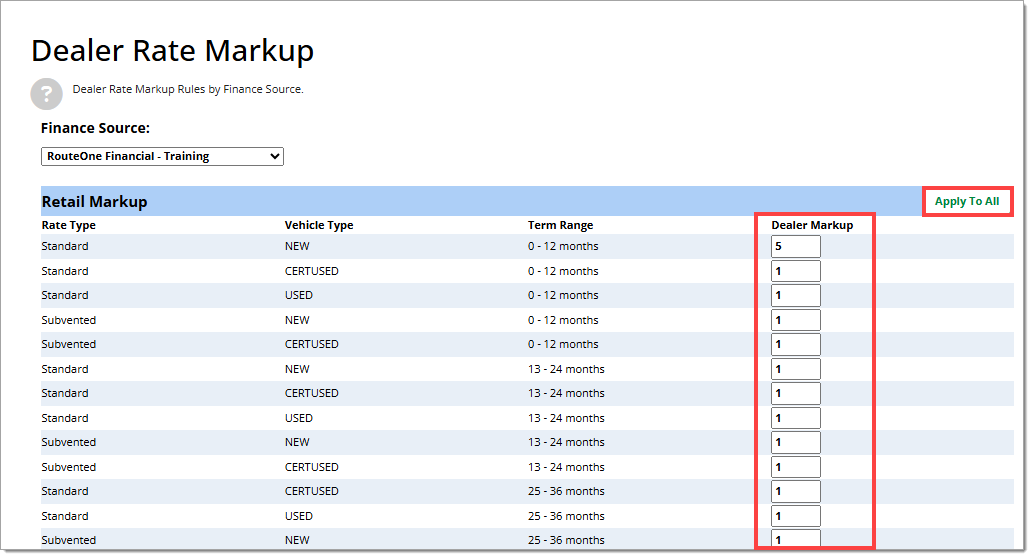
A table with the current available rates from that finance source will appear, listed by rate type, vehicle type, and term range. Enter your desired markup as a percentage in the ‘Dealer Markup’ field for each rate.
To apply the same markup to all rates, enter the desired rate in the first box and click ‘Apply to All.’
Credit Application
In the ‘Credit Application’ tab you can enable and configure the presentation of the Online Credit Application (OCA) as part of the Fusion experience. For more information on the Online Credit Application (OCA), click here to view our installation guide.
To present the OCA as part of the Fusion application, set the ‘Apply for credit option at end of quote’ toggle to “On.”
Enter the OCA parameter name in the ‘Parameters to append to Credit Application URL’ field.
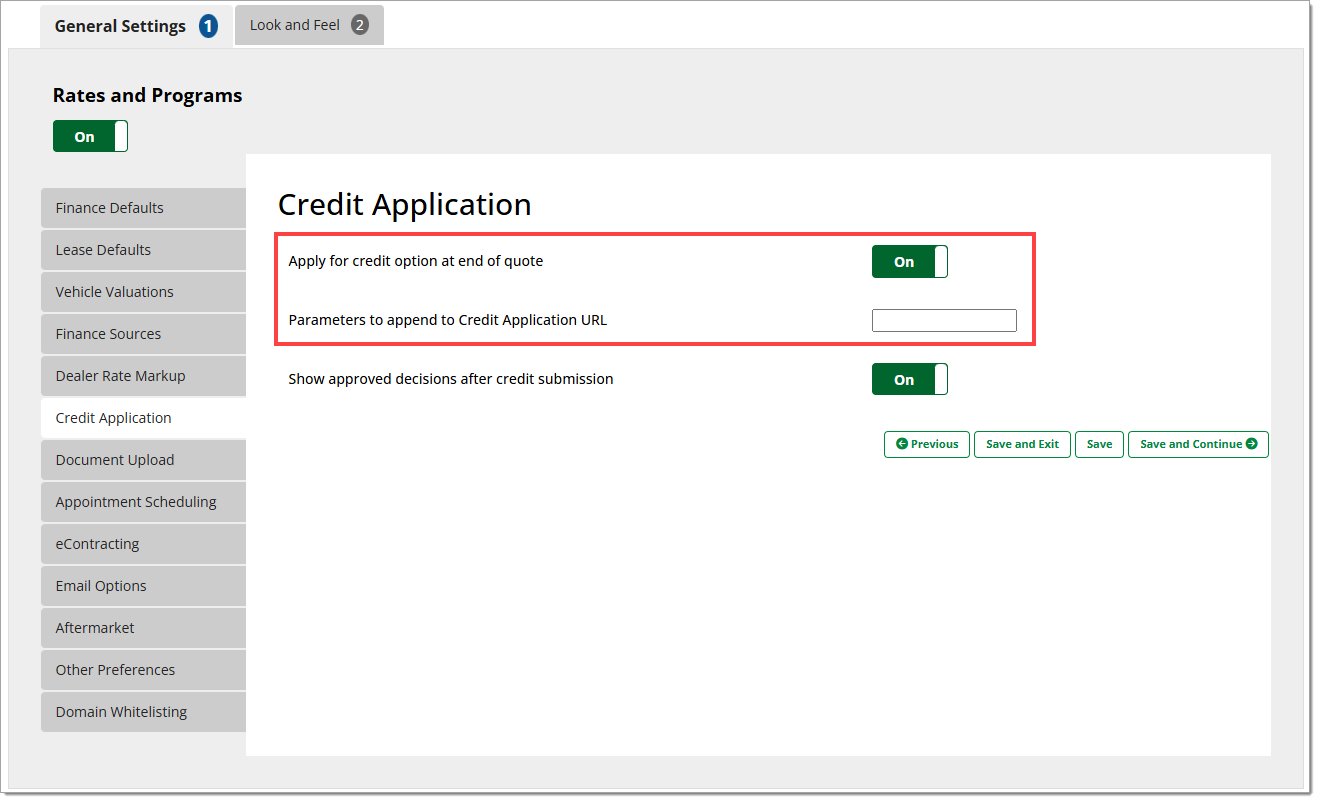
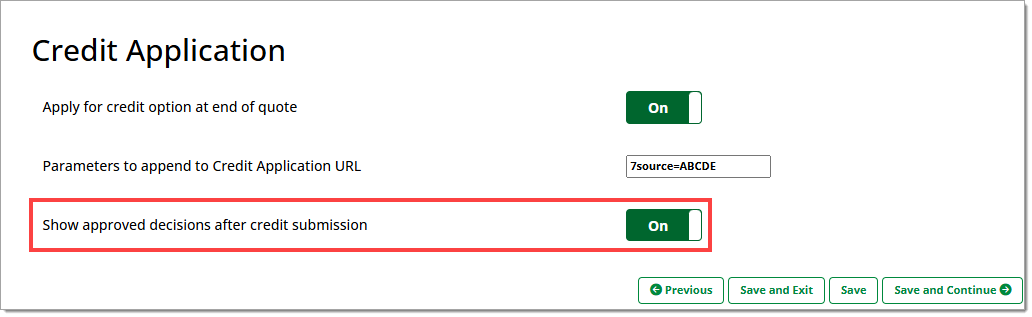
If you would like approved credit application decisions to be shown to the customer, set the ‘Show approved decisions after credit submission’ toggle to “On.”
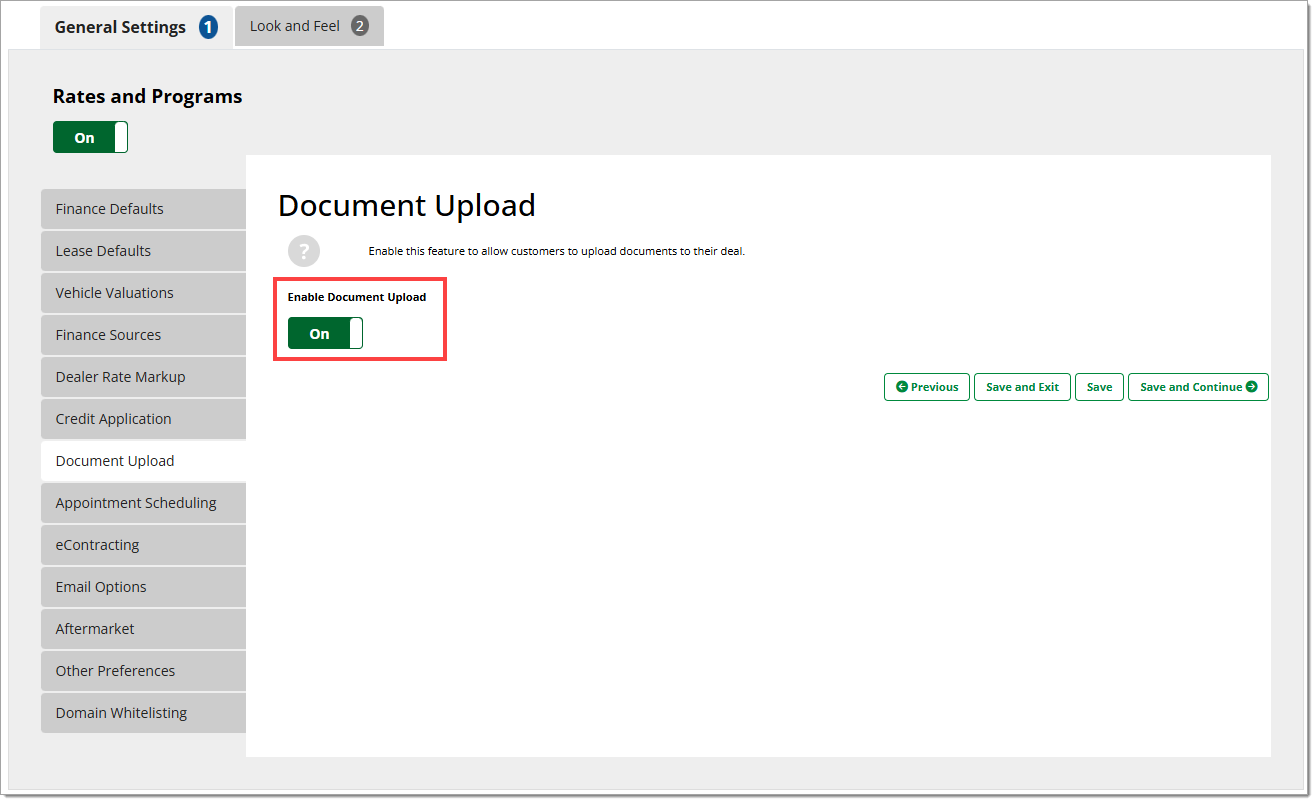
Document Upload
To allow customers to upload relevant documents (driver’s license, proof of employment, proof of income, proof of insurance, and proof of residence) directly to their deal, set the ‘Enable Document Upload’ toggle to “On.” If you do not want to allow the customer to upload documents, set the toggle to “Off.”
Enabling this feature will not require the customer to upload any documents.
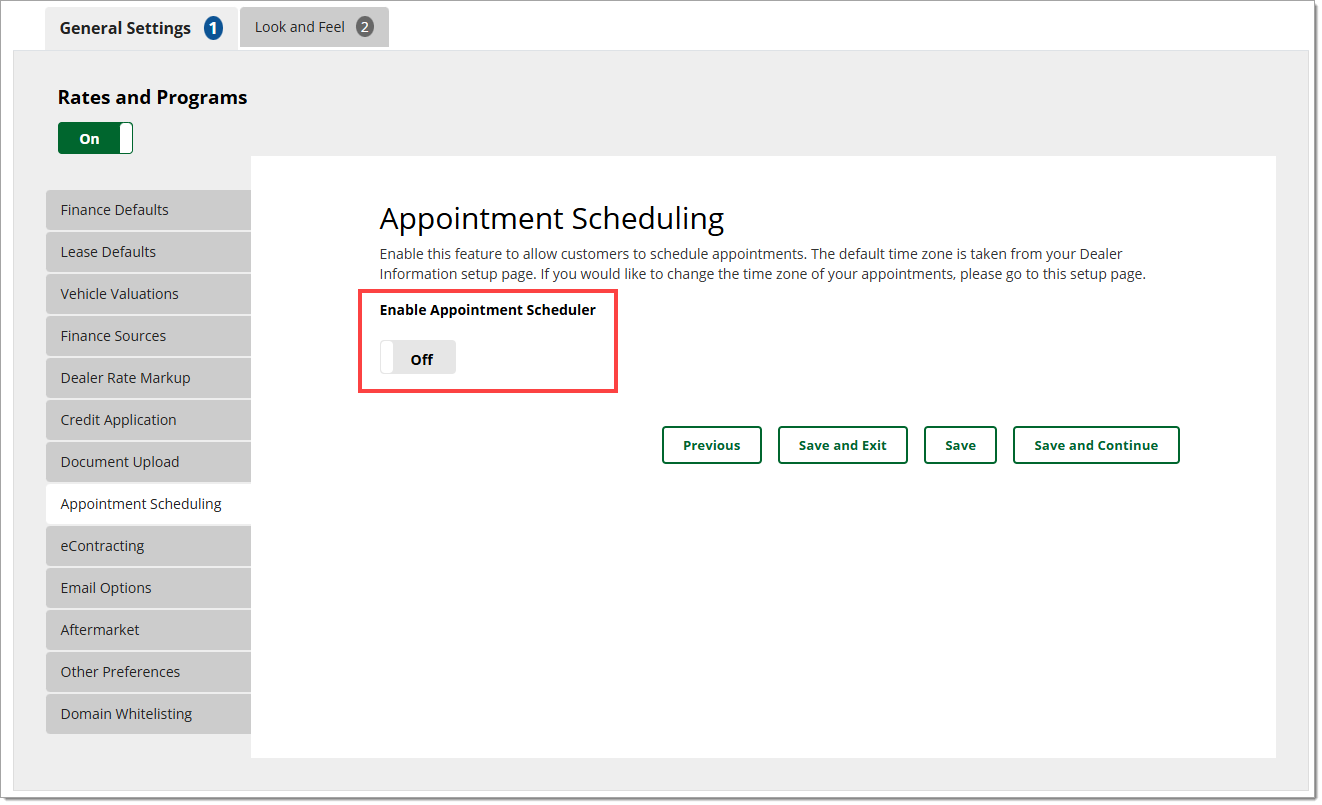
Appointment Scheduling
In the ‘Appointment Scheduling’ tab you can enable and configure the Appointment Scheduling feature. The Appointment Scheduling feature enables customers to request, reschedule, or cancel appointments with your dealership directly within the Fusion application, with real-time availability reflecting dealer-configured hours and exclusion periods. The system ensures that only valid, available time slots are shown to users, and updates are immediately reflected in the application when dealer availability changes in the configuration. Emailed calendar invites are automatically generated and sent to your dealership when a customer requests an appointment.
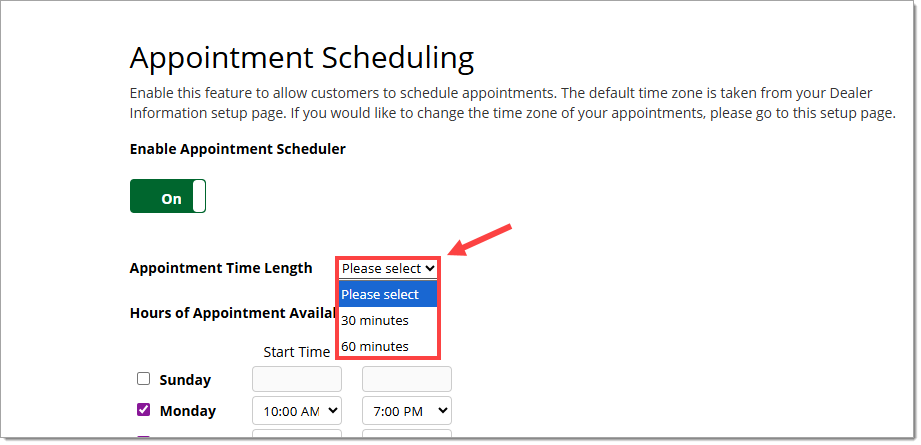
To enable appointment scheduling, set the ‘Enable Appointment Scheduler’ toggle to “On.”
Use the ‘Appointment Time Length’ dropdown menu to select between the 30- and 60-minute appointment options.
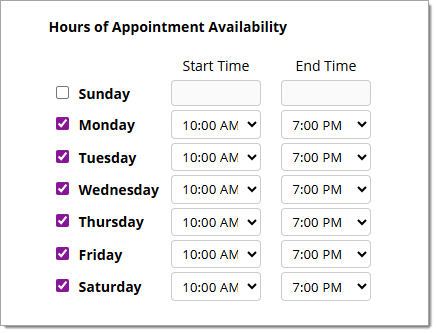
Under ‘Hours of Appointment Availability’ click the checkboxes for all days of the week that will have time available for appointments. Use the ‘Start Time’ and ‘End Time’ dropdown menus to set the available hours for each day, in the time zone of your dealership.
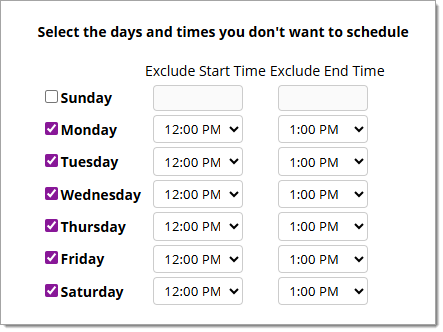
To set unavailability within the set times (such as for a lunch hour), under ‘Select the days and times you don’t want to schedule’ click the checkboxes for days that need a time exclusion. Use the ‘Exclude Start Time’ and ‘Exclude End Time’ dropdown menus to set the time range during which appointments will not be scheduled.
eContracting
To allow customers to generate an eContracting worksheet from the Fusion application, set the ‘Apply eContracting’ toggle to “On.”

Email Options
You can access this page directly from the Fusion section of the Premium Services page by clicking the ‘Email Notifications’ button.
To have Fusion leads emailed to the dealer, set the ‘Send email to dealer?’ toggle to “On.”
Enter up to 5 email addresses to receive Fusion leads.
Fusion emails may contain sensitive information. Access to the designated email addresses should be limited.
The entered email addresses will also be notified when a customer books an appointment via Fusion.
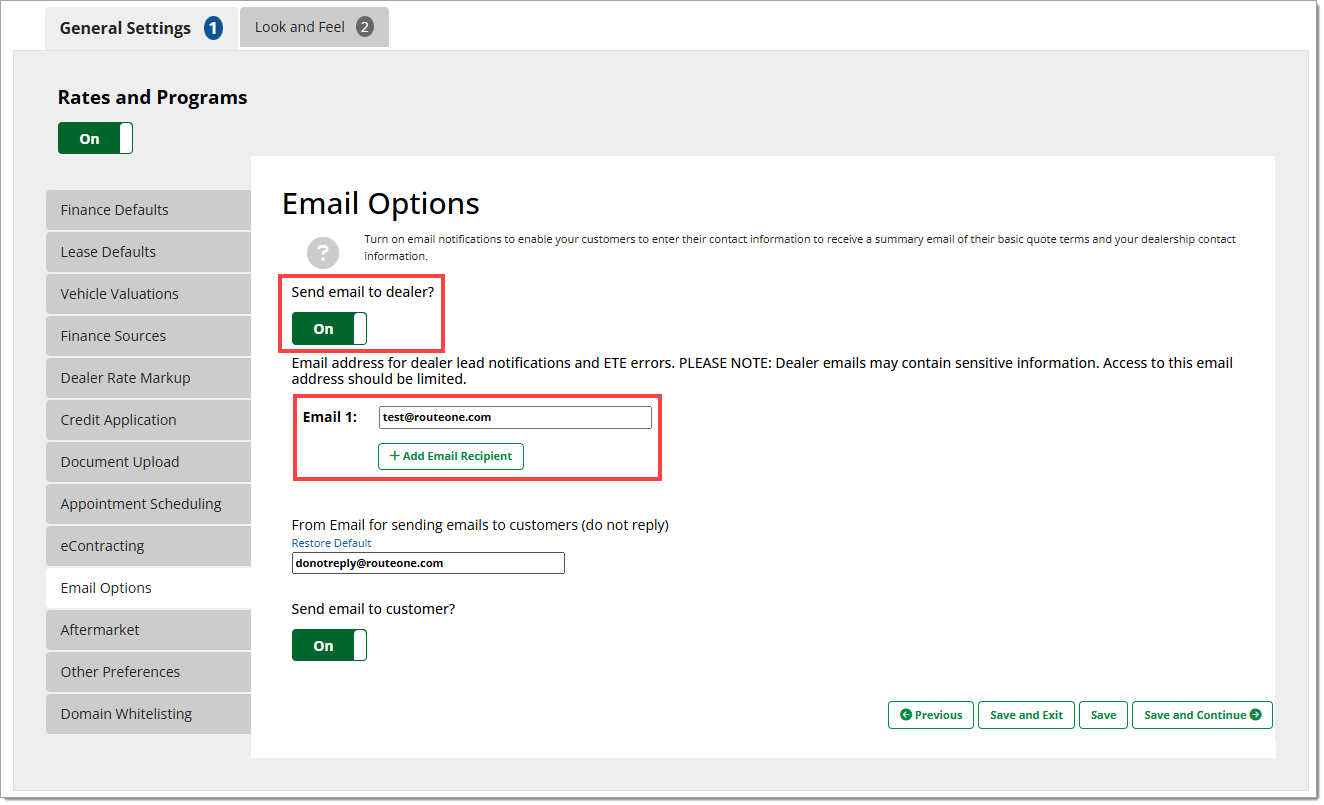
By default, Fusion-related emails will originate from “[email protected].” To customize this address, edit the local-part in the 'From Email for sending emails to customers (do not reply)’ field.
The domain of the email address will always be @routeone.com.

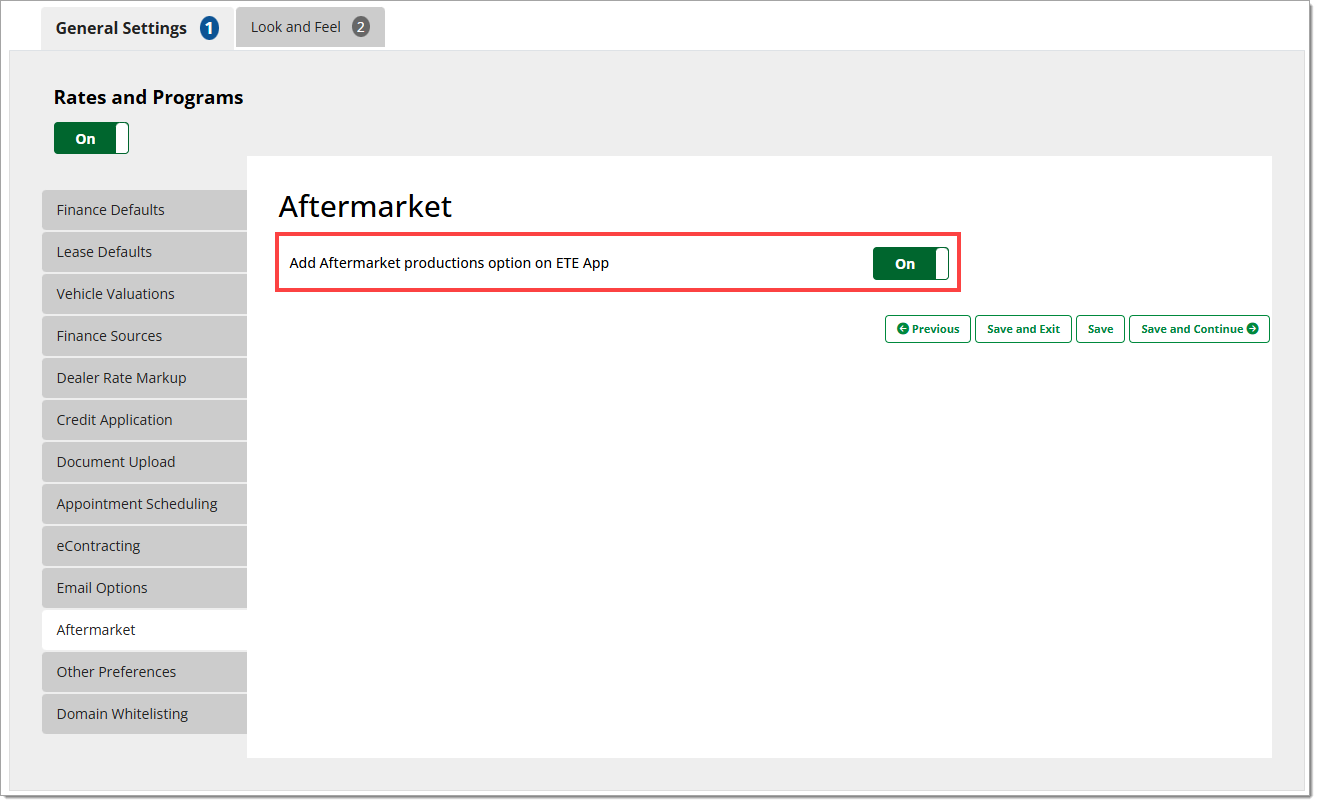
Aftermarket
To enable the presentation of aftermarket products in the Fusion application, set the ‘Add Aftermarket productions option on ETE App’ toggle to “On.”
Other Preferences
Show Estimated Costs at Registration
If your dealership is in a state where there are costs to be paid by the customer at registration – separate from the vehicle transaction and purchase – you can control whether these are shown to the customer by using the ‘Show Estimated Costs at Registration’ toggle.
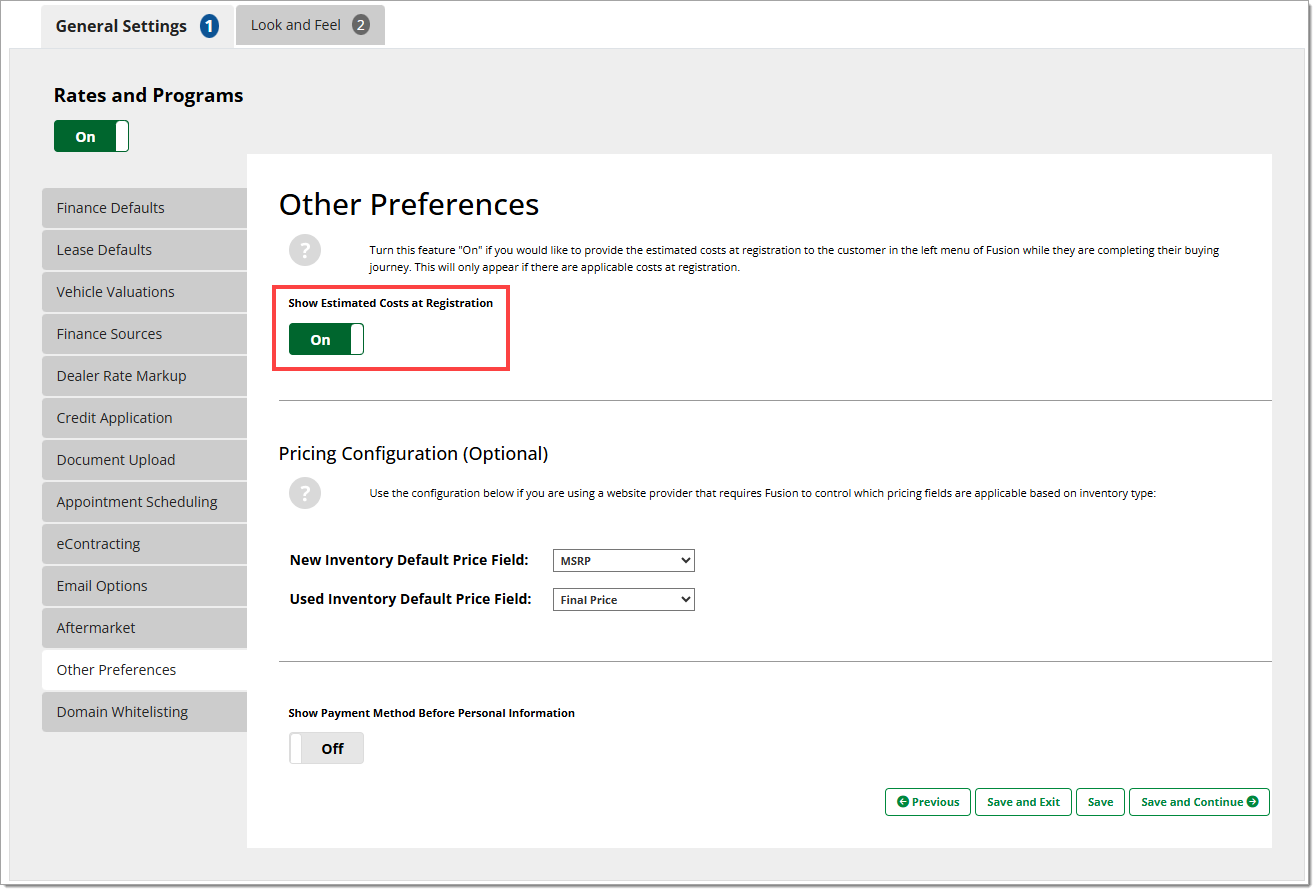
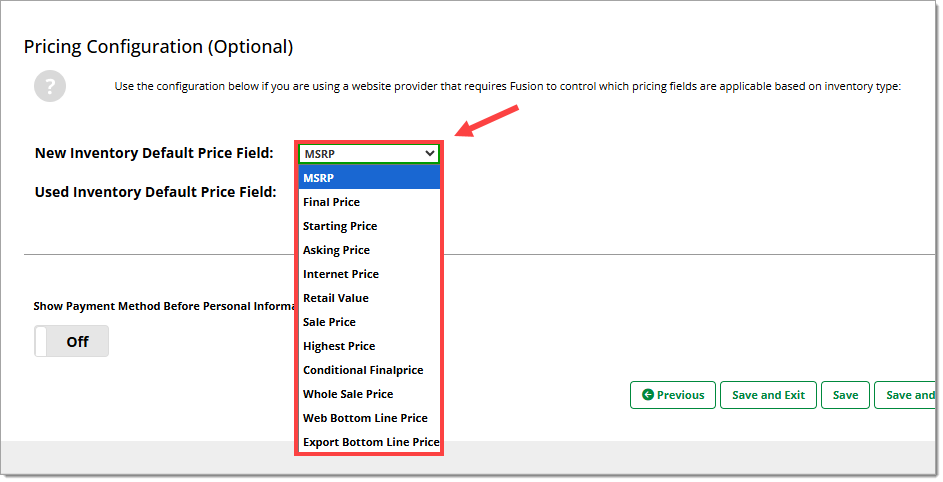
Pricing Configuration
This setting only applies to dealerships who use Dealer.com as their website provider.
By default, the New Inventory Default Price Field is set to MSRP, and the Used Inventory Default Price Field defaults to Final Price. To change either of these defaults, use the dropdown menus.
Show Payment Method Before Personal Information
By default (toggle set to “Off”), the customer information page appears before the payment method page in the Fusion application. To display the payment method page before the customer information page, set the toggle to “On.”

Domain Whitelisting
All domains and subdomains for sites where you will be enabling Fusion need to be added to the ‘Domain Whitelisting’ page. This section is filled out during setup, but if any domains are changed or added, they can be managed here.
For best results, include “https://www.” as part of the domain(s).
To add a new domain, click the ‘+Add Domain’ button and enter the new domain.
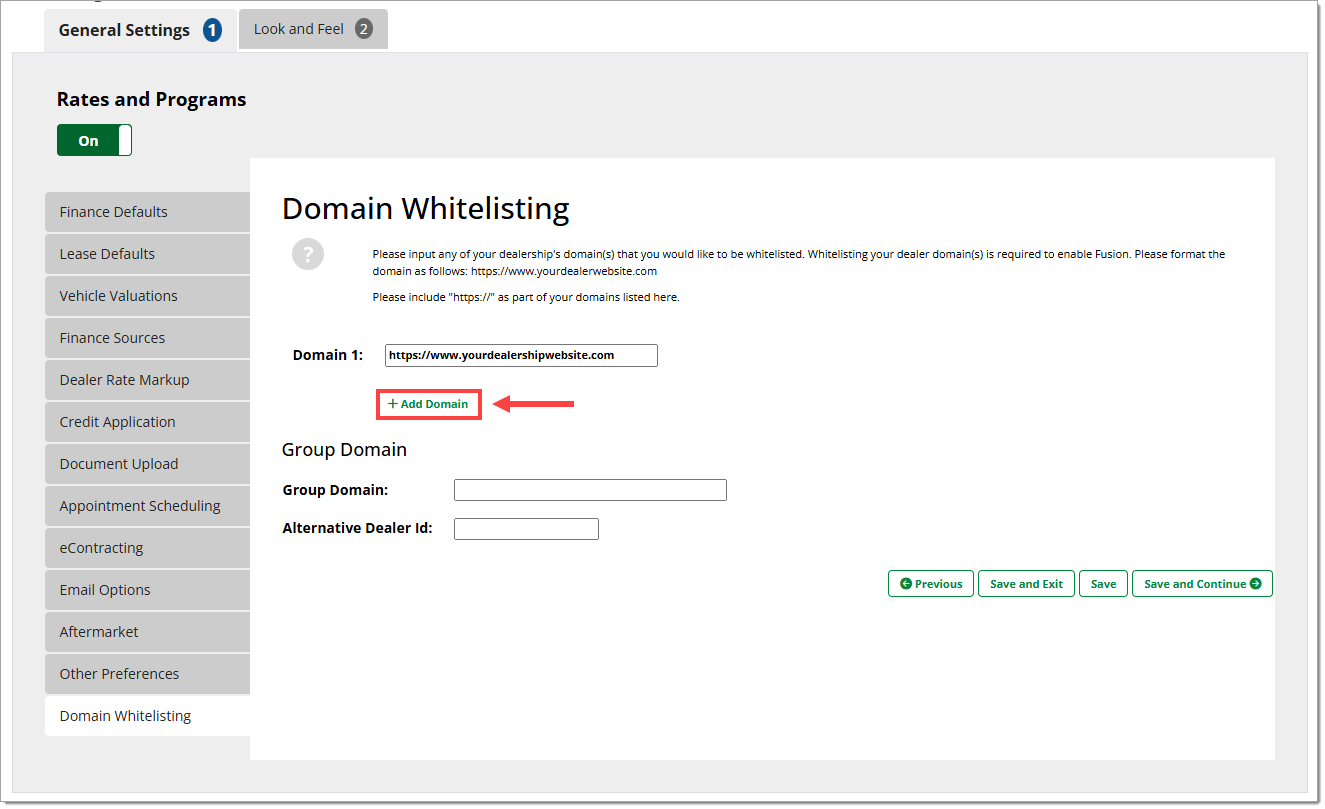
If you are using Fusion on a ‘Parent’ or ‘Group’ website, contact your Fusion representative for setup and configuration.
Configuring the Fusion Application Look and Feel
Color Theme
To manage the theme for your Fusion application, click on the top ‘Look and Feel (2)’ tab.
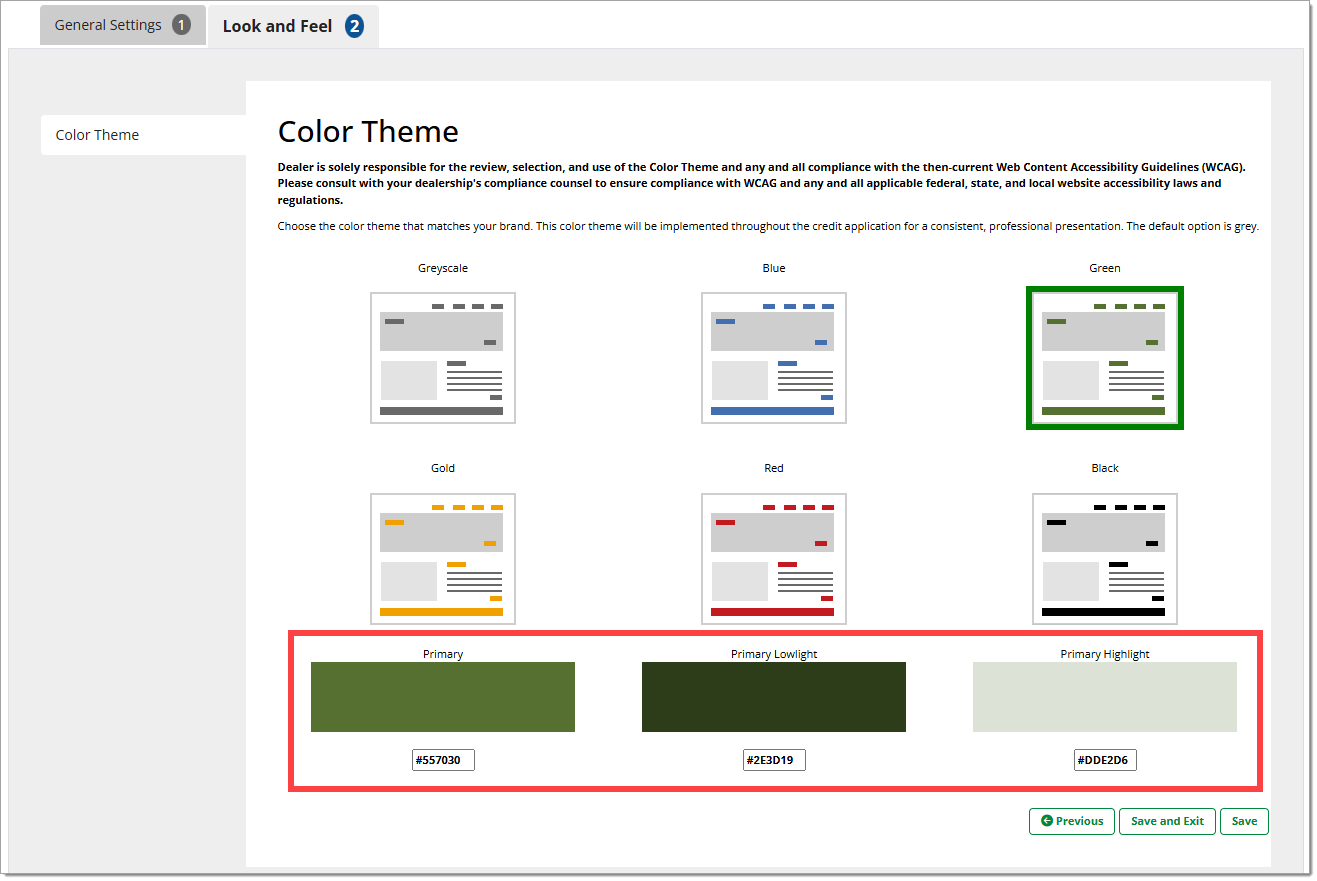
On the Color Theme page, select the color theme which matches your brand.
Dealer is solely responsible for the review, selection, and use of the Color Theme and any and all compliance with the then-current Web Content Accessibility Guidelines (WCAG). Please consult with your dealership's compliance counsel to ensure compliance with WCAG and any and all applicable federal, state, and local website accessibility laws and regulations.
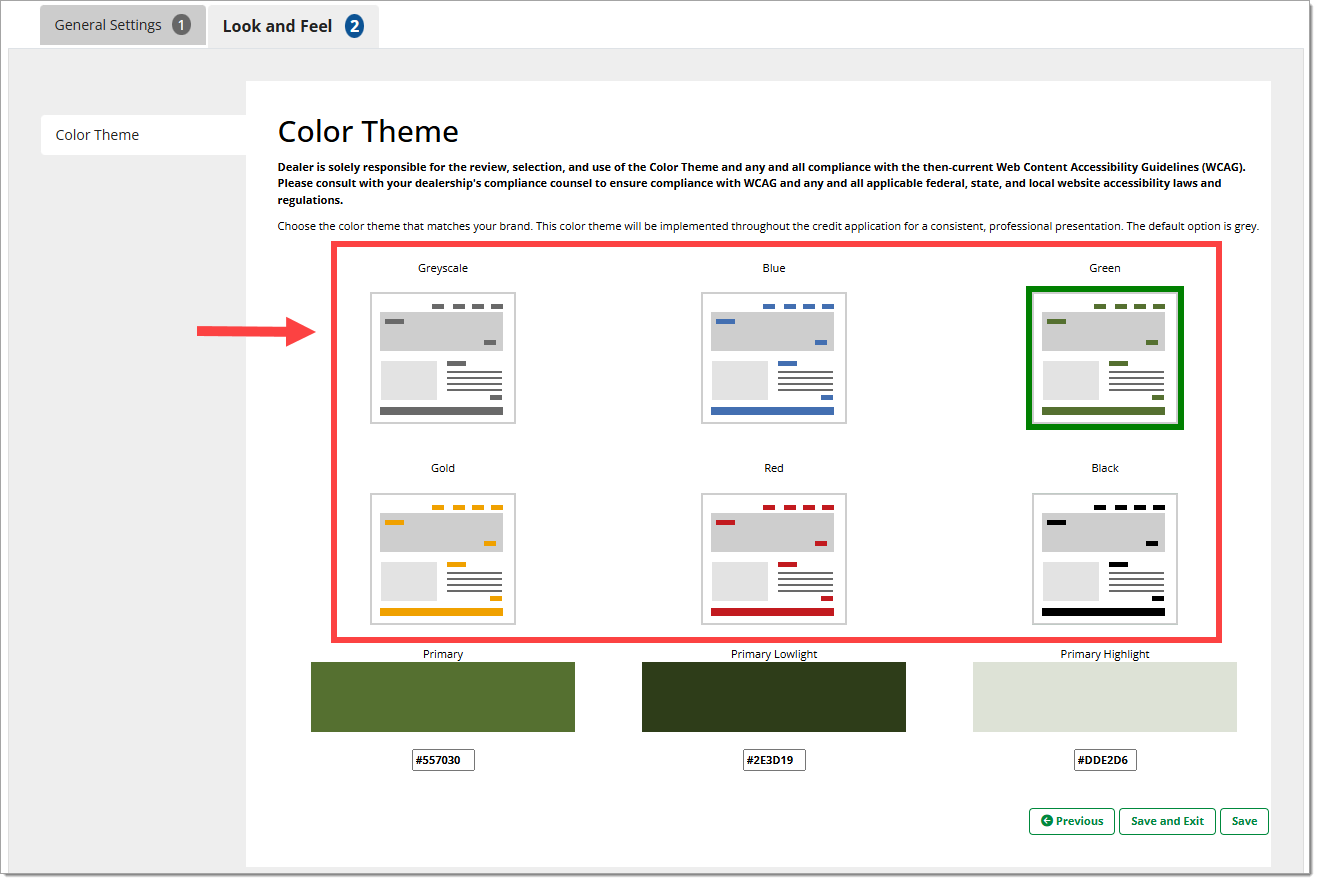
Upon selection, you will see a preview of the theme colors, along with the corresponding hex codes.
Fusion Banner
Fusion automatically generates a banner using your dealership’s provided logo and information. If any information is missing or incorrect, it must be updated on the Dealer Information page. For more information, click here to view our Dealer Information and Preferences user guide.

ROUTEONE SUPPORT
Hours (EST)
Monday - Friday: 6:00am – Midnight
Saturday: 9am – 9pm
Can’t find what you need?
Try our search
