In This Guide:
Related Guides:
Access and Administration
Installing the Online Credit Application (OCA)
Overview
In this Digital Retail installation guide you will receive instruction on:
- How to find and copy your online credit application URLs. These URLs can be shared with web developers who maintain your dealer website.
- How to find and copy language-specific URLs to support Spanish and/or French on your website. (Standard and Premium subscription levels only)
Basic subscribers have a single online credit application URL, known as the primary URL.
- In addition to this primary URL, Standard and Premium subscribers have the option to add additional URLs to support their lead management. These URLs can be embedded in different places on your website or shared in social media and may be visible to all dealership users. When credit applications are submitted from different Digital Retail URLs, they are labelled in CAS with a lead identifier that you have created, allowing you to know which URL was used.
For further instruction on how to add additional URLs and create lead identifiers, click here to view the ‘Customizing the Online Credit Application’ guide.
Copying Your Online Credit Application URL(s)
The instructions in this section show you how to copy your online credit application URL(s). When an application is loaded and displayed to your customers using this URL, it will use the default language from your settings.
At the Basic subscription level, only English is provided.
Log in to RouteOne.net with your dealer account: https://www.routeone.net
Dealer Users
Non-DSA Users in dealerships subscribed to digital retail can access links and QR codes from the link icon at the top right of the screen.
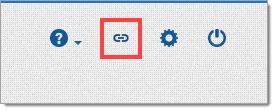
Clicking the icon will bring you to the Online Credit Application Links and QR codes page, where the URLs, QR codes, and printed instructions for each lead source can be viewed and copied.
For more information on customizing lead identifiers, click here.

Dealer System Administrator (DSA) Users
Click ‘Admin’ from the top navigation and select ‘Premium Services.’ If you do not see this option, it may mean that you do not have adequate permissions. You will need to contact your Dealer System Administrator (DSA) for assistance.
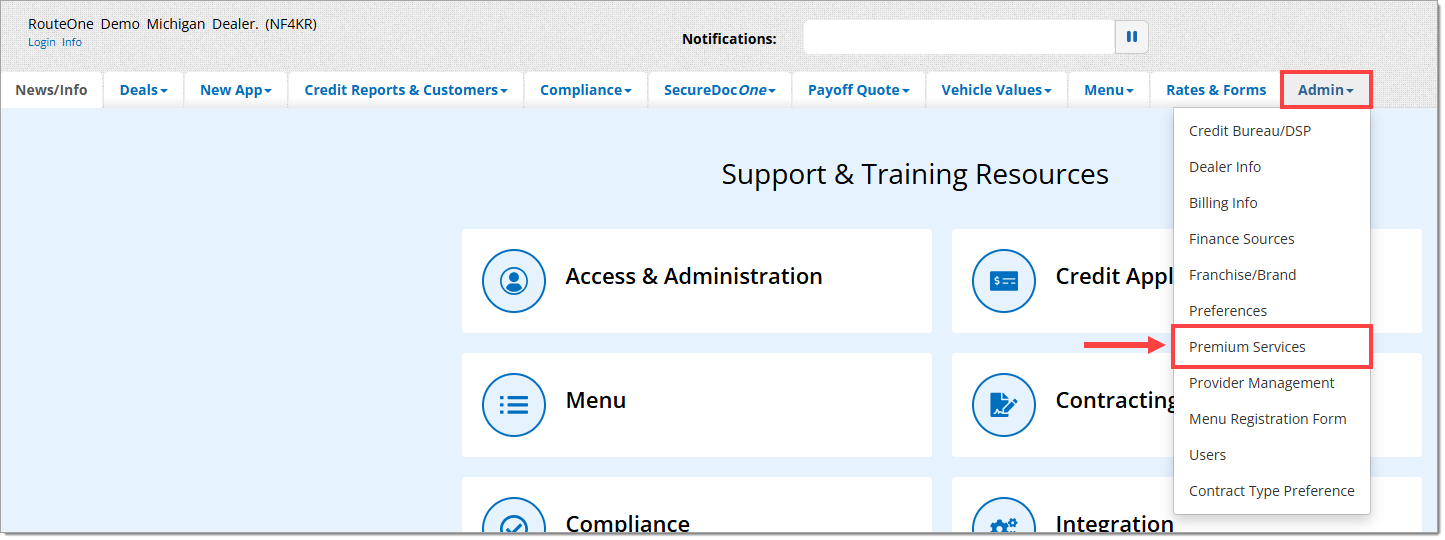
In Premium Services, scroll down to Digital Retail and click to expand this section:
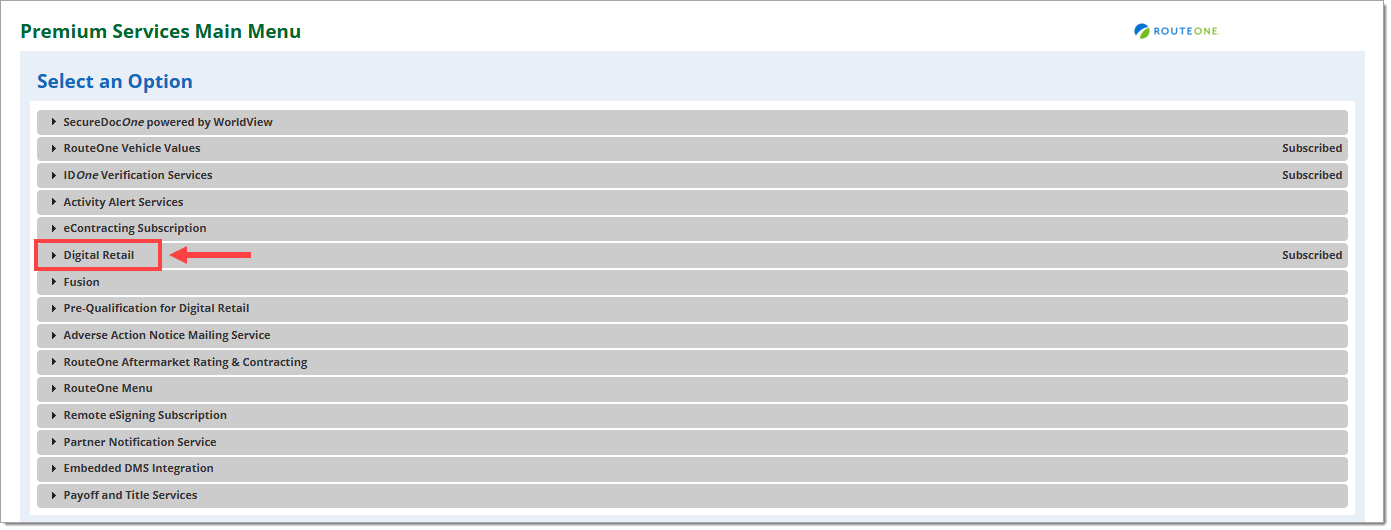
Scroll down to the Online Credit Application Configuration area.
A URL will be displayed for your online credit application.
You can copy your online credit application URL by using the ‘Copy Product Link’ button or by highlighting and copying the text link to share or embed it.
To learn how to place the URL on your dealership website, see the next section of this guide, ‘Embedding Your Online Credit Application URL(s).’

Standard and Premium subscribers have the ability to add additional active URLs to their Digital Retail product.
This setting is accessed by clicking ‘Edit Configuration’ in the Online Credit Application Configuration, going to the ‘Global Settings’ tab, and clicking the ‘Lead Management’ tab.
Use your cursor to highlight additional URLs. To copy, you can right click or use the CTRL+C keyboard command.

You can also click ‘Show Active Website Details’ in the top-right corner of the page to see all the primary product URLs that you are subscribed to, which may include French and Spanish-language URLs.
It will not include any URLs added in Lead Management.

Embedding the Online Credit Application
Embedding the online credit application into your website using HTML will ensure that customers will be able to access the Digital Retail form when they visit your site.
If you are unfamiliar with HTML (the language that websites are built in), it is advised that you find someone (such as a web developer) who can assist you with this task.
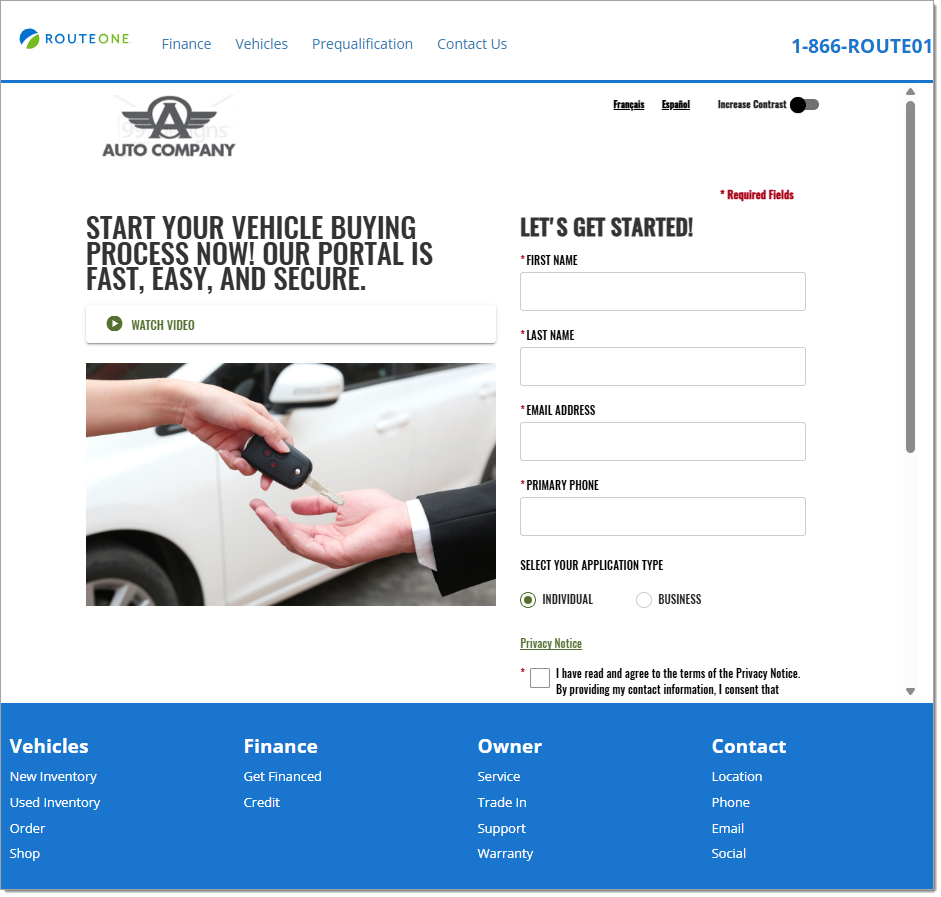
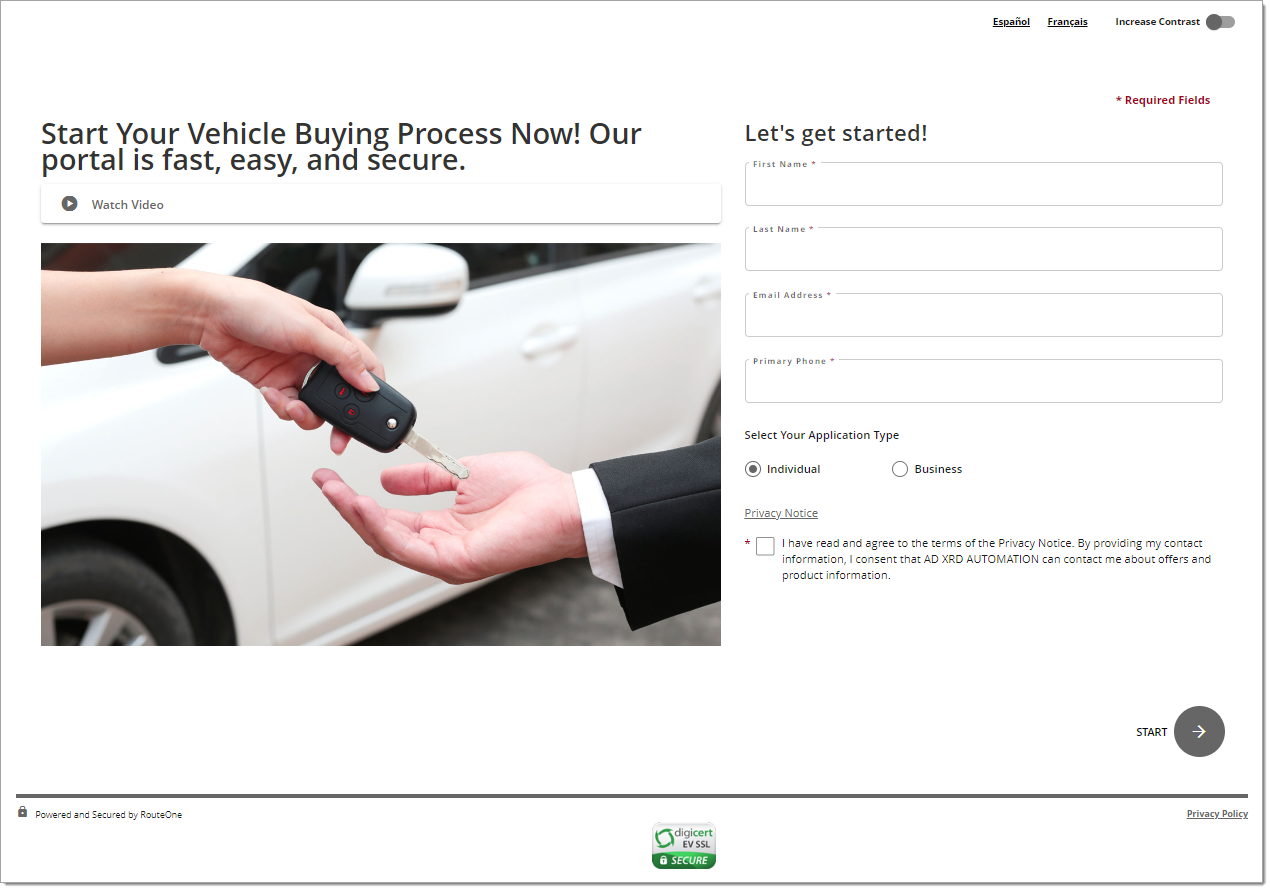
Below is an example of an embedded online credit application. Remember, this is just an example; other sites may vary depending on the dealer site style.
Important Note About Quotation Marks: It is important to use straight quotation marks, not curved, in attributes on your HTML elements, such as the src attribute on an iframe or the href attribute on your anchor tag. Otherwise, the code will not work as intended.
- Correct start and end quote: ""
- Incorrect start and end quote: “”
Steps to Embed the Online Credit Application using the RouteOne iFrame Widget (preferred method)
RouteOne maintains a simplified iframing widget which is updated periodically to manage changes in such as browser specific changes and integrations (such as GA4 compatibility and enabling cross domain communication) , iframe resizing and various ADA support options.
Insert the following widget at the location where the iframe should be situated within the page of the dealer site. The widget requires that the RouteOne dealer ID be included in the call (ABCDE in the examples below).
<script data-dealerId="ABCDE" src="https://www.routeone.net/digital-retail-ui/assets/routeOneDigitalRetailOcaIntegrationWidget.min.js"></script>
If additional static parameters (such as lead capture source) are required, then they may be added as query params in the data-dealerId parameter. For example:
<script data-dealerId="ABCDE&source=33ad0" src="https://www.routeone.net/digital-retail-ui/assets/routeOneDigitalRetailOcaIntegrationWidget.min.js"></script>
Alternative Steps to Embed the Online Credit Application (if the widget cannot be used)
This process is more complicated.
Copy the following text into your website where you would like the embed to go:
<iframe src="URL-GOES-HERE" style="height:1200px;width:100%;" frameborder="0"></iframe>
You can adjust the height and width values to match the style of your site.
Replace URL-GOES-HERE from the text copied above with your Digital Services Online Credit Application URL. Your URL can be found by following the instructions in the Copying Your Online Credit Application URL(s) section above.
Example:
For a dealership with the ID ABCDE, the product URL would be:
https://www.routeone.net/digital-retail-ui/?dealerId=ABCDE&locale=en_US
And the embed would be:
<iframe src="https://www.routeone.net/digital-retail-ui/?dealerId=ABCDE&locale=en_US" style="height:1200px;width:100%;" frameborder="0"></iframe>
Reminder: Your URL will be different than the example above, as your RouteOne Dealer ID will be specific to your dealer.
Important Note: It is strongly advised that you do not add the attribute "scrolling='no'" to your iframe. Digital Retail requires a scroll bar option and is not meant to be embedded without one.
For the same reason, it is strongly advised that you do not add "overflow:hidden" to the iframe’s style attribute.
The online credit application is designed to be responsive for mobile-friendly websites. If your website is also configured to be responsive, ensure that the container div that surrounds the iframe has responsive attributes such as percentage widths or media queries with defined width break-points.
It is strongly recommended to include the RouteOne integration script. For more information on the RouteOne integration script, see the Technical Setup – Embedding Website Requirements section below.
Before updating your site, make sure to test that the embed is working properly. If you are using a website tool that allows you to preview changes before publishing them, do so now.
- If the embed is not working properly, review the instructions above.
If your website has both “test” and “production” instances, be sure to test the embed after publishing in production as well to verify that it works in both instances.
Enabling Cross-Domain Communication via the Digital Retail Integration Script (if the Widget is not used)
The RouteOne Digital Retail OCA is typically embedded within another site (usually the dealership website) using an iframe. Some functionality of the OCA leverages communication between the OCA and the parent page. To enable this communication, a technical resource (usually a web-developer) who manages the site that the OCA is embedded within and a Dealer System Administrator who can supply configuration information within RouteOne must work together to complete the following steps.
Technical Setup - Embedding Website Requirements
RouteOne maintains an integration script which needs to be referenced and initialized within the <head></head> tags of the embedding parent page. Referencing the RouteOne hosted version of the integration script (found at https://www.routeone.net/digital-retail-ui-service/analytics/scripts/integration) will ensure that as updates are made by RouteOne, they will automatically apply to your embedded application without manually updating.
While there are many complexities in the design of a webpage that embeds the RouteOne OCA, a simplified example where the integration script is referenced and initialized has been provided below.
<head>
<script type='text/javascript' src='https://www.routeone.net/digital-retail-ui-service/analytics/scripts/integration’> </script>
<script>DigitalRetail.init();</script>
</head>
Dealer System Administrator (DSA) Configuration Requirements
Some dealership-specific data is required to support various functionalities.
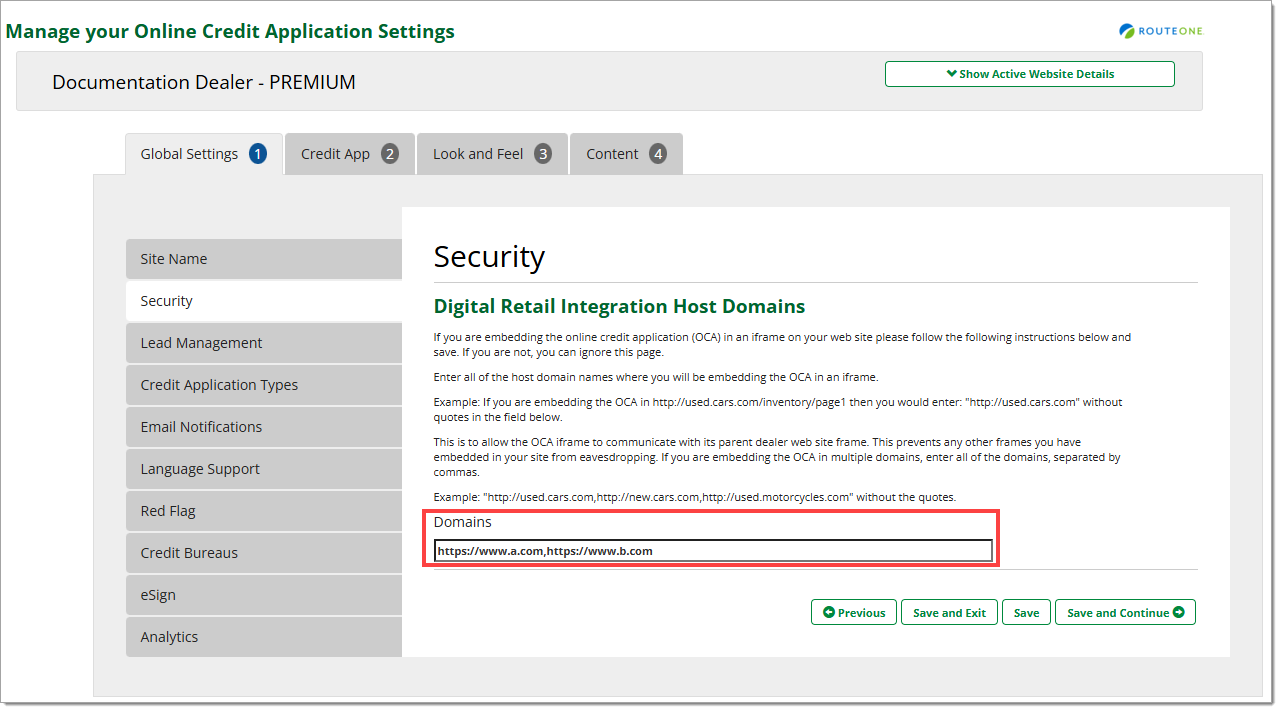
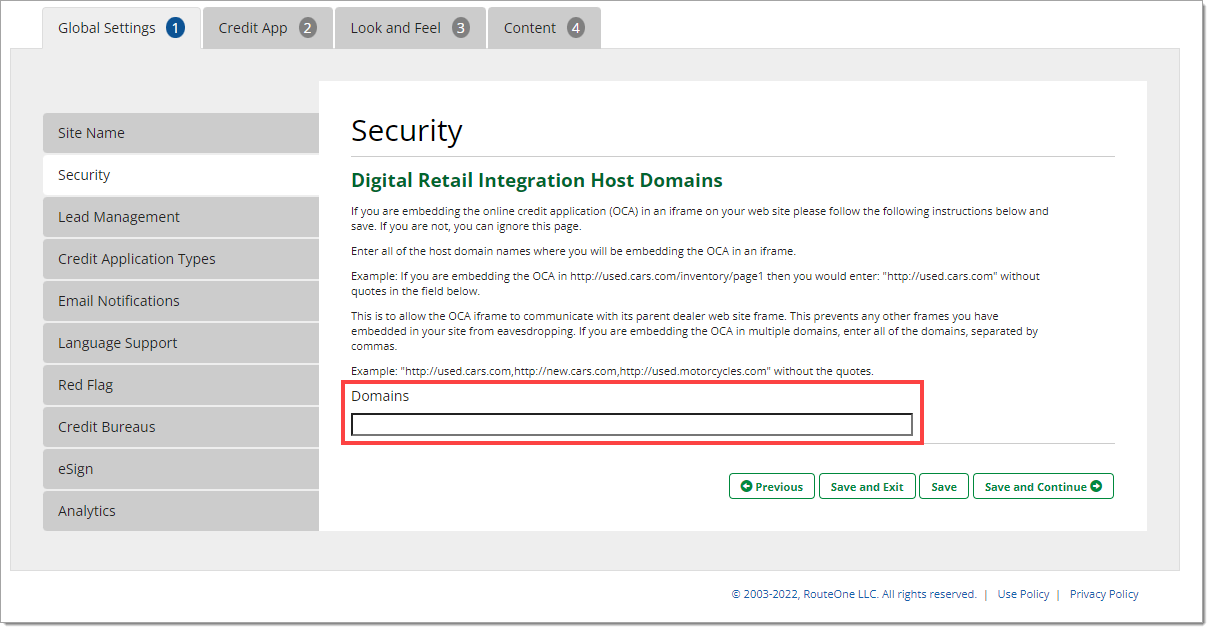
Configure Host Domains on the Security Tab
To ensure that the cross-domain communication used by the OCA is limited to your website’s frame and no other frames, use the Digital Retail Configuration Wizard in RouteOne’s CAS application to specify the full host names of all sites that you are embedding the OCA within. If your OCA is embedded in multiple sites, list them all, with a comma between each host name.
Additional Language Options
Additional language options are only available in Standard and Premium subscription levels.
When you subscribe to Digital Retail, your language default is set to English. If you have subscribed to Standard or Premium, you have the option to change your default language to French or Spanish.
To change the language settings of the OCA, hover over the ‘Admin’ tab and select ‘Premium Services.’
Select ‘Digital Retail,’ and click ‘Edit Configuration’ for the online credit application.

In the ‘Global Settings’ tab, navigate to the ‘Language Support’ tab. From there you can customize the languages supported by your online credit application.
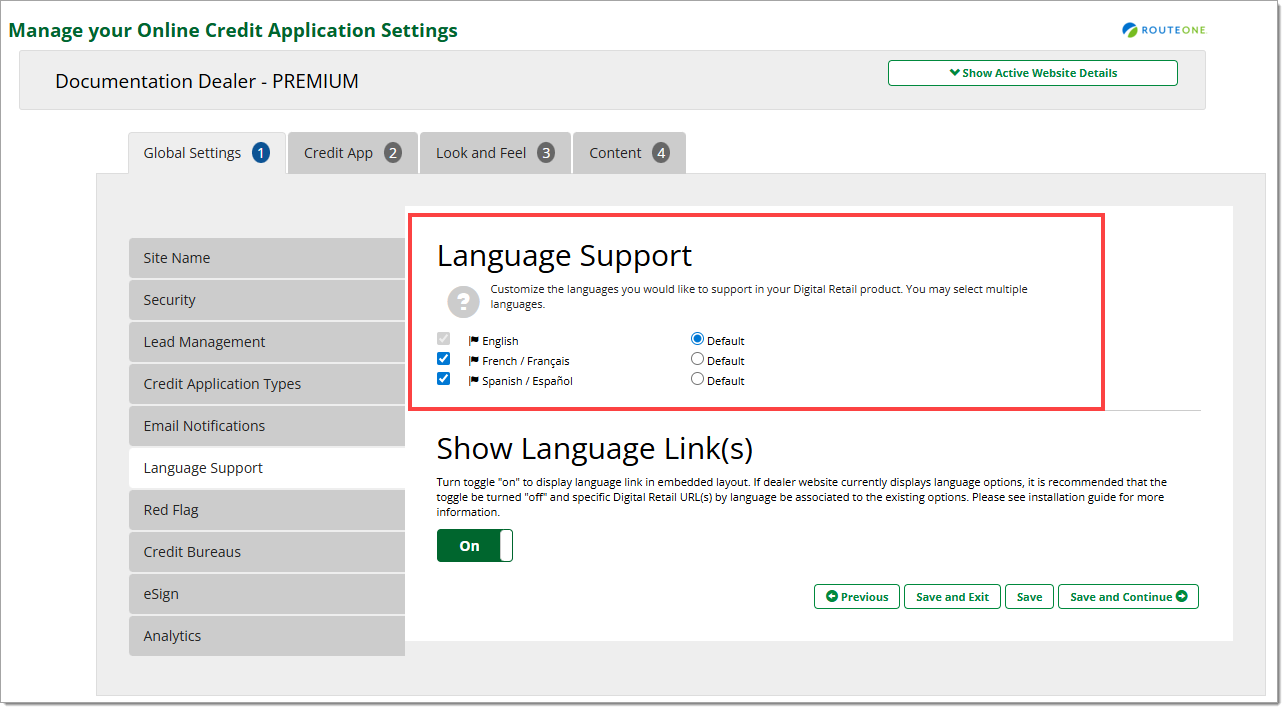
For each language that is enabled with a checkmark in your ‘Language Support’ settings, Digital Retail supplies a distinct URL which will initiate the application in the given language.
If the ‘Show Language Links’ option is set to ‘On,’ the consumer will be presented with links at the top of the page that allow them to toggle to other available languages.
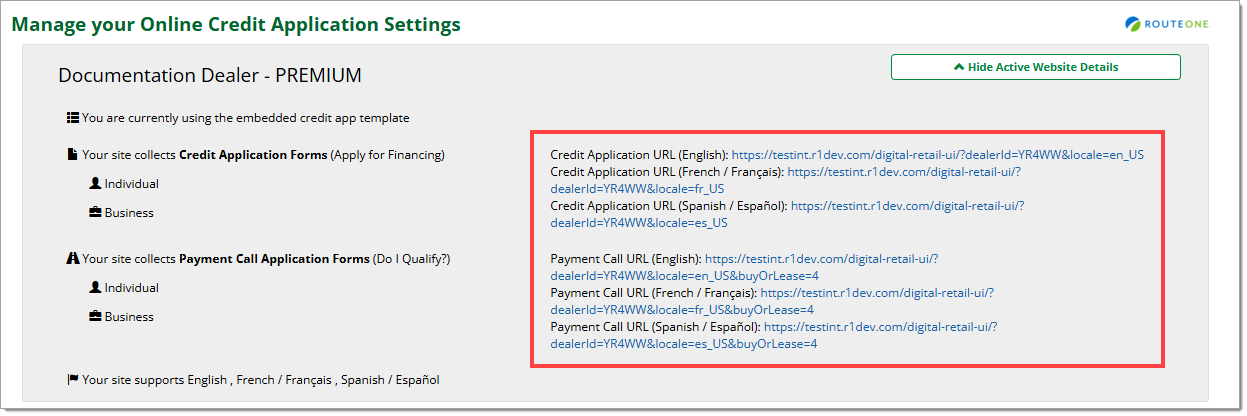
To locate the URLs specific to each language, navigate to your Online Credit Application Configuration and click the ‘Show Active Website Details’ button near the top of the page to expand the section.

Here, you will find URLs you can use to force your Digital Retail credit application to begin with specific parameters, such as language.
You may use more than one URL. These URLs can be associated with your dealer website’s language selectors to display the online credit application in those languages.
Only the language links for the primary online credit application will display in the Active Website Details drop down. If you want to dynamically choose the language for the URL, you can place a “locale” query-string parameter in your URL as shown in the language-specific URLs. Your country must be either the United States or Canada, and it must match the country of your RouteOne account of your Digital Retail subscription. Your language must be one of the supported languages. Digital Retail supports English (en), Spanish (es), and French (fr) for Digital Retail online credit applications.
For the United States, your options are:
- locale=en_US
- locale=es_US
- locale=fr_US
For Canada, your options are:
- locale=en_CA
- locale=es_CA
- locale=fr_CA
You can dynamically choose the language for your primary URL or any additional URLs that you build.
Important Note: If you have a Google Translate plugin on your site, it will not translate the credit application, as it resides within a secure iframe. To give language options to your users, use the URLs above.
Embedding Your iFrame with Dynamic Resizing (if the Widget is not used)
If you are embedding the OCA within your own website, you can implement this in a way that will have the iframe resize dynamically as its content changes size. We recommend this solution for the best user experience because it causes the entire OCA page to be visible on your site. This means the user does not need to interact with a second scroll bar created by the iframe.
Here is how you implement the solution:
1. Have an ID on the Digital Retail iframe that is not null:
Example:
<iframe ...="" frameborder="none" id="digitalRetail" scrolling="auto" width="100%"></iframe>
2. Embed the following iframe resizer library on their site:
<script src="https://www.routeone.net/digital-retail-ui/assets/javascript/iframeResizer.min.js"></script>
3. Somewhere in the HTML, below the script tag in step #2, place the following script. This script will initiate the iframe resizing library on the iframe using its new ID from step #1.
<script>iFrameResize({ log:false }, "#digitalRetail")</script>
Using the Analytics Option
This feature is only available at Standard and Premium subscription levels.
If you have subscribed to Digital Retail Standard or Premium, you have the option to gather Google Analytics data about your dealership Online Credit Application usage.
These instructions assume that you have already completed the iframe embedding for Digital Retail, and have Enabled Cross Domain Communication using the Integration Script.
The following steps must be completed by an administrator of the website that the OCA is embedded within.
Generating a Google Analytics (GA4) Tracking Code
These steps are subject to change based on updates to the Google Analytics user interface. For assistance, please refer to Google Analytics’ documentation, such as the Google Analytics Support link noted below:
Settings and configurations of Google Analytics are the responsibility of the dealership.
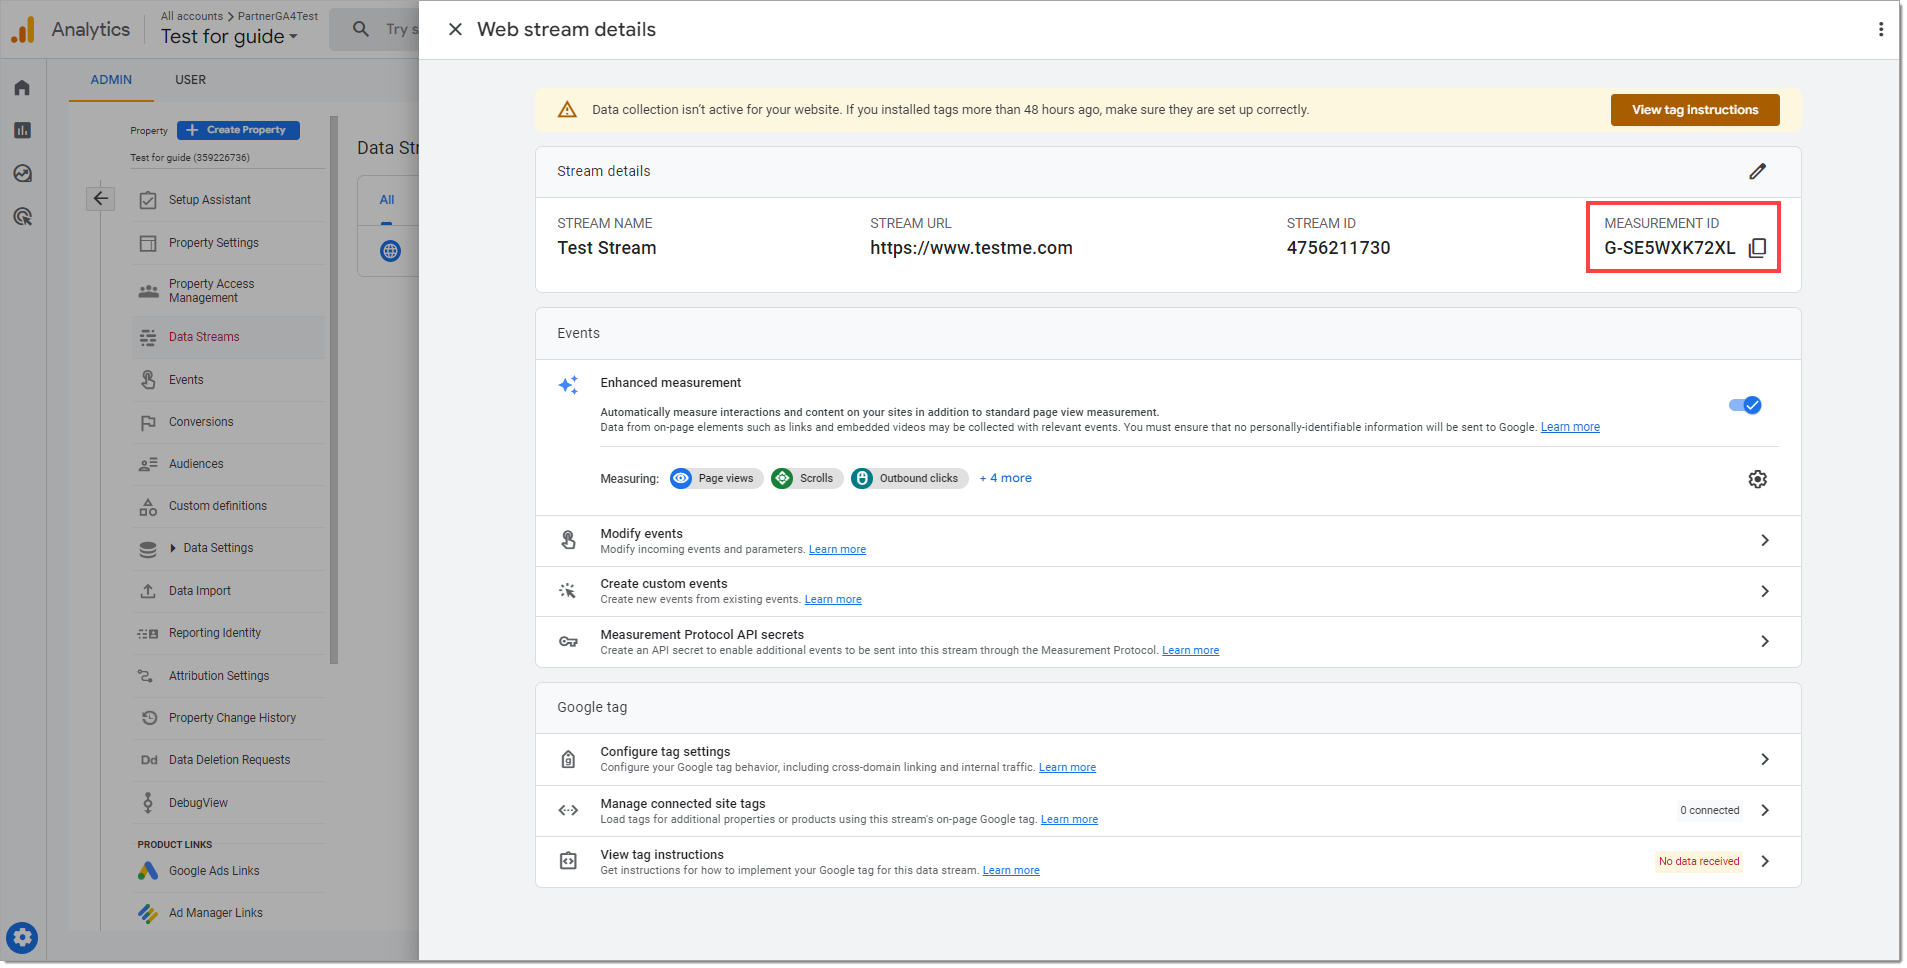
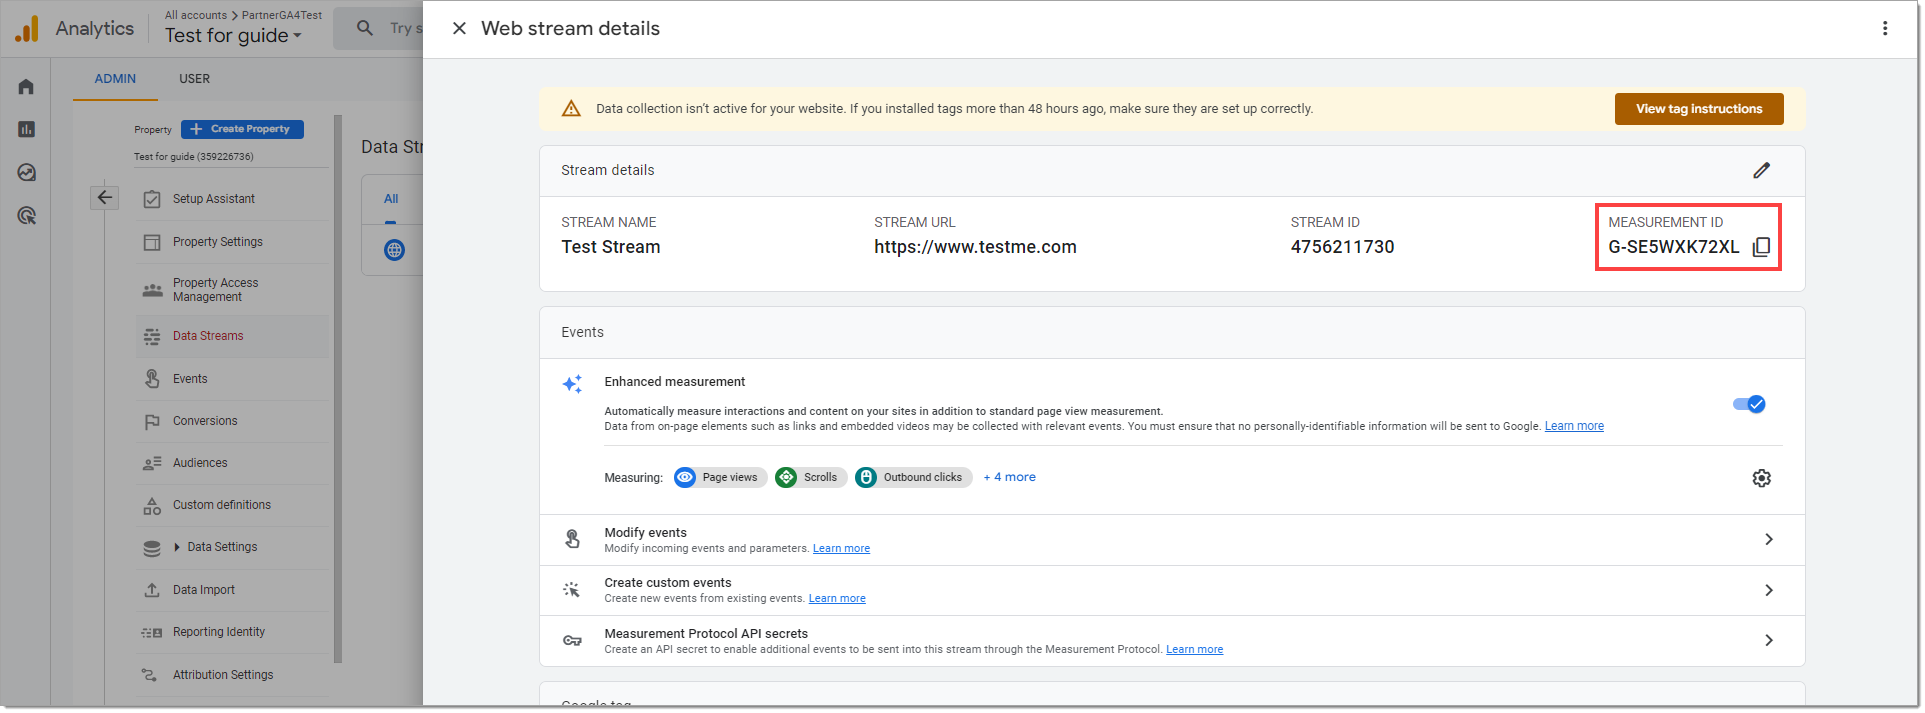
When the setup of Google Analytics has been completed, make note of the Measurement ID for your data stream so that a RouteOne Dealer System Administrator for your dealership can note the value in the Analytics tab. The Measurement ID is the value that is used to link the consumer interactions on your Online Credit Application with the Google Analytics data storage.
A property is a website, mobile application, or blog, etc., that is associated with a unique measurement ID. A Google Analytics account can contain one or more properties.
Accessing Existing Tracking Codes
This process is subject to change based on updates to the Google Analytics user interface. For assistance, please refer to Google Analytics’ documentation, such as the Google Analytics Support link noted below.
Click here to view a Google Analytics article on Measurement IDs.
Enabling Analytics through RouteOne OCA Configurations
If the security domain(s) in the Digital Retail - Online Credit Application (OCA) Configuration page has not been specified yet, log in to routeone.net and go to the Global Settings panel. Click on the Security tab and add the domain of the embedding website. As described within the screen instructions, if you are embedding the OCA in https://used.cars.com/inventory/page1, for example, then you would enter https://used.cars.com. Multiple domains may be entered with comma separators. Be sure to save your changes using the button at the bottom of the page.
Make sure that Analytics is enabled, and a G-prefixed measurement ID is saved to the Analytics page. See above for information about the measurement ID.
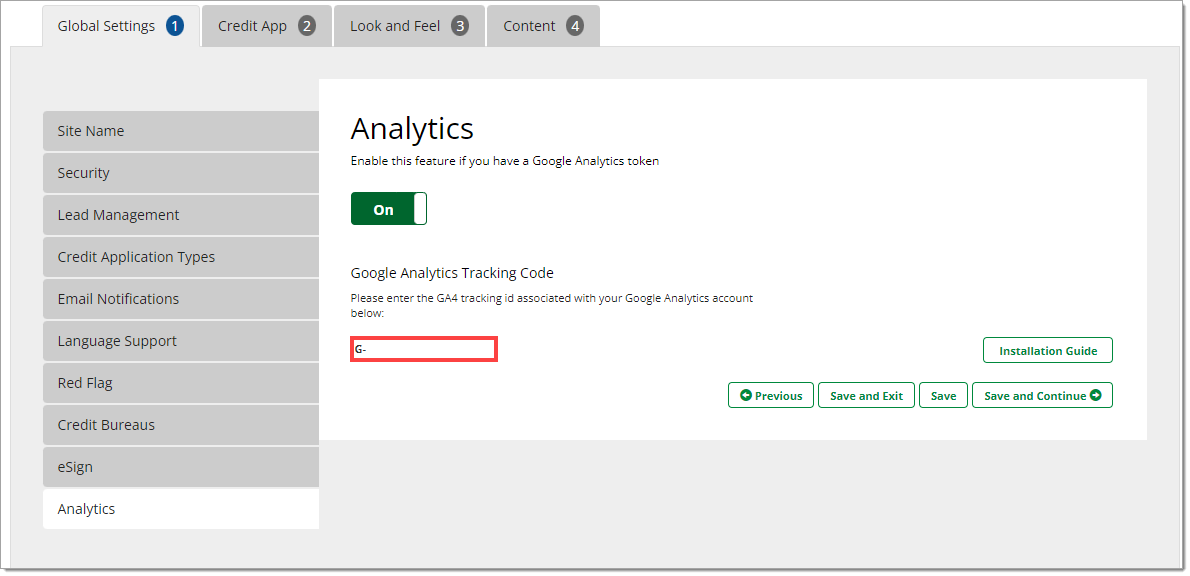
If the dealer already has gtag initialized in the parent that hosts the Digital Retail OCA iframe, please ensure that you have entered the same G- tracking code that it uses.
Google Analytics Tracking Events & Flow
Depending on the configuration of the OCA, up to fifteen events may be made available. The Error page is not a workflow event and can be triggered at any point in the flow.
Each page view in the workflow is tracked via an Event with a parameter. In the table below, each event is asc_pageview.
event_owner = RouteOne Digital Retail. The page_type parameter is used to describe the step in the user flow.
In order, the page_types with associated page are:
page_type | Page | Comment |
|---|---|---|
leadCapture | Lead Capture Landing page | This is the Start of the OCA Flow, and captures a customer lead after a customer navigates forward from this page. |
personalInformation | Personal Info page | |
residentialInformation | Address Info page | |
incomeAndEmployment | Income Info page | |
paymentEstimateR or paymentEstimateRL | Vehicle Info page | Depends on whether the page was initialized upon entry for Retail (R) or Lease (L). Common flow for initial entry is Retail. |
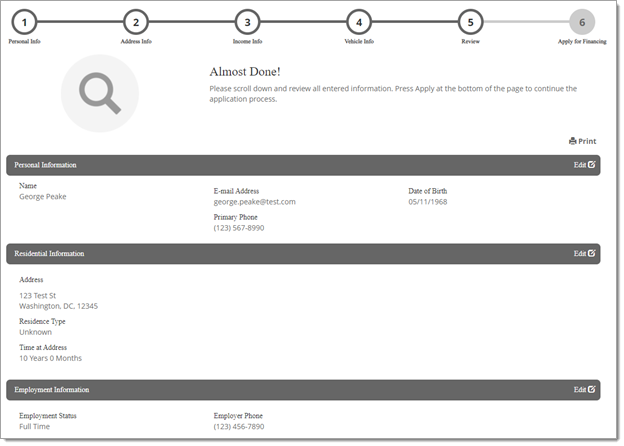
reviewApplication/detail | Review page | |
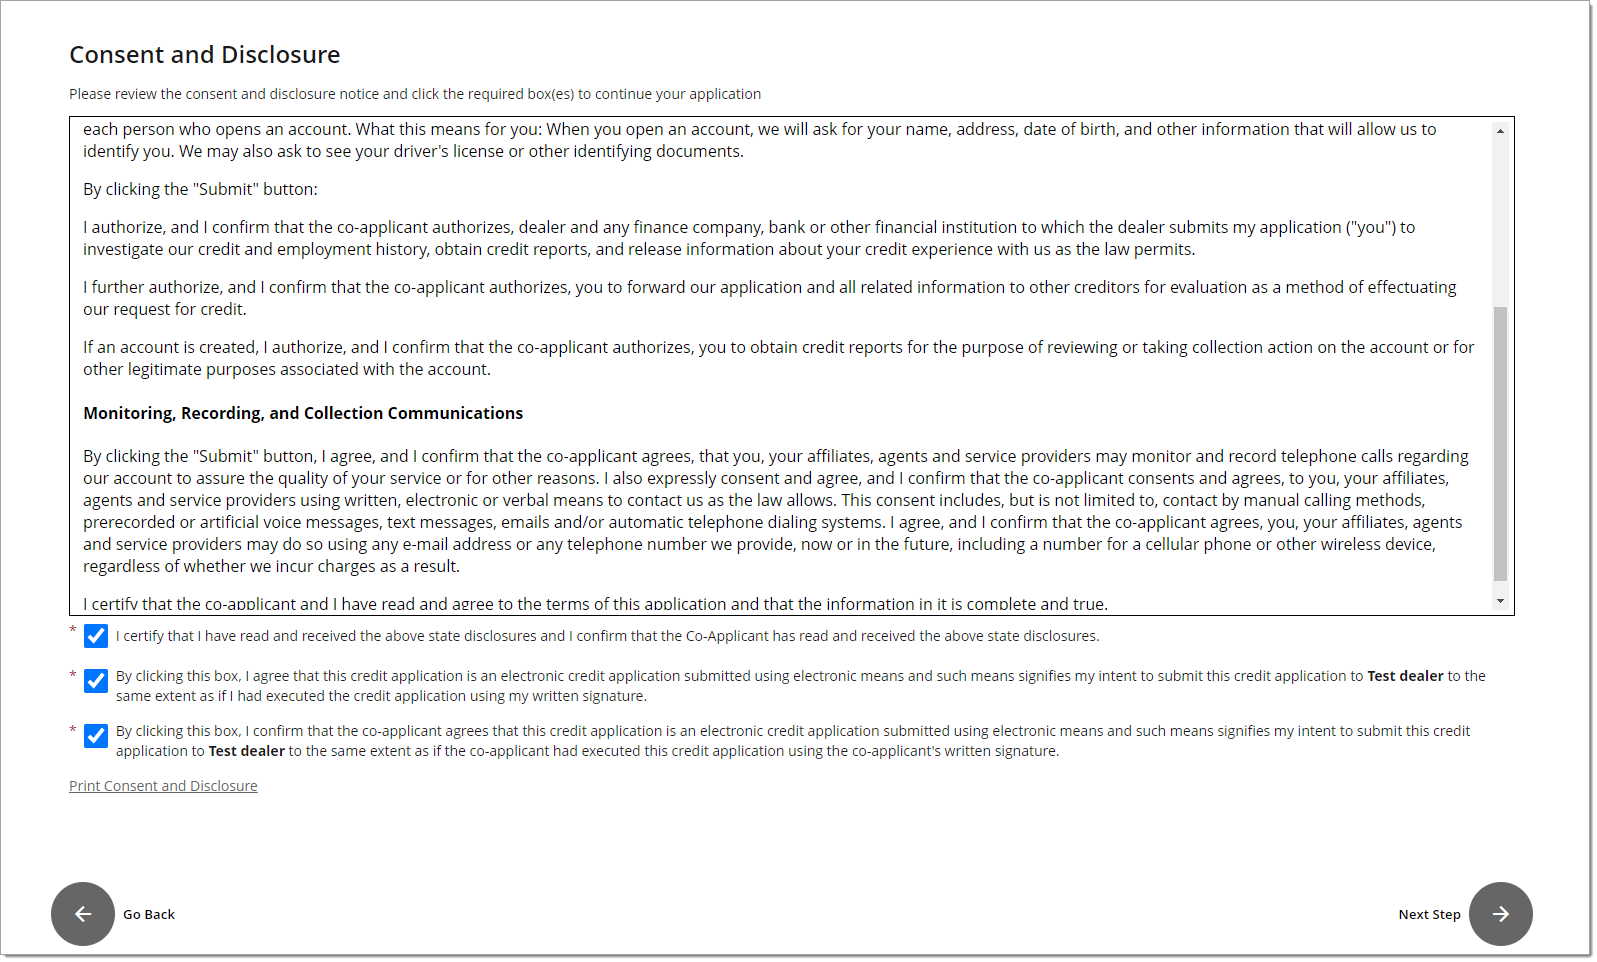
reviewApplication/consent | Consent and Disclosure |
|
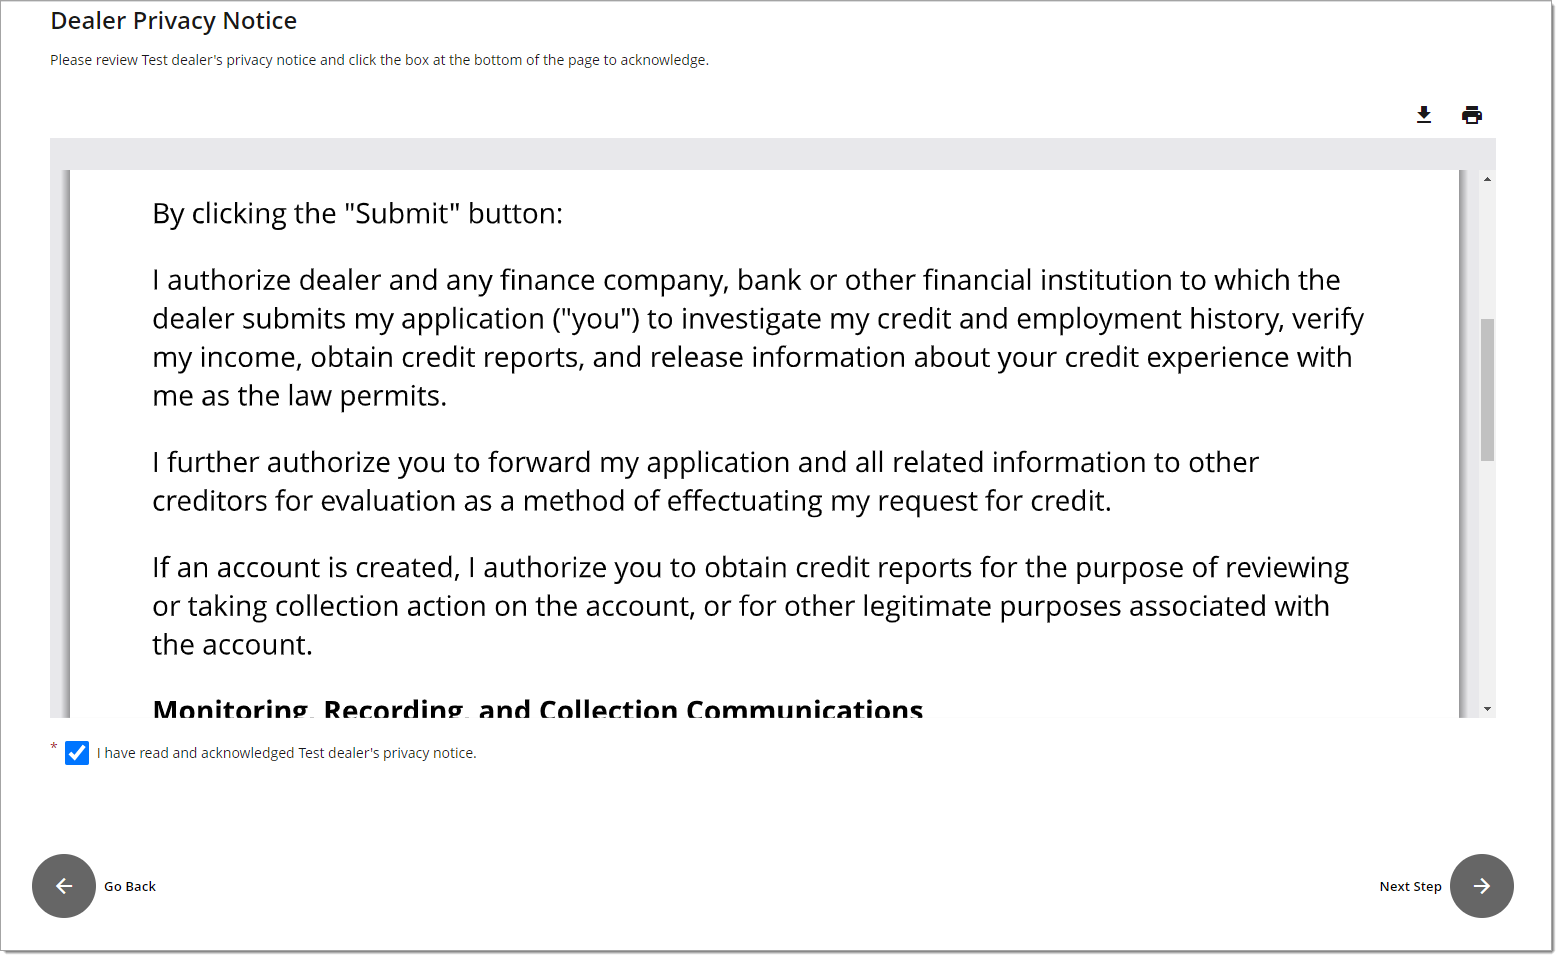
reviewApplication/dealerPrivacyNotice | Dealer Privacy Notice | |
createDealJacket | Deal Jacket Created | |
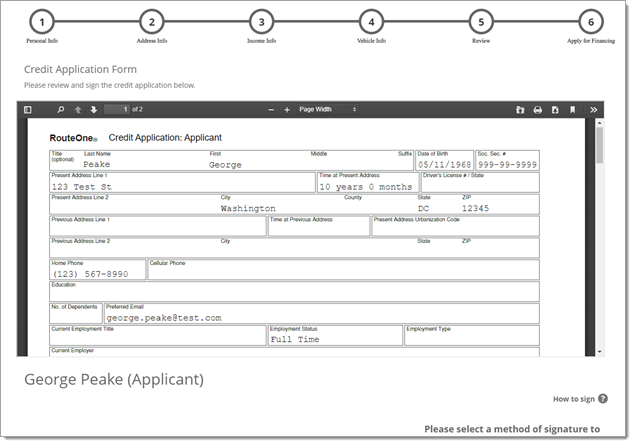
creditApplicationForm | Credit Application Form page | |
submitOcaDealer | Submission of Credit Application | This is the Submission of the Credit App, and results in the record generation in CAS |
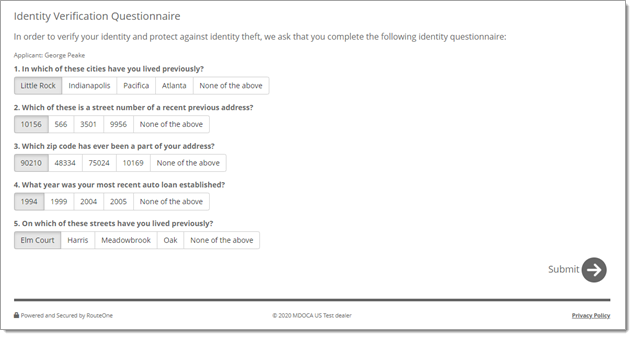
idv | Identity Verification Questionnaire page | Once per Quiz (applicant and co-applicant) |
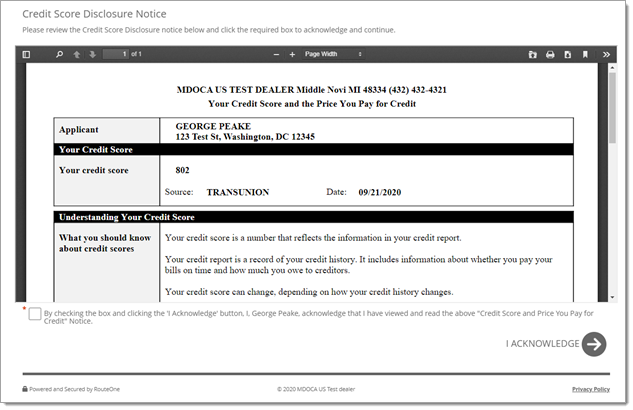
csdn | Credit Score Disclosure Notice page | Once per Quiz (applicant and co-applicant) |
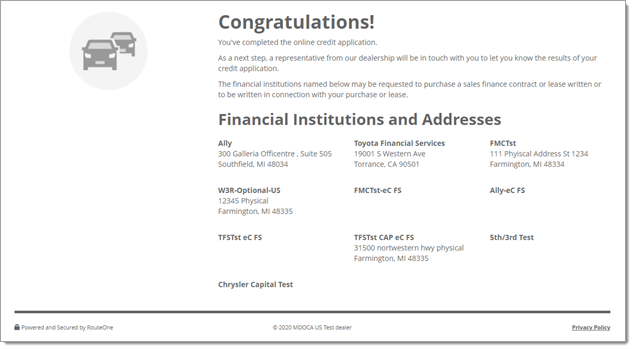
noRetrieval | Congratulations page | This is the End of the OCA Flow |
error | Error Page | This page is shown in case of any errors. |
Lead Capture Landing Page (OCA Start Page)
Name of Event Tracked: leadCapture
| Parameters | value |
|---|---|
event_owner | RouteOne Digital Retail |
page_type | leadCapture |
Required User-Submitted Content:
First & Last Name
E-mail
Phone
Privacy Notice Acknowledgement
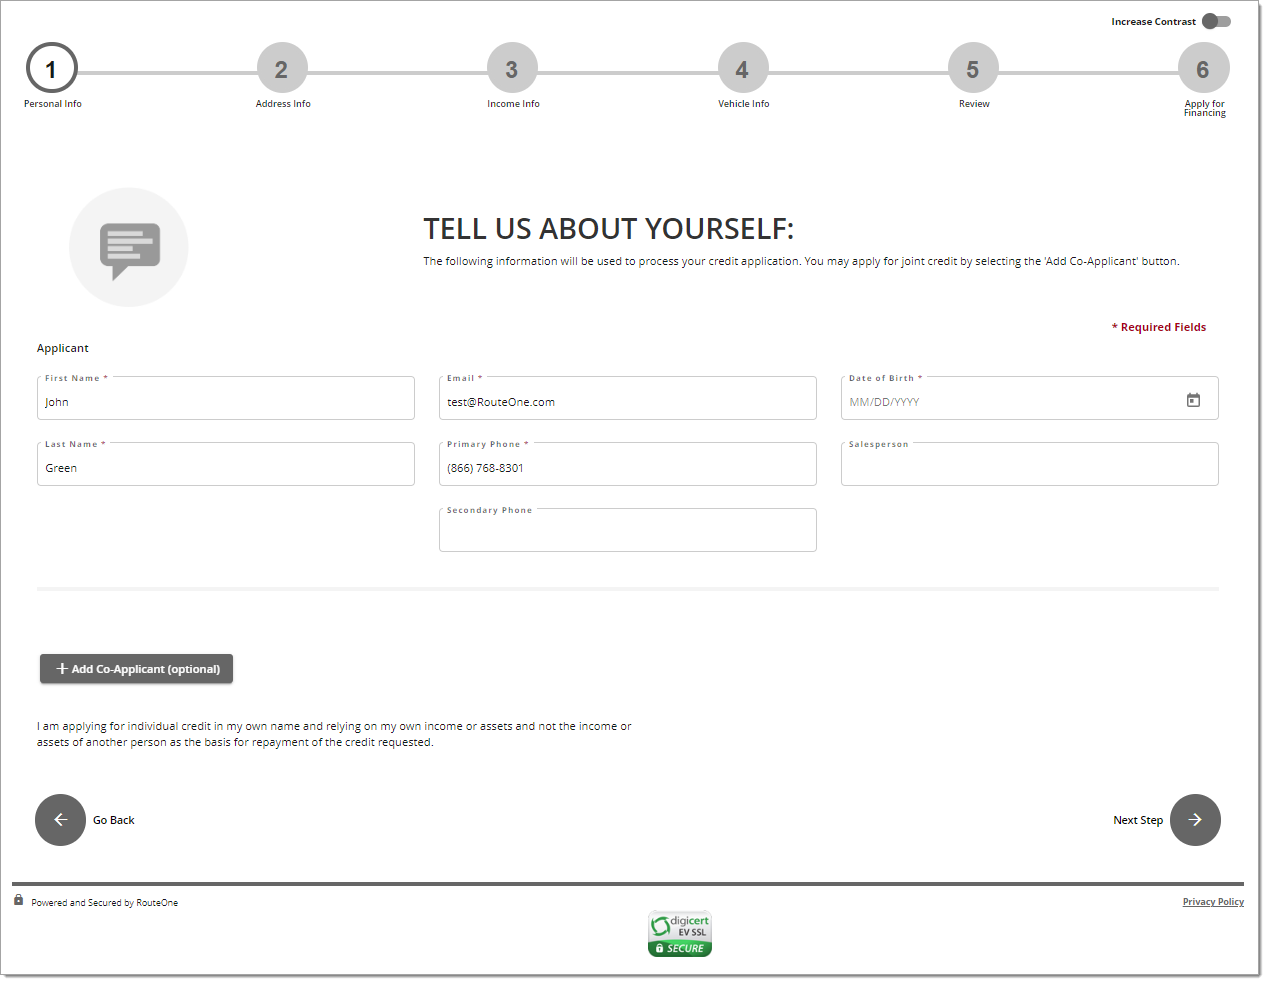
Personal Info page
Name of Event Tracked: personalInformation
| Parameters | value |
|---|---|
event_owner | RouteOne Digital Retail |
page_type | personalInformation |
Required User-Submitted Content:
First & Last Name
E-mail
Phone
Date of Birth
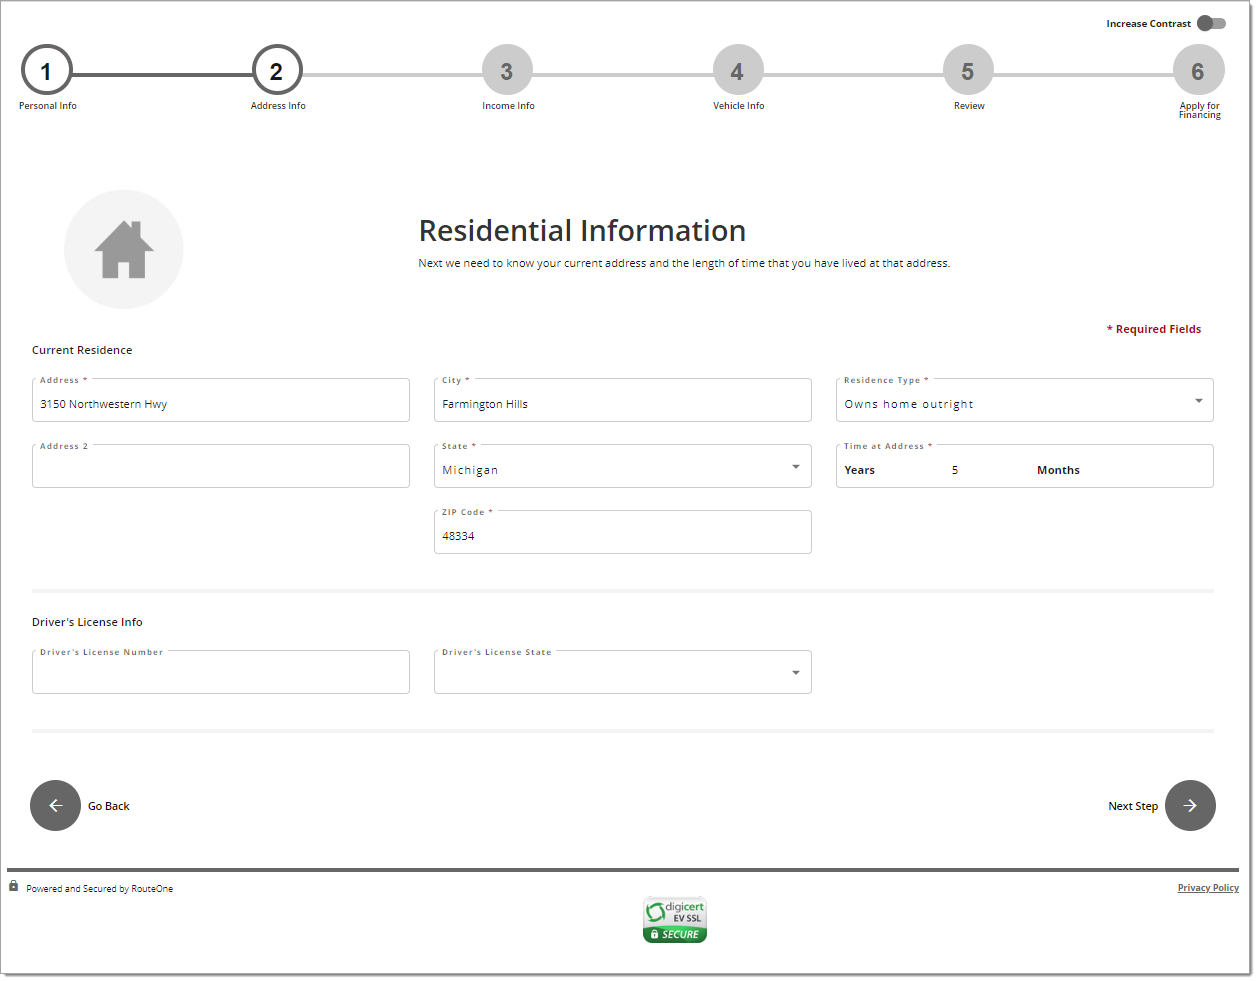
Residential Info Page
Name of Event Tracked: residentialInformation
| Parameters | value |
|---|---|
event_owner | RouteOne Digital Retail |
page_type | residentialInformation |
Required User-Submitted Content:
Address
City
State
ZIP
Residence Type
Time at Address
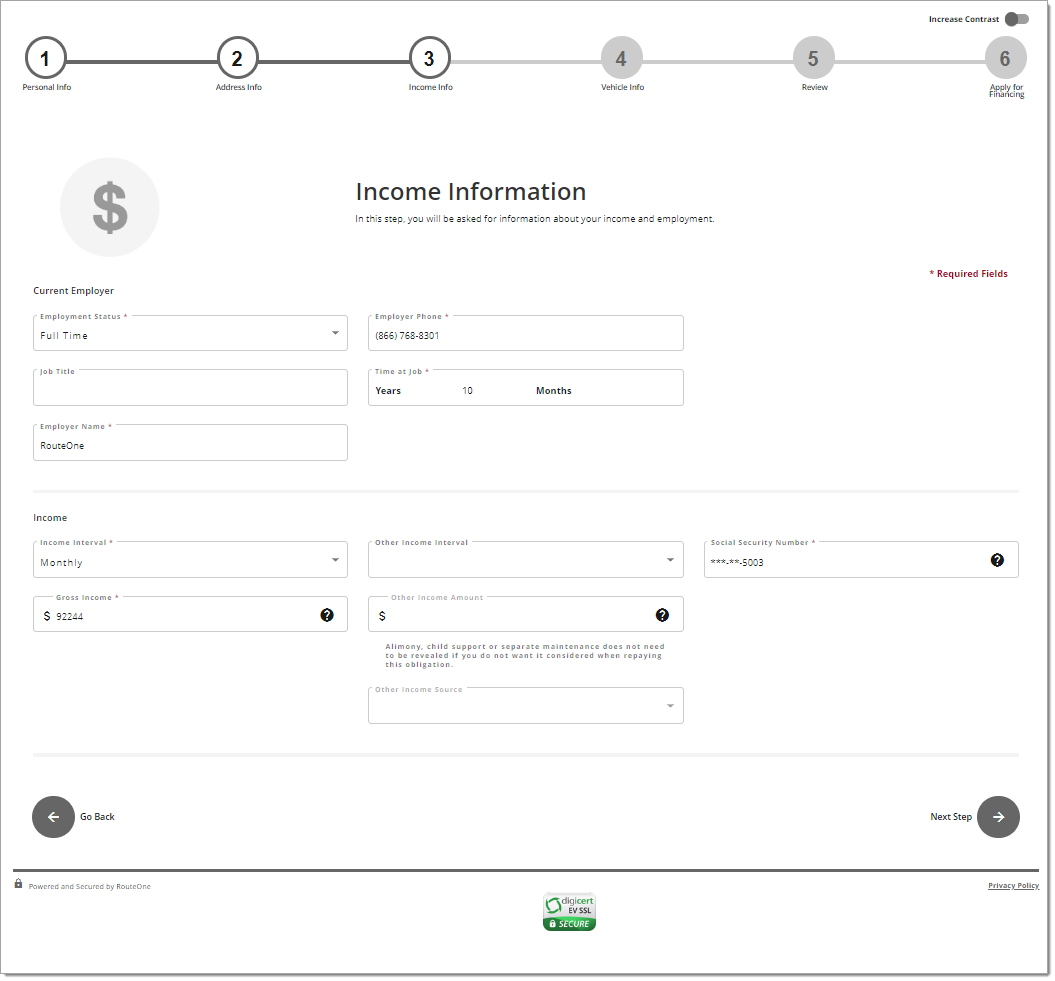
Income Info Page
Name of Event Tracked: incomeAndEmployment
| Parameters | value |
|---|---|
event_owner | RouteOne Digital Retail |
page_type | incomeAndEmployment |
Required User-Submitted Content:
Employment Status
Employee Name
Employee Phone
Time at Job
Income Interval
Gross Income
SSN
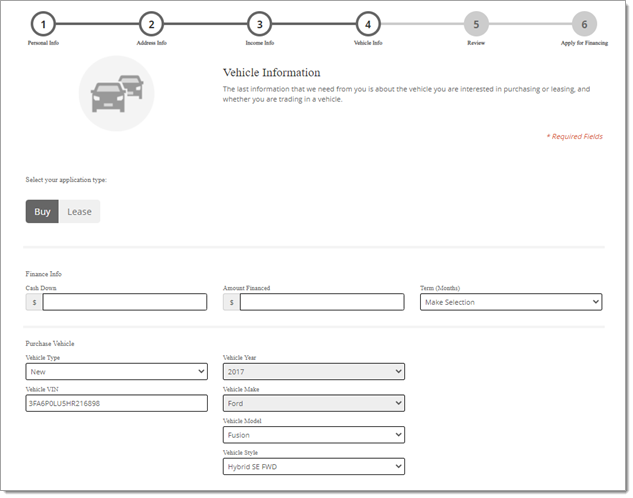
Vehicle Info Page
Name of Event Tracked: paymentEstimateR or paymentEstimateL
| Parameters | value |
|---|---|
event_owner | RouteOne Digital Retail |
page_type | paymentEstimateR or paymentEstimateL |
R indicates the App was started as Retail (the typical default)
L indicates the App was started as Lease
Required User-Submitted Content:
N/A
Review Page
Name of Event Tracked: reviewApplication/detail
| Parameters | value |
|---|---|
event_owner | RouteOne Digital Retail |
page_type | reviewApplication/detail |
Required User-Submitted Content:
N/A
Consent and Disclosure Page
Name of Event Tracked: reviewApplication/consent
| Parameters | value |
|---|---|
event_owner | RouteOne Digital Retail |
page_type | reviewApplication/consent |
Required User-Submitted Content:
User Acknowledgement
Dealer Privacy Notice Page
Name of Event Tracked: createDealJacket
| Parameters | value |
|---|---|
event_owner | RouteOne Digital Retail |
page_type | createDealJacket |
Required User-Submitted Content:
- User Acknowledgement
Deal Jacket Created
Name of Event Tracked: reviewApplication/dealerPrivacyNotice
| Parameters | value |
|---|---|
event_owner | RouteOne Digital Retail |
page_type | reviewApplication/dealerPrivacyNotice |
Required User-Submitted Content:
- N/A
Credit Application Form Page
Name of Event Tracked: creditApplicationForm
| Parameters | value |
|---|---|
event_owner | RouteOne Digital Retail |
page_type | creditApplicationForm |
Required User-Submitted Content:
User Signature
Identification Verification Page
Name of Event Tracked: idv
| Parameters | value |
|---|---|
event_owner | RouteOne Digital Retail |
page_type | idv |
Required User-Submitted Content:
Answers to IDV Questions
Credit Score Disclosure Notice
Name of Event Tracked: csdn
| Parameters | value |
|---|---|
event_owner | RouteOne Digital Retail |
page_type | csdn |
Required User-Submitted Content:
User Acknowledgement
Congratulations Page
Name of Event Tracked: noRetrieval
| Parameters | value |
|---|---|
event_owner | RouteOne Digital Retail |
page_type | noRetrieval |
Required User-Submitted Content:
N/A
Google Analytics Troubleshooting
If you believe that you should be receiving a stream of Google Analytics Events but do not observe them please submit a service desk ticket which indicates the following:
The website that has embedded the RouteOne – Digital Retail Online Credit App
- Example: We have embedded https://www.routeone.net/digital-retail-ui/?dealerId=ABCDE in our dealer website https://www.buyagoodcarhere.com
A confirmation that your website has included and initialized the RouteOne integration script described in Technical Setup - Embedding Website Requirements (your website administrator should be able to help you confirm this).
Include a screenshot of your Digital Retail – Security tab configuration shown in Enabling Analytics through RouteOne OCA Configurations (your Dealer Site Administrator should be able to help you confirm this).
Include a screenshot of your Digital Retail – Analytics tab configuration shown in Enabling Analytics through RouteOne OCA Configurations (your Dealer Site Administrator should be able to help you confirm this).
Linking to your Digital Retail Product
The URL for your digital retail website can be accessed by consumers directly like other standard URLs, without having to go through your dealer site.
You can use these links like any other links and:
- Paste them into an email
- Paste them into a post on social media, blogs, comment-sections, etc.
- Bookmark them
<a href="https://www.routeone.net/digital-retail-ui/?dealerId=ABCDE">
Apply For Credit
</a>
To make your link open in a new tab, use: target="_blank"
<a href="https://www.routeone.net/digital-retail-ui/?dealerId=ABCDE" target="_blank">
Apply For Credit
</a>
To the user of your website, this link will appear as ‘Apply For Credit.'
How to customize the Online Credit Application
Frequently Asked Questions
If you are not a web developer and are unfamiliar with HTML, it is advised that you find someone who can assist you with this task.
Please forward the instructions located in this user guide, and your online credit application URL to the appropriate person to install the online credit application.
Some browsers interfere with the ability to play video. Including and initializing the RouteOne Integration script (see the “Technical Setup - Embedding Website Requirements“ section above) in the parent page where the iframe is embedded should resolve the issue.
Alternatively, the property allow="autoplay" can be included in the iframe.
Example:
<iframe src="https://www.routeone.net/digital-retail-ui/?dealerId=NF4KR&locale=en_US" style="height:1200px;width:100%;" frameborder="0" allow="autoplay"></iframe>
The configuration to allow Google Analytics to be sent to the dealer account requires coordinated configuration both in the dealer site where digital retail is embedded, and within the configurations screens that a Dealer System Admin has access to.
- The Parent Site Admin (Dealer.com, Inspire.com, etc...) should confirm that the Integration Script is present and initialized (See “Technical Setup - Embedding Website Requirements“) within the parent page where digital retail is iframed.
- The Dealer System Administrator for the dealership should verify the Security Tab information where the embedding site details are stored. Careful attention is required to ensure the proper use of http:// and https://.
- The Dealer System Administrator for the dealership should verify on the Analytics Tab that the correct GA4 measurement ID has been specified, and that Google Analytics is turned on.
Changes made on the Configuration screens may take up to 24 hours to be observed in Production.
ROUTEONE SUPPORT
Hours (EST)
Monday - Friday: 6:00am – Midnight
Saturday: 9am – 9pm
Can’t find what you need?
Try our search
