In This Guide:
Related Guides:
Access and Administration
Customizing the Online Credit Application
Accessing the Online Credit Application configuration options
Your Dealer System Administrator may access the Online Credit Application configuration options to customize the Online Credit Application by following the steps below.
Within the ‘Admin’ tab, select the ‘Premium Services’ option, and open the ‘Digital Retail Panel.’
If you have already subscribed to a Digital Retail product, there will be an Online Credit Application Configuration section. In this section, click the ‘Edit Configuration’ button to access the customizable options associated with your Digital Retail credit application.
For tips while setting up your Online Credit Application, hover over the ‘?’ icons.
For instructions on installing the Digital Retail Online Credit Application, click here.

You will be redirected to a page with the configuration options available to you based on your subscription level.
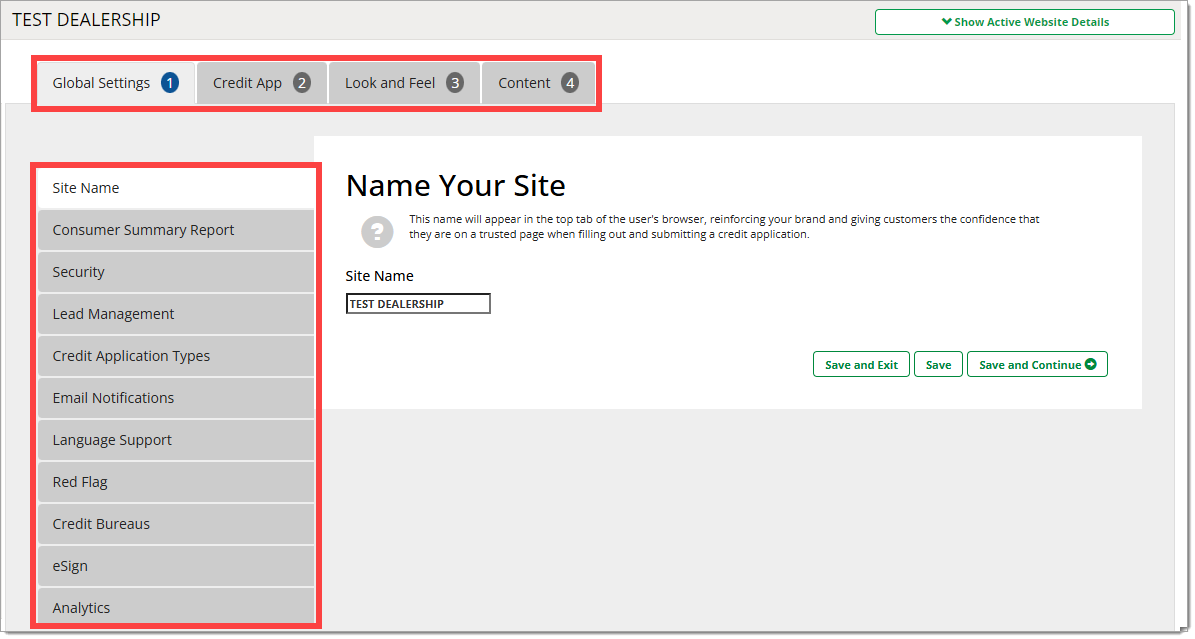
All levels of Digital Retail products will have four top configuration tab options available. The side tab options within each section will differ based on whether you have subscribed to Basic, Standard, or Premium.
The first time you set up your Digital Retail product, it is recommended that you go through each of the top tabs and review each of the side tabs that are available for your subscription. The primary tabs at the top of the page allow you to navigate between categories of settings, and the secondary tabs on the left side of the page allow you to navigate between subsections of the selected category.
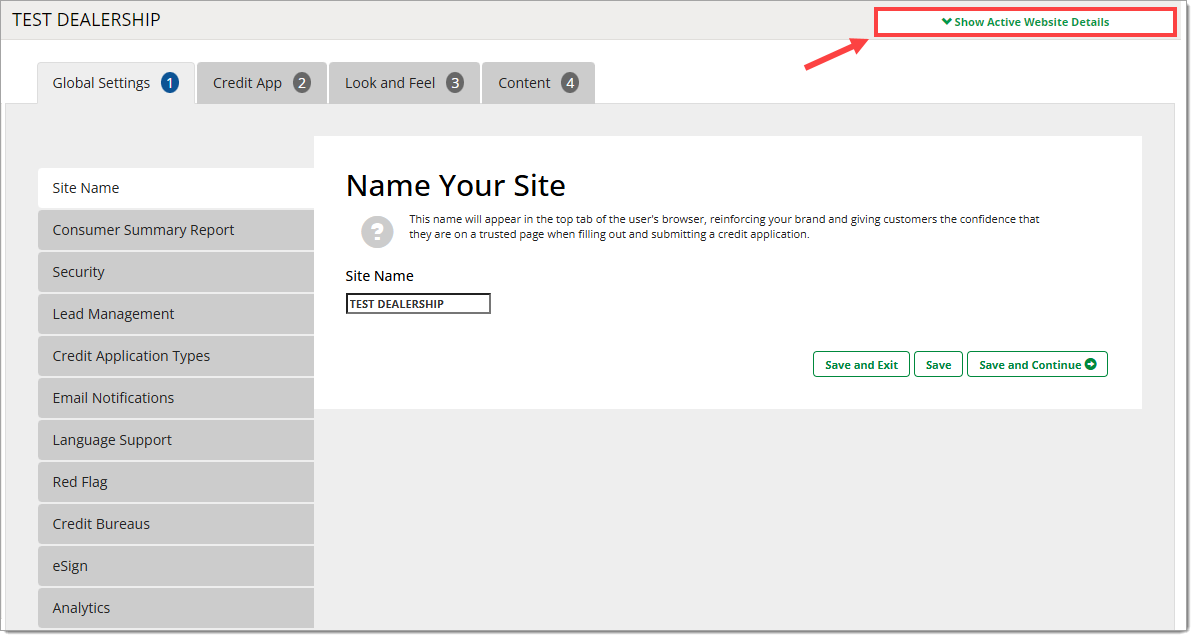
To view a summary of all current settings and a list of your active product URLs, click the ‘Show Active Website Details’ button in the upper right corner from any screen.
You may choose to use the default settings or make changes based on your dealership preferences.
The ‘Global Settings’ Tab
Available tab options within ‘Global Settings’ tab for dealers subscribed to Basic, Standard, or Premium:
| Site Name | Consumer Summary Report | Security | Lead Management | Credit Application Types | Email Notifications | Language Support | Red Flag | Credit Bureaus | eSign | Analytics | |
|---|---|---|---|---|---|---|---|---|---|---|---|
| Basic | X | X | X | X | |||||||
| Standard | X | X | X | X | X | X | X | X | |||
| Premium | X | X | X | X | X | X | X | X | X | X | X |
Site Name (Basic, Standard, Premium)
Use this setting to name the tab of your Digital Retail product, reinforcing your brand and assuring customers that they are on a trusted page when filling out and submitting a Credit Application.
Enter your desired text into the field and click ‘Save.’
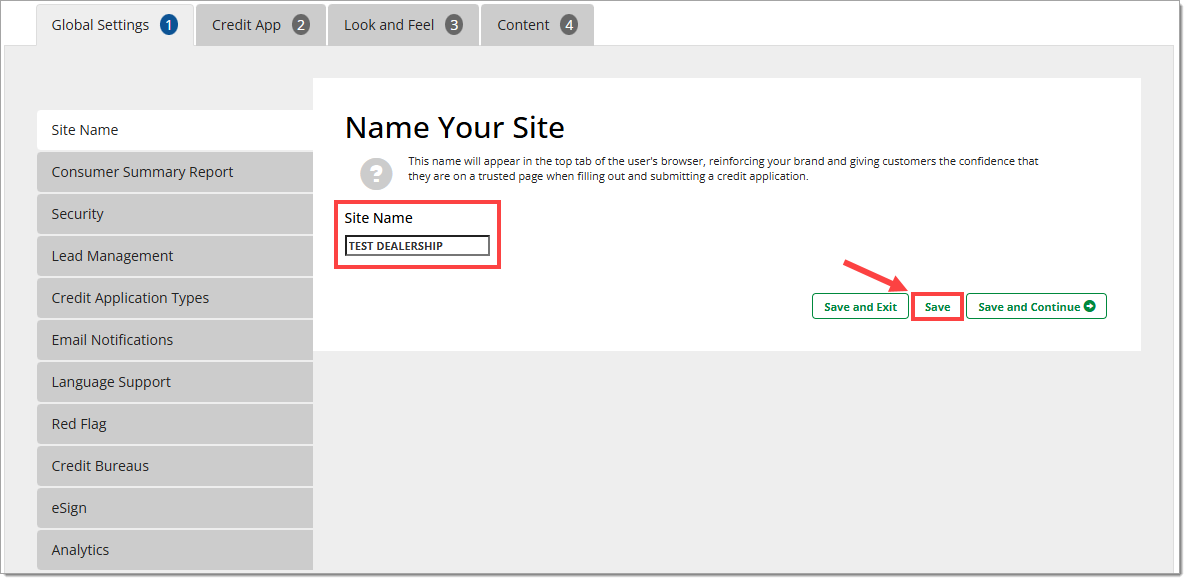
The entered text will then appear in the tab of an Internet browser.
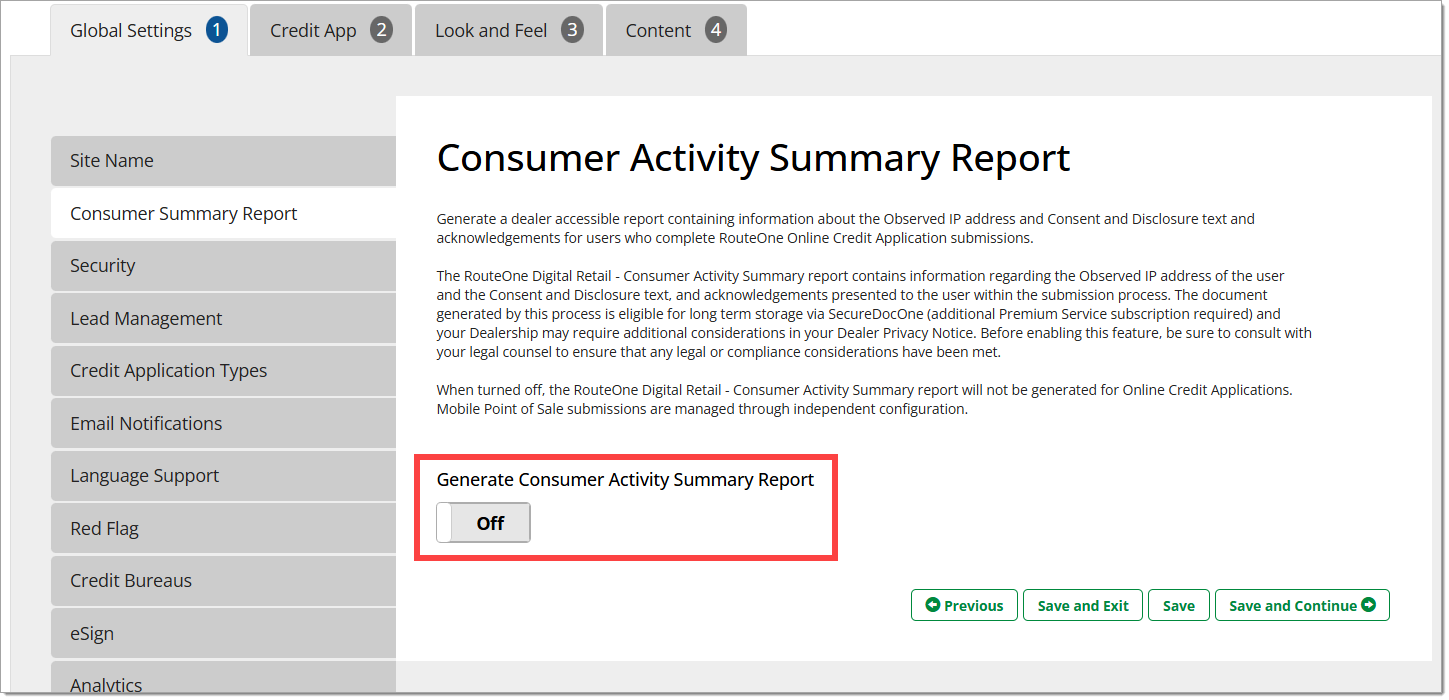
Consumer Summary Report (Basic, Standard, Premium)
The setting on this page allows you to decide if a Consumer Activity Summary document is generated when a consumer completes the Online Credit Application process. This document contains the observed IP address of the user, and the Consent and Disclosure text as presented to the user in the Online Credit Application. The Consumer Activity Summary Report is periodically purged from RouteOne along with other generated documents and is no longer available following removal. For dealers who wish to keep this document for long term reference, this document is eligible for automatic archival storage via SecureDocOne (additional subscription required). For more information on subscribing to automatic archival storage, click here to visit our Subscribing to SecureDocOne user guide.
This setting specifically governs the Online Credit Application, an independent setting is available for Mobile Point of Sale. Click here to visit our Mobile Point of Sale user guide.
The nature and retention of this document may require updates to your Dealer Privacy Notice(s). Please be sure to consult with your legal counsel before enabling this capability.
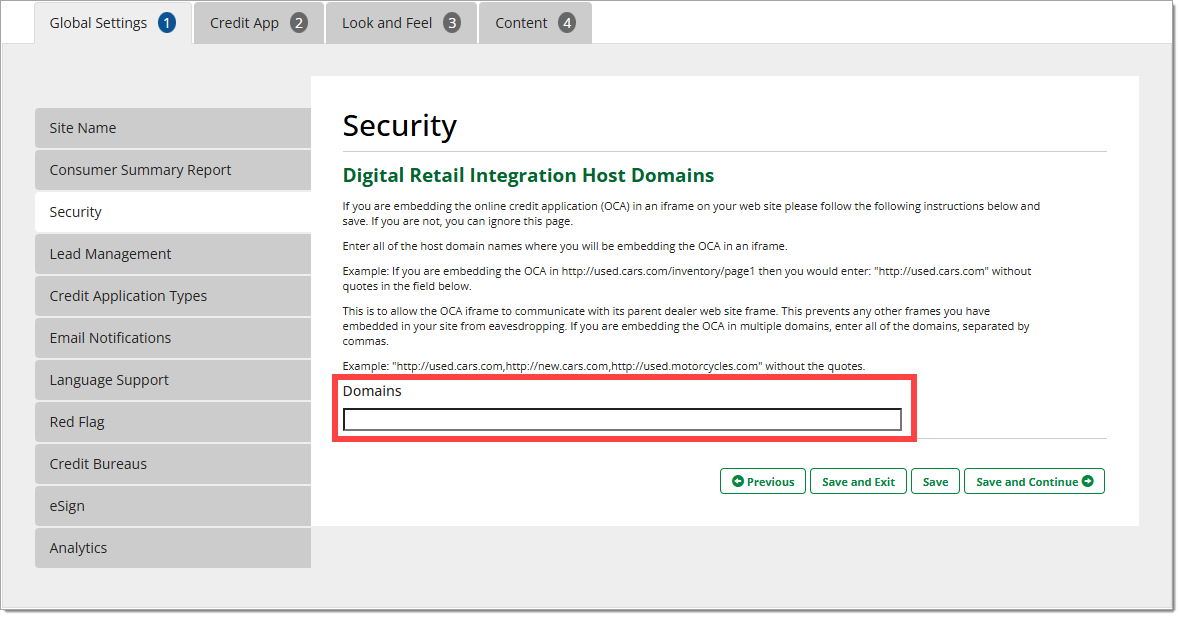
Security (Basic, Standard, Premium)
This setting supports security of your Digital Retail Online Credit Application (OCA) if you are embedding it in an iframe on your website.
By entering all of the host domain names where you will be embedding the OCA in an iframe and saving this setting, this will allow the OCA iframe to ‘talk’ to your website, and prevent any other frames on your website from eavesdropping. If this is not a concern, you can input a single asterisk (*) in the field and save. If you are embedding the OCA in multiple domains, enter all of the domains, separated by commas.
Example: If you are embedding the OCA in http://used.cars.com/inventory/page1 then you would enter: "http://used.cars.com" without quotes in the field below.
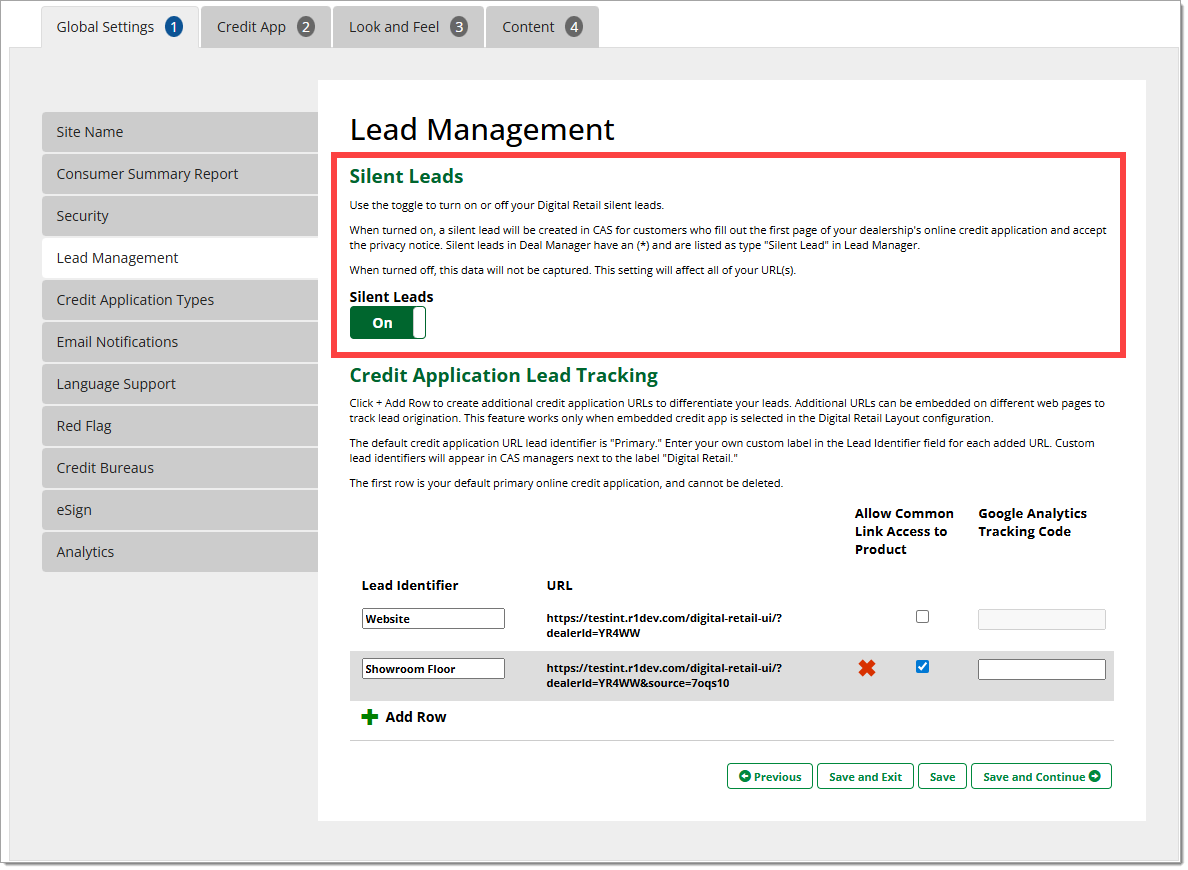
Lead Management (Standard, Premium)
Use the settings on this page to manage your silent leads and credit application lead tracking.
Silent leads are leads created in RouteOne’s CAS for customers who fill out the first page of the Online Credit Application and accept your dealership’s privacy notice but who do not finish and submit their application. As a dealer, you have the ability to turn this feature on or off in your configuration.
Credit application lead tracking allows you to create additional credit application URLs with unique names (“lead identifiers”) for your subscription to differentiate your leads in RouteOne’s CAS. Additional URLs can be embedded on different web pages to track lead origination or use in social media.
Full details can be found in the ‘Using Lead Management’ guide here.
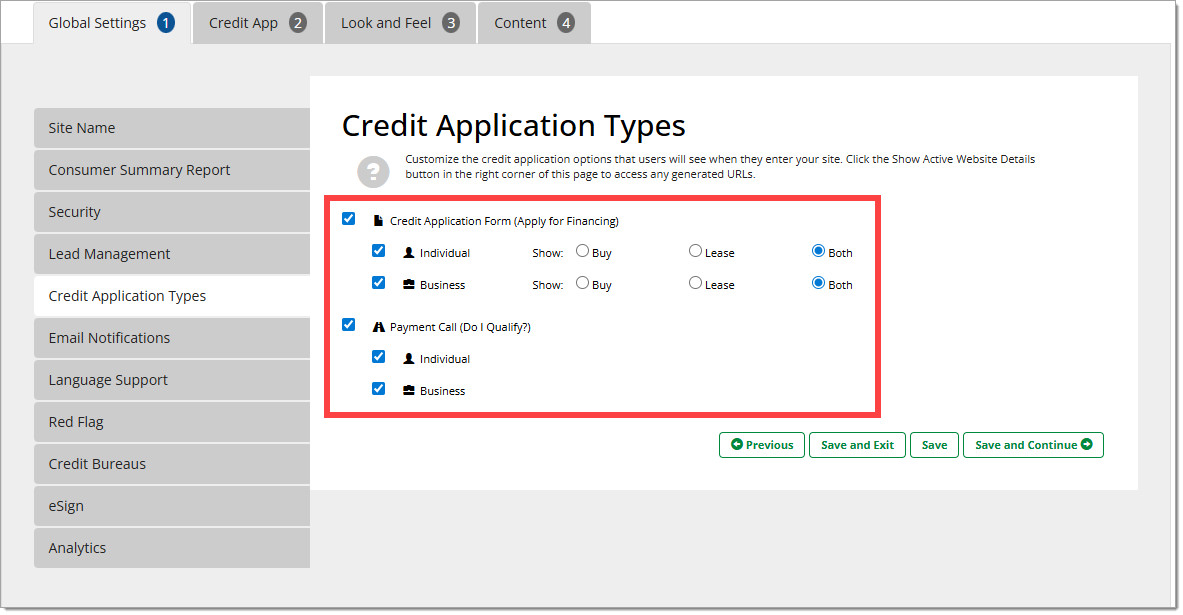
Credit Application Types (Standard, Premium)
Within the ‘Credit Application Types’ tab, dealers can click to turn on/off the following options so they may be displayed or hidden from view from their users:
- Credit Application Form (Apply for Financing) for Individual or Business
- Payment Call (Do I Qualify?) for Individuals or Businesses (Premium subscribers only)
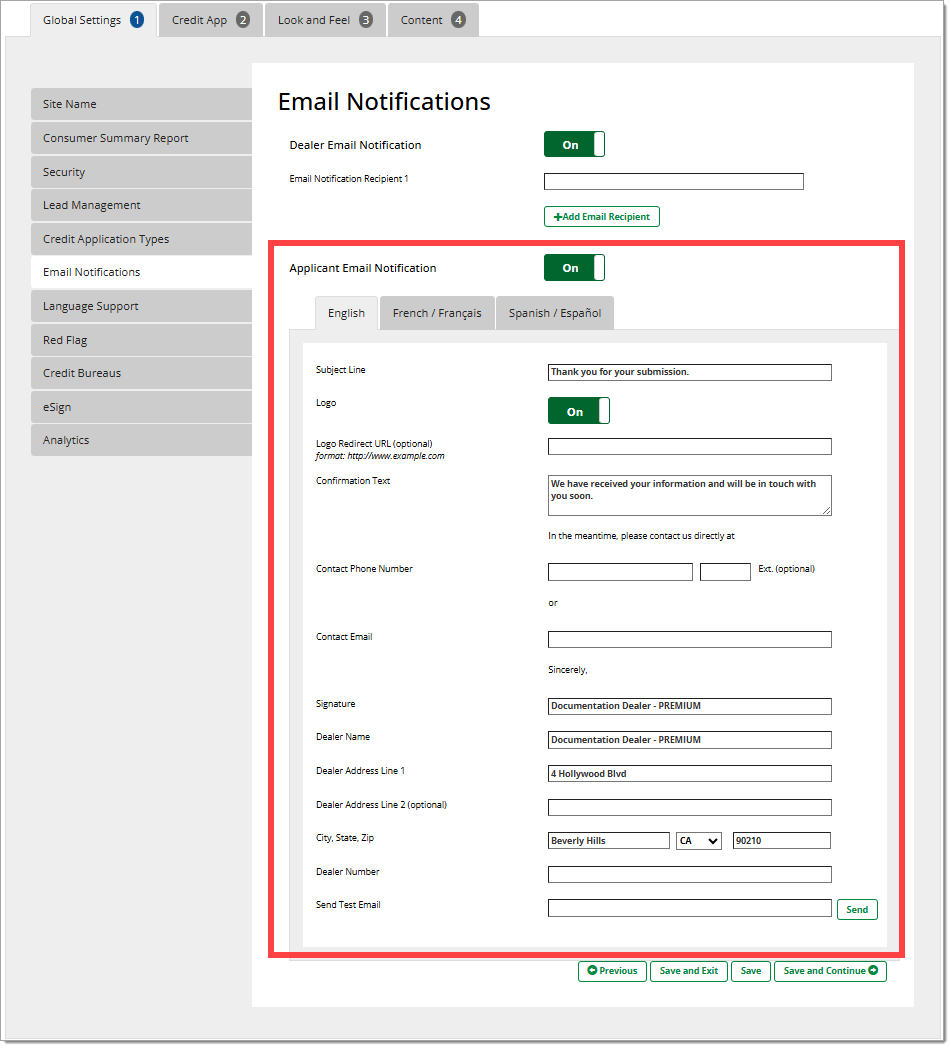
Email Notifications (Basic, Standard, Premium)
The Email Notifications settings page allows you to set whether the dealer is notified when an online credit application is completed, as well as set up a confirmation email that is sent to the applicant upon completion.
To have an email sent to the dealer when an online credit application is completed, set the ‘Dealer Email Notification toggle to “On” and enter the desired target email address in the ‘Email Notification Recipient 1’ field. To add more recipients, click the ‘+Add Email Recipient’ button.
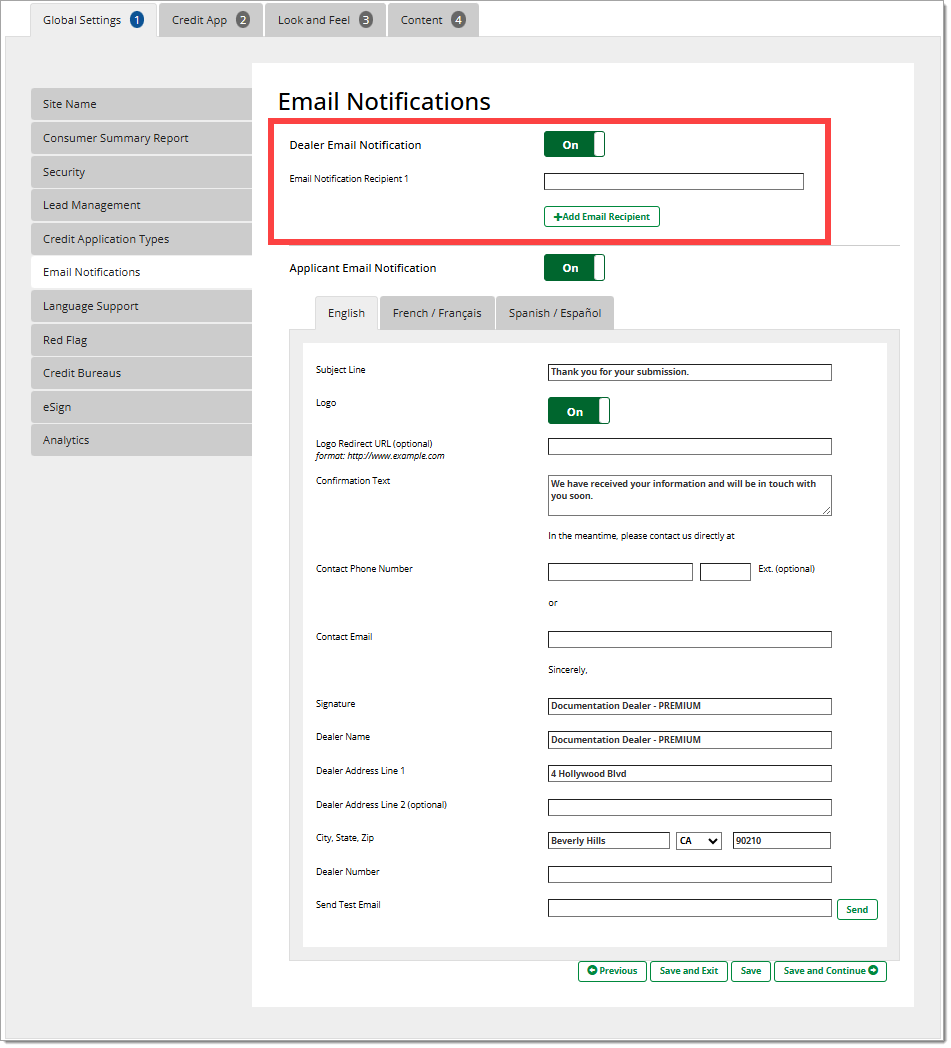
To configure a confirmation email for the applicant, set the ‘Applicant Email Notification’ toggle to “On”. Then fill out the fields to customize the email as desired.
Standard and Premium users that have configured language support will also be able to create confirmation emails in French and/or Spanish.
Once configured, you can enter an email in the ‘Send Test Email’ field and click ‘Send’ to send a preview of the confirmation email to the entered email address.
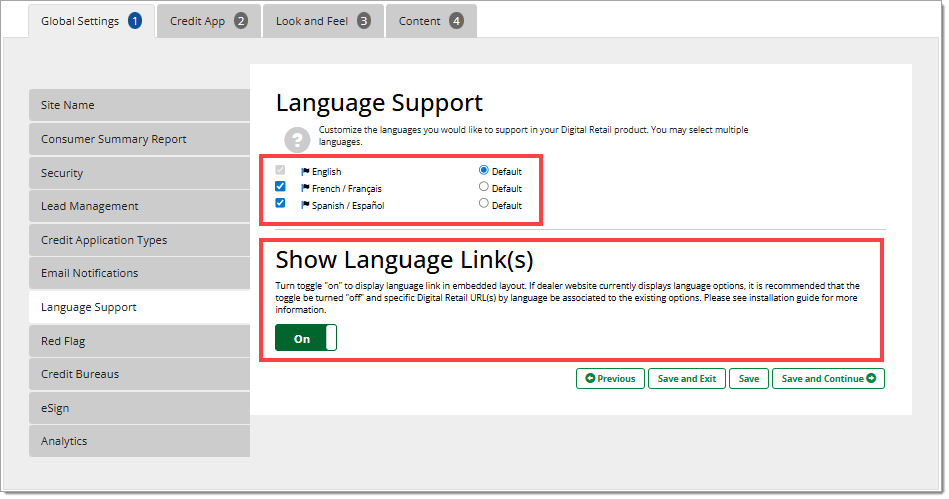
Language Support (Standard, Premium)
Within the ‘Language Support’ tab, dealers can select the default language. You may also select the additional languages you would want available within your Digital Retail product.
The default language is English.
Additionally, you may choose to show the language links in your embedded Online Credit Application instead of using your dealer website’s language links using the ‘Show Language Link(s) toggle. This is recommended if you do not have any other translated content on your dealer website.
Red Flag (Premium)
To present users with an identity verification questionnaire each time an online credit application is submitted, turn on the ‘Red Flag’ option. The user will see this questionnaire after he/she finishes entering and reviewing all of their data and accepts the dealership’s privacy notice.
You must be subscribed to ID Verification to use Red Flag. NCC is not supported with this functionality.

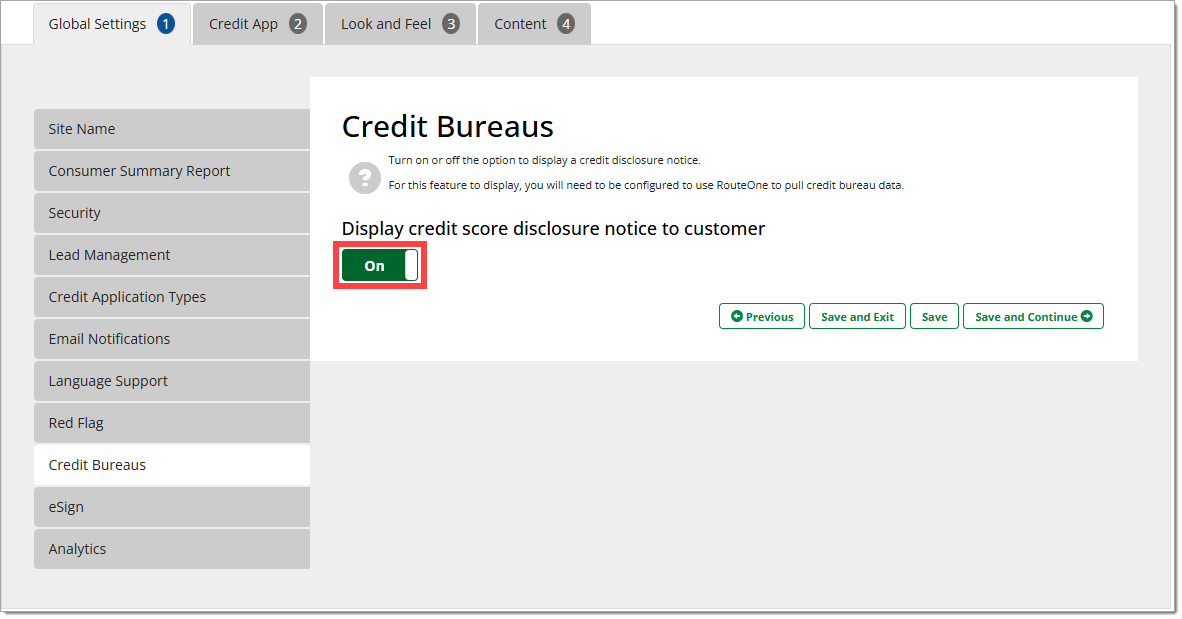
Credit Bureaus (Premium)
Turn on CSDN (Credit Score Disclosure Notice) to present the disclosure notice to users during review of their online credit application.
This feature requires that you are configured to use RouteOne to pull credit bureau data, and that you have selected a preferred credit bureau. If these configurations are not set, you will not be able to turn on CSDN in this section.
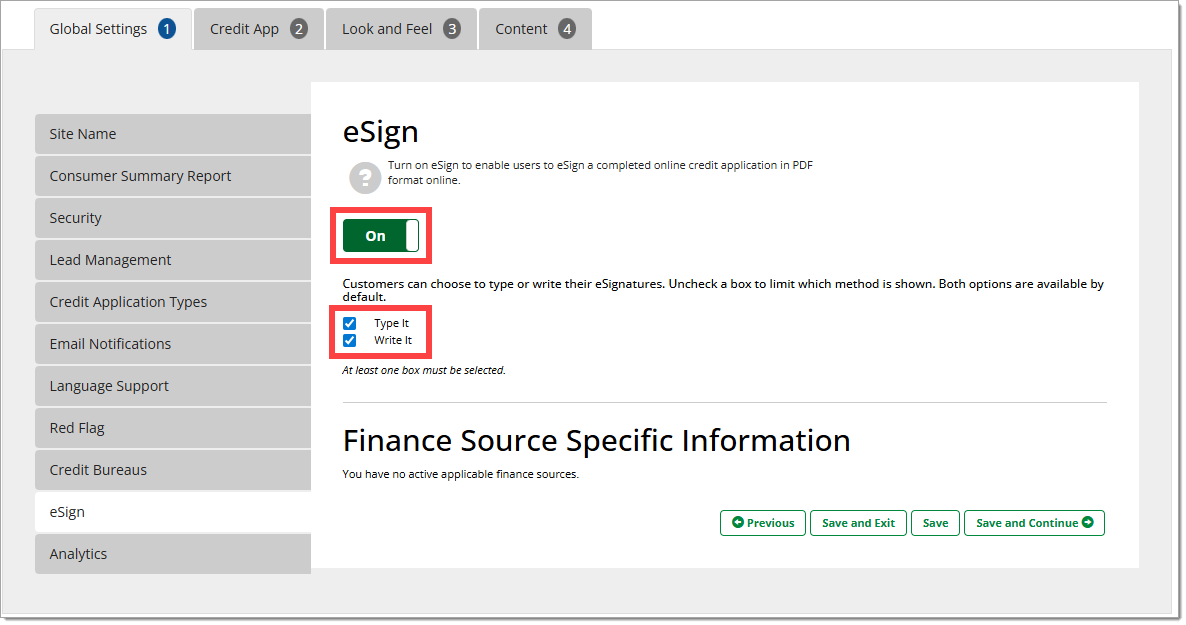
eSign (Premium)
Turn on ‘eSign’ to enable users to eSign a completed Online Credit Application in PDF format online.
On a desktop application, customers can use a mouse to sign or type their signature(s).
On a tablet or mobile device, customers can use their fingertip or a stylus, or type to sign.
Consumers will always have the choice of eSignature type (Typed or Written), but the dealer preference noted below will be presented as the default to promote usage of that signature style.
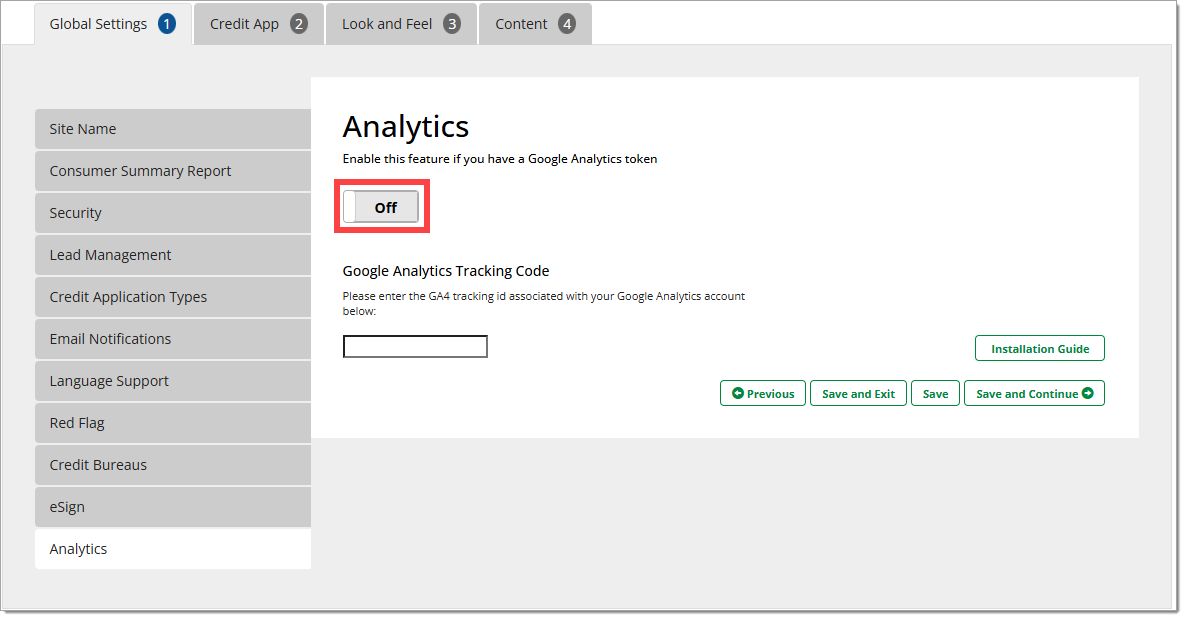
Analytics (Standard, Premium)
The Analytics page allows you to enable the capture of Google Analytics 4 measurement data which will be sent to the identified Google Analytics 4 measurement id. In addition to this configuration, the Security tab must be configured, and the application must be properly iframed in your dealer site. For more information, click here to view the Installing the Online Credit Application user guide.
The ‘Credit App’ Tab
Available tab options within the ‘Credit App’ tab for dealers subscribed to Basic, Standard, or Premium:
| Optional Fields | Income Interval | Vehicle Makes | |
|---|---|---|---|
| Basic | X | X | X |
| Standard | X | X | X |
| Premium | X | X | X |
Optional Fields (Basic, Standard, Premium)
Customize the data collected from the consumer on the Credit Application to fit your dealership's requirements. The fields on this page can be turned ‘On’ or ‘Off,’ making them visible (or not) to the customer on the credit application.
By selecting the corresponding ‘Required’ check box, you have the flexibility to require the following field(s) to be completed in order for the customer to submit a credit application.
Standard and Premium subscribers have options to modify the fields to the Individual or Business application (only for Standard and Premium packages).
If you wish a change to affect both Individual and Business applications, you must edit the options in each corresponding tab.
For dealers that have uploaded a California Consumer Privacy Act Notice at Collection, a link to the notice will appear below form fields for the applicant and co-applicant to review as necessary prior to submitting their personal information. Learn more about the California Consumer Privacy Act process with RouteOne.

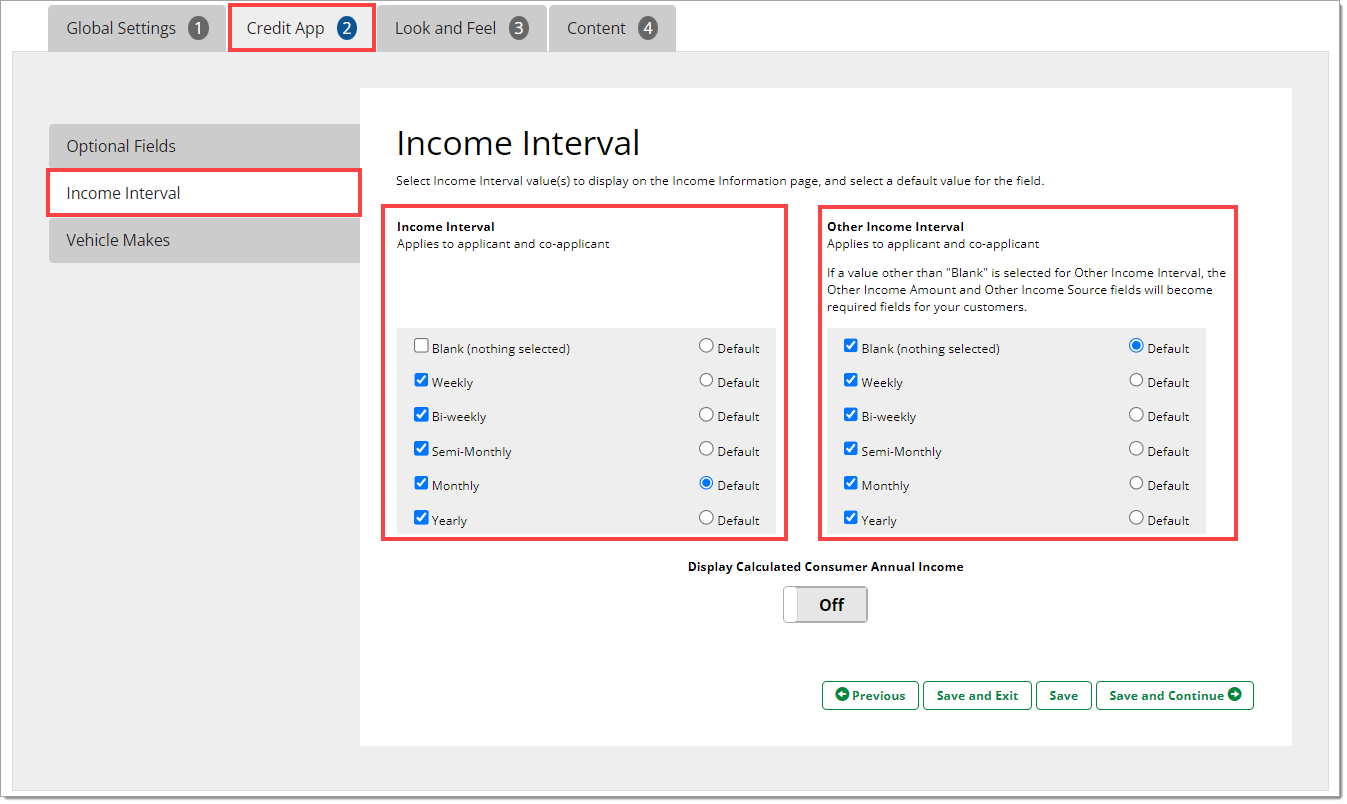
Income Interval (Basic, Standard, Premium)
Use the Income Interval configuration section to customize how you would like to collect income information from your customers.
Check or uncheck boxes to select which value options your customer will see for ‘Income Interval’ and ‘Other Income Interval.’ Selections will apply for both the applicant and co-applicant.
You can also choose a default value option for ‘Income Interval,’ as well as ‘Other Income Interval.’
- For example, you can choose to only show monthly or yearly income, and then select monthly as the default selection.
- Alternatively, you can default to ‘Blank (nothing selected).’
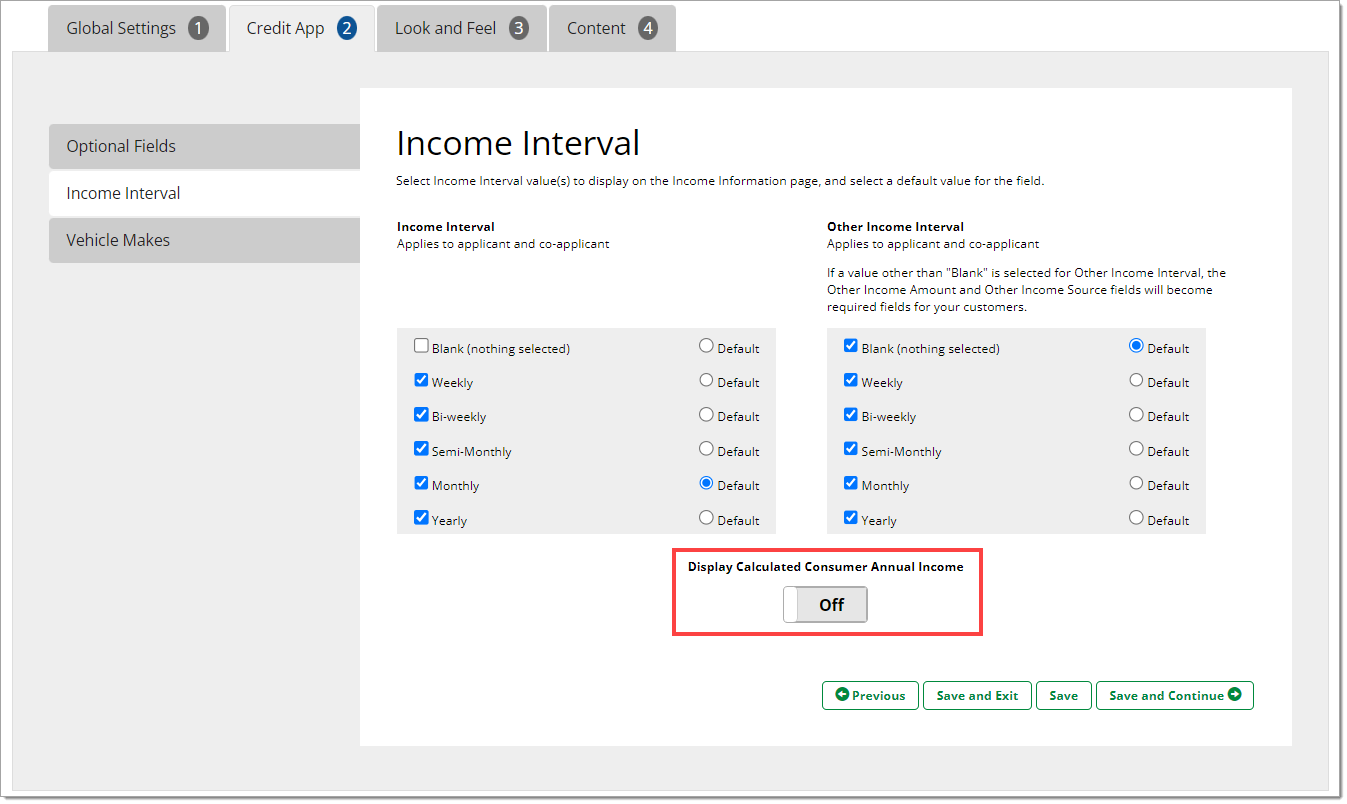
Configure the Display of a Calculated Annual Income. Enabling this option helps a consumer determine if their income data is accurately represented.
Vehicle Makes (Basic, Standard, Premium)
Customize and simplify the process for your customers by using this feature to only select the vehicle makes that your dealership sells. Only the selected makes will be available options to customers.

The ‘Look and Feel’ Tab
Available tab options within the ‘Look and Feel’ tab for dealers subscribed to Basic, Standard, or Premium:
| Logo | Color Theme | Font | |
|---|---|---|---|
| Basic | X | X | |
| Standard | X | X | X |
| Premium | X | X | X |
Logo (Basic, Standard, Premium)
Upload your logo to brand your Online Credit Application. Your logo will appear in the upper left corner of your credit application pages and will be your default image for additional/future RouteOne Digital Retail products (if applicable).
To edit your logo, you can do so under the ‘Admin Tab’, by selecting the ‘Dealer Info’ option.
In the ‘Look and Feel’ top tab, click the ‘Choose File’ button to upload your logo. The logo must be 186 x 88 pixels, and smaller than 2 MB. The logo option must be turned on for it to be displayed.

Color Theme (Basic, Standard, Premium)
This color theme will be implemented throughout the Credit Application for a consistent, professional presentation. Design elements such as buttons will be updated to this color (the default option is grey).
To select a color, click the preferred color thumbnail. You may also add your customized colors by typing in the HEX color codes. Your selection will be highlighted with a border. Click one of the save options to store your change.
When entering HEX color codes, enter in a code for each of the ‘Primary’ color, ‘Primary Lowlight’ color, and ‘Primary Highlight’ color.
If you do not know the HEX color codes, you can use a HEX converter tool online to help populate the desired HEX color code.

Font (Standard, Premium)
Customize the font that is used throughout your Digital Retail product to best match your website and brand. Using the radio buttons on the page, you will have the option to select a font template, which is the default selection, or the option to select a font style or upload a font file.
To change the default template selection, click on an alternate template. Your selection will be highlighted in a green border. Click one of the save options to apply the selected font. It will apply to all content in your OCA.

Click the radio button below the templates to use a specific font file and/or upload your own custom font file.

In this selection, you are able to modify the header text, body text, and input labels separately. If you wish for the font in your OCA to be consistent throughout, you must apply the same change to each section and save.

The ‘Content’ Tab
Available tab options within the ‘Content’ tab for dealers subscribed to Basic, Standard, or Premium:
| Page Content | Watch Video - Link Upload | F&I Information | Privacy Notice | Footer | |
|---|---|---|---|---|---|
| Basic | X | X | |||
| Standard | X | X | X | X | X |
| Premium | X | X | X | X | X |
Page Content (Standard, Premium)
The homepage default text, images, and video that appear to your customers may be modified on this page.
Homepage content is associated with the content on the first page of the embedded application that your customer sees: the two images; the text that can be inserted into the first image and below it; and the video that is available.
The standard site security and privacy disclaimers cannot be edited.

The homepage images can be replaced using the upload feature, and the text can be updated through the labeled editors.
RouteOne provides a default video instructing users on how the Online Credit Application process works. You can replace this video by linking to a new YouTube™ or Vimeo link (remember to check your privacy settings on your video).

Congratulations Page Content (Basic, Standard, Premium)
Manage the user options at the end of their Online Credit Application process by customizing your dealership’s message to them and/or by adding a call to action button to the page.
The ‘Call to Action’ button can be labeled by you and associated with a specific URL. When the user clicks this button, they will be redirected to this new page (e.g., to schedule a test drive at your dealership).

Watch Video – Link Upload (Basic, Standard, Premium)
Use the video URL field below to replace the default RouteOne video on the homepage of your Online Credit Application. Click 'Restore Default' to return to the RouteOne video.

F&I Information (Standard, Premium)
You can modify the contact information that is displayed in the top right corner of your Digital Retail product. You may enter the name, title, email, and phone number information in this tab, as well as upload a headshot photo. Images are limited to .jpg files no greater than 2 MB, and must be 73 x 73 pixels.


Footer (Standard, Premium)
Customize the text that will appear at the bottom of your Digital Retail product page. The default text is copyright name and saved dealer name. The default may be restored at any time by clicking the link on the page.
To update the footer, enter text into the box and click the ‘Save’ button.


Once your website has been customized to your choosing, you will then be able to embed the credit application on your website and/or create links to your Digital Retail product.
ROUTEONE SUPPORT
Hours (EST)
Monday - Friday: 6:00am – Midnight
Saturday: 9am – 9pm
Can’t find what you need?
Try our search
