In This Guide:
Related Guides:
Menu
Using Digital Menu
What is the Digital Menu?
The Digital Menu is a digital version of the paper menu used in dealerships, using either a desktop or a tablet.
Accessing the Digital Menu
To access the Digital Menu, select an existing deal. For more information on creating a deal, see Creating Deals in RouteOne Menu. In Step 1 of the Deal Wizard, click the ‘Digital’ arrow to expand the dropdown menu, then select the ‘Digital Menu’ option.


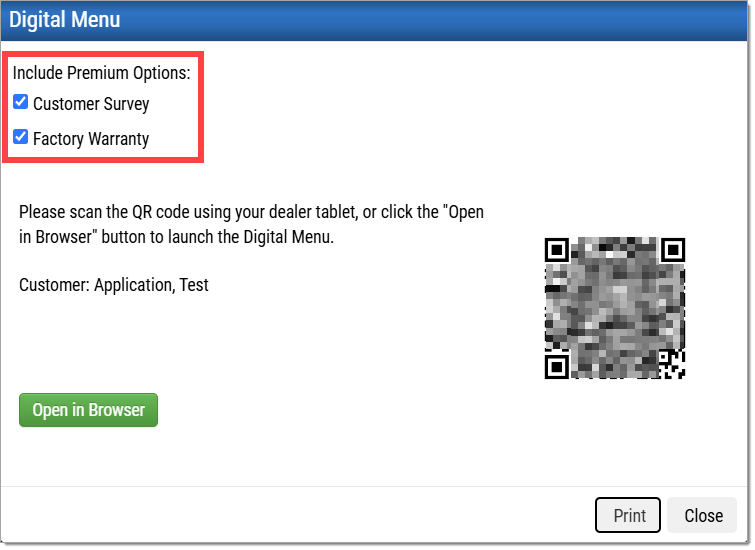
A pop-up for Digital Menu will appear with options for accessing the Digital Menu.
To show a survey to the customer along with the Digital Menu, click the checkbox next to ‘Customer Survey.’
The Customer Survey is part of the Premium Menu subscription.
To show a Factory Warranty to the customer along with the Digital Menu, click the checkbox next to ‘Factory Warranty.’
Factory Warranty Review is part of the Premium Menu subscription. Click here to navigate to the Factory Warranty Review section for more information.
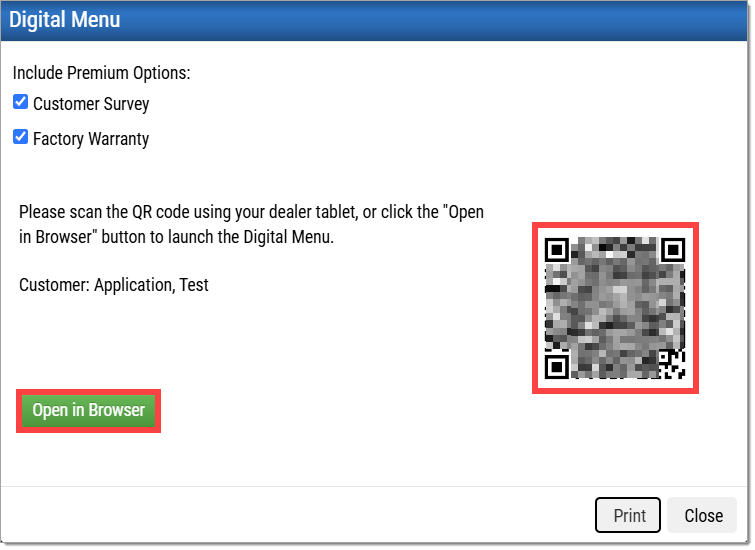
If you would like to present the menu from your desktop computer, click the ‘Open in Browser’ button to access the Digital Menu. If you would like to present the menu from a tablet, use the tablet’s camera to scan the QR code on the desktop screen to access the Digital Menu on the tablet.
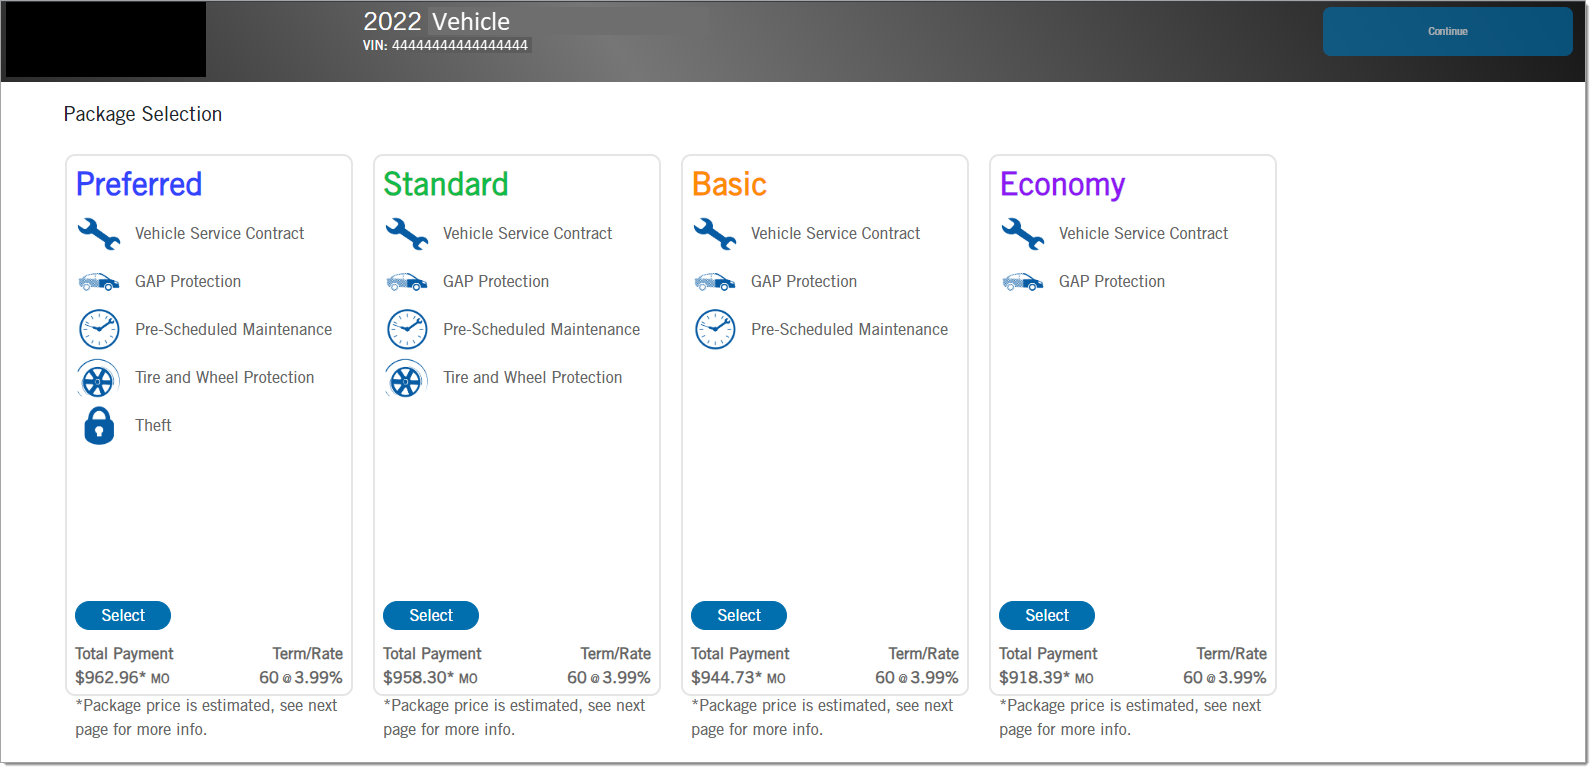
Have the customer review and select their desired package.
If the survey is selected, the factory warranty will be presented after the survey and prior to product selection.
If the survey is not selected, the factory warranty will be presented before product selection.
Factory Warranty Review
Factory Warranty Review (FWR) is an optional, premium feature that helps F&I Managers explain factory warranty coverage, highlight coverage gaps, and present protection options. The FWR can be included as part of the Digital Menu using the steps outlined in the ‘Accessing the Digital Menu’ section above.
Factory Warranty Review is part of the Premium Menu subscription.
The FWR will open after the survey (if the survey is selected) and before product selection, showing the Summary page with an overview of the vehicle and its current factory and powertrain warranty coverage.
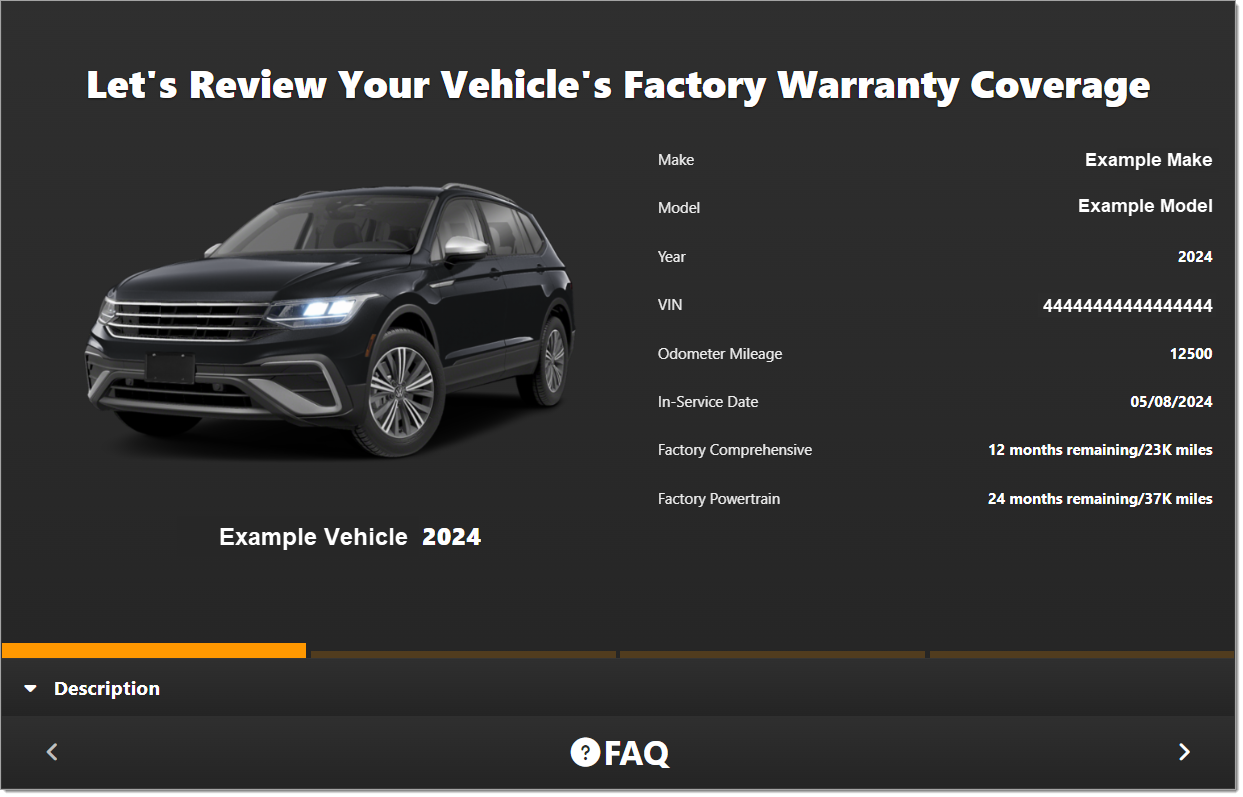
The customer can navigate through the sections of the FWR using the arrows at the bottom of the screen.
The Factory and Powertrain Warranty pages provide detailed information about each warranty. The Outlook page offers a comprehensive view of current coverage and highlights the customer’s potential exposure to future repair costs.
For more information, click the ‘FAQ’ at the bottom of the page to review frequently asked questions.
Once this step is completed, the customer can navigate to the package selection and product selection. The customer can navigate back to the survey or factory warranty selection from the product selection page.
Selecting or Customizing a Package
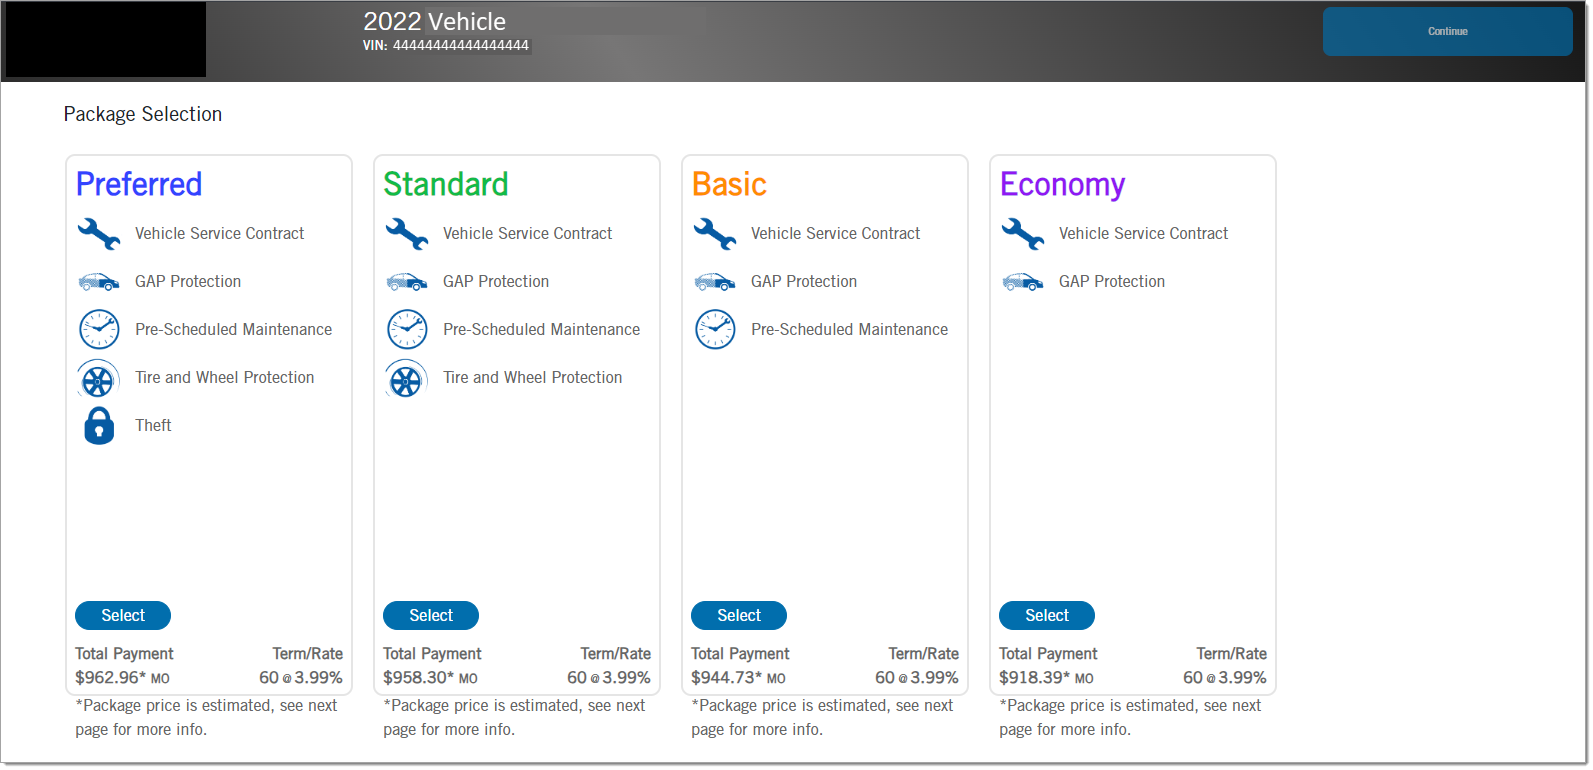
The customer can review each of the packages to determine which one they would like to purchase. They may also select one or more products from a different package by dragging and dropping them into the package of their choice. To do this, the customer must first click the ‘Select’ button for the package they like. The selected package will be outlined in green, and the word ‘Select’ will be changed to ‘Selected.’
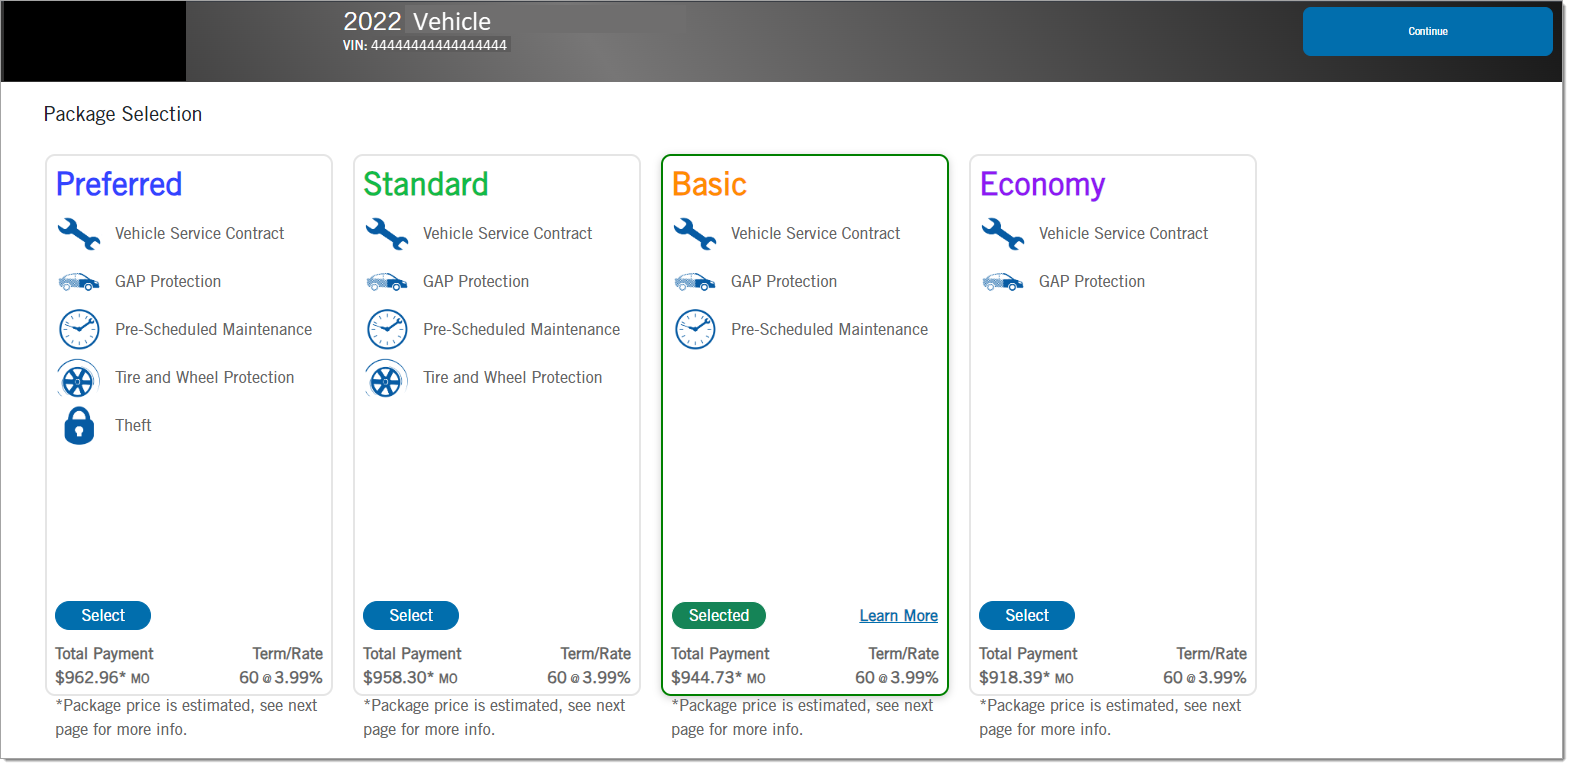
If desired, the customer can drag and drop a desired product from another package to the selected package. The total payment details will be updated to reflect the new pricing.
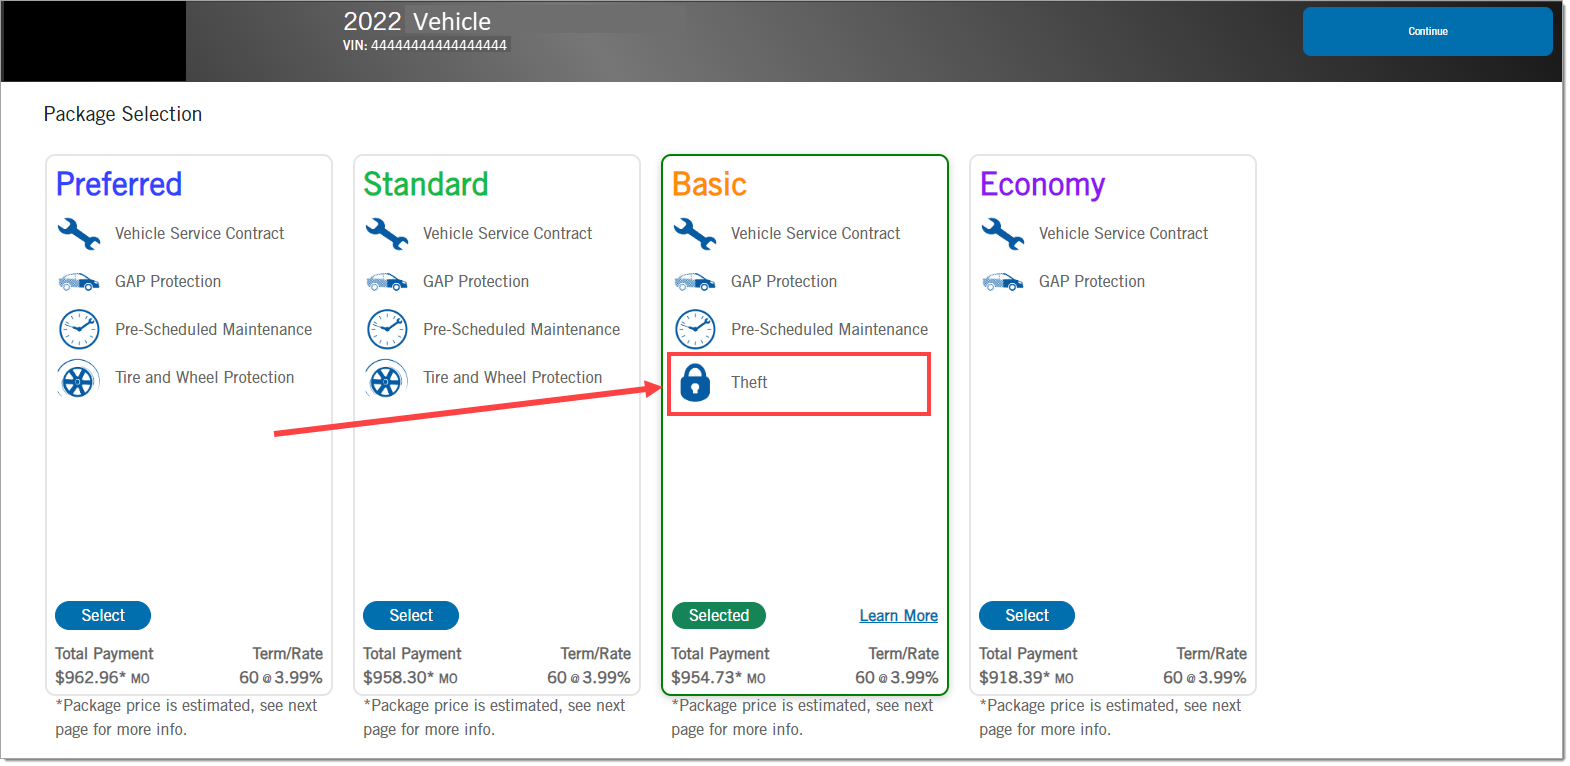
Once selections are finalized, click the blue ‘Continue’ button at the top right corner of the screen.

The customer will now be presented with their selected package, showing detailed pricing for each product. The ‘Learn More’ link will take them to a video overview of that product.
To remove a product from the package, click the ‘Remove’ button.
To add an additional product to the package, click the ‘Add’ button.
The pricing information will update with any additions or removals.
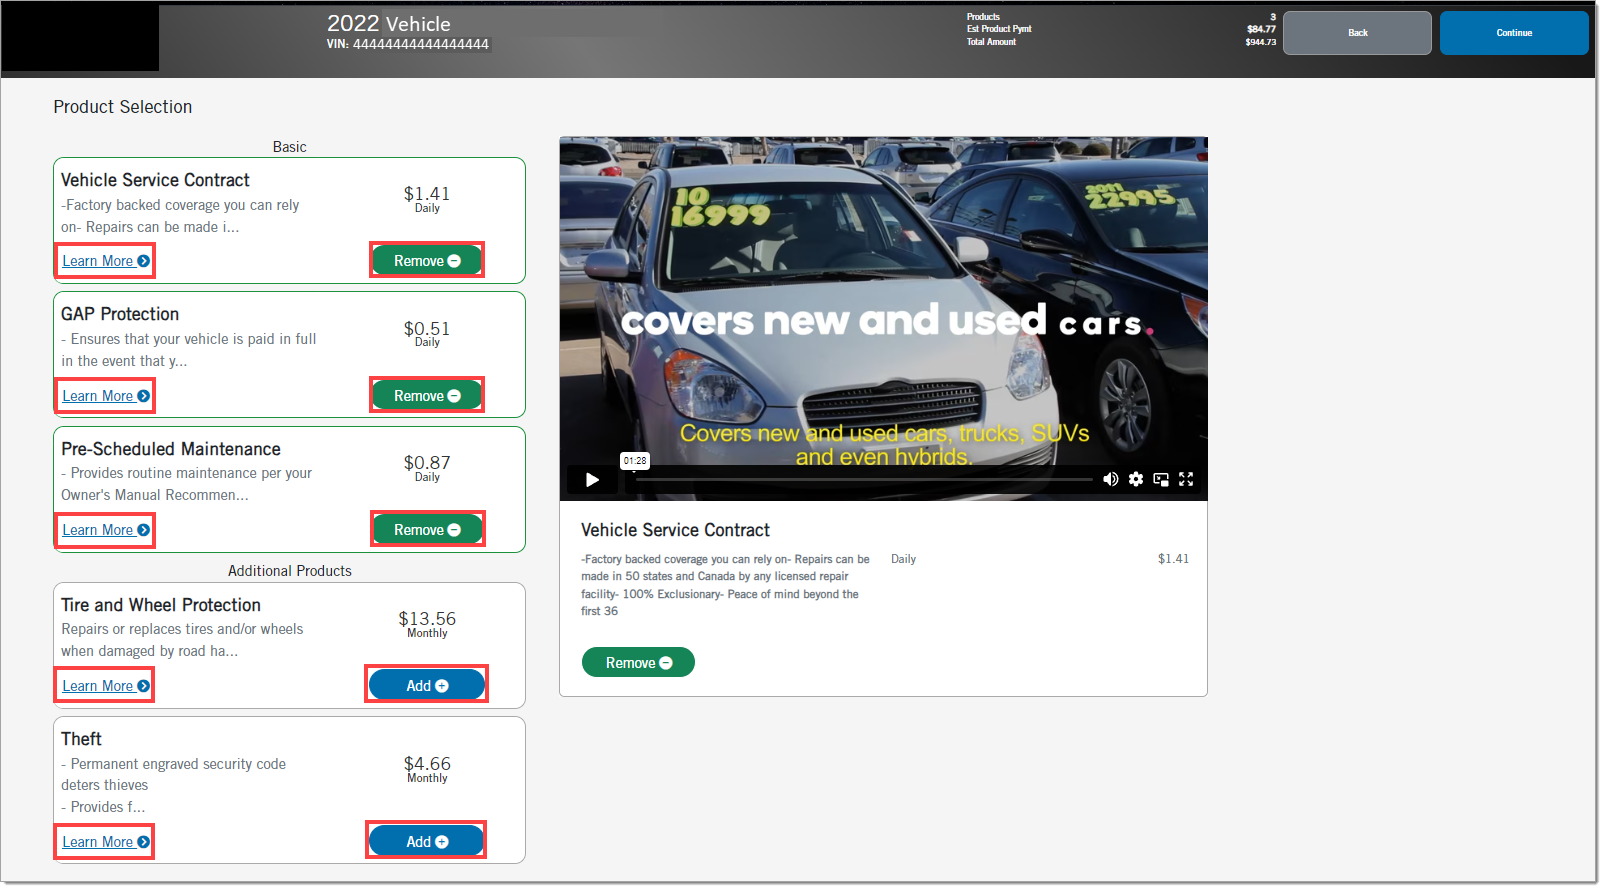
To return to the multi-package page, click the grey ‘Back’ button at the top right corner of the screen.

Once the customer has reviewed their products and is ready to move forward, click the blue ‘Continue’ button at the top right corner.

Accept/Decline Page
Clicking the blue ‘Continue’ button will take the customer to the Accept/Decline Disclosure page where the customer needs to confirm products they have selected and declined. If needed, the customer can click the grey ‘Change Election’ button to return to the previous page.
After confirming the products, the customer clicks the ‘Accept Selections’ button.
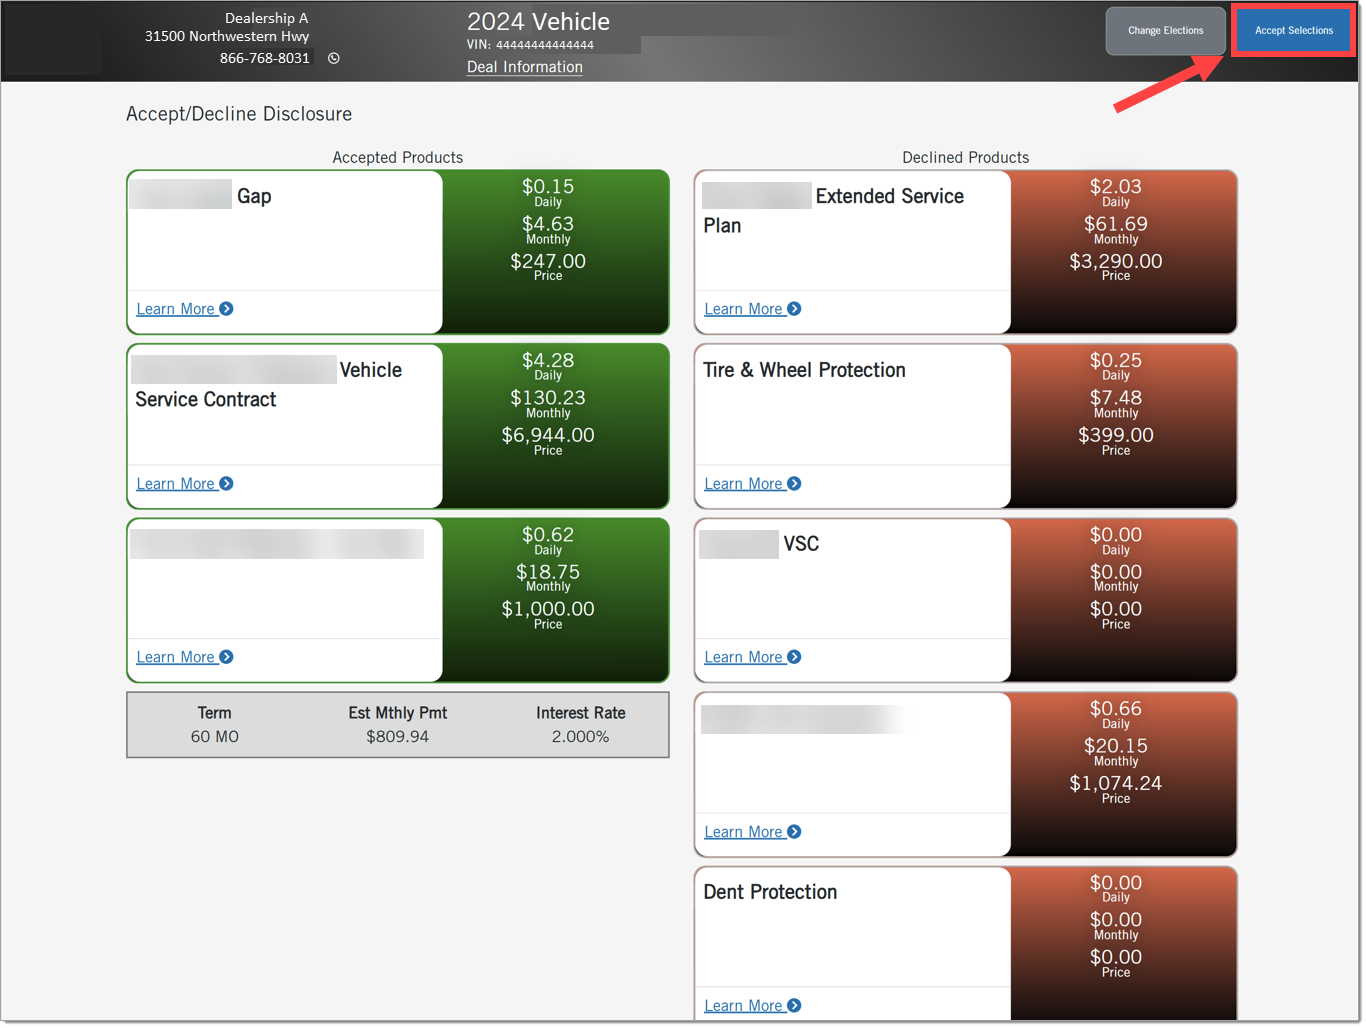
The Accept/Decline Disclosure, Menu form, and Product Contracts can be eSigned remotely or at the dealership. For more information, click here to view our eContracting and Deal Review user guide.
Order Confirmation Page
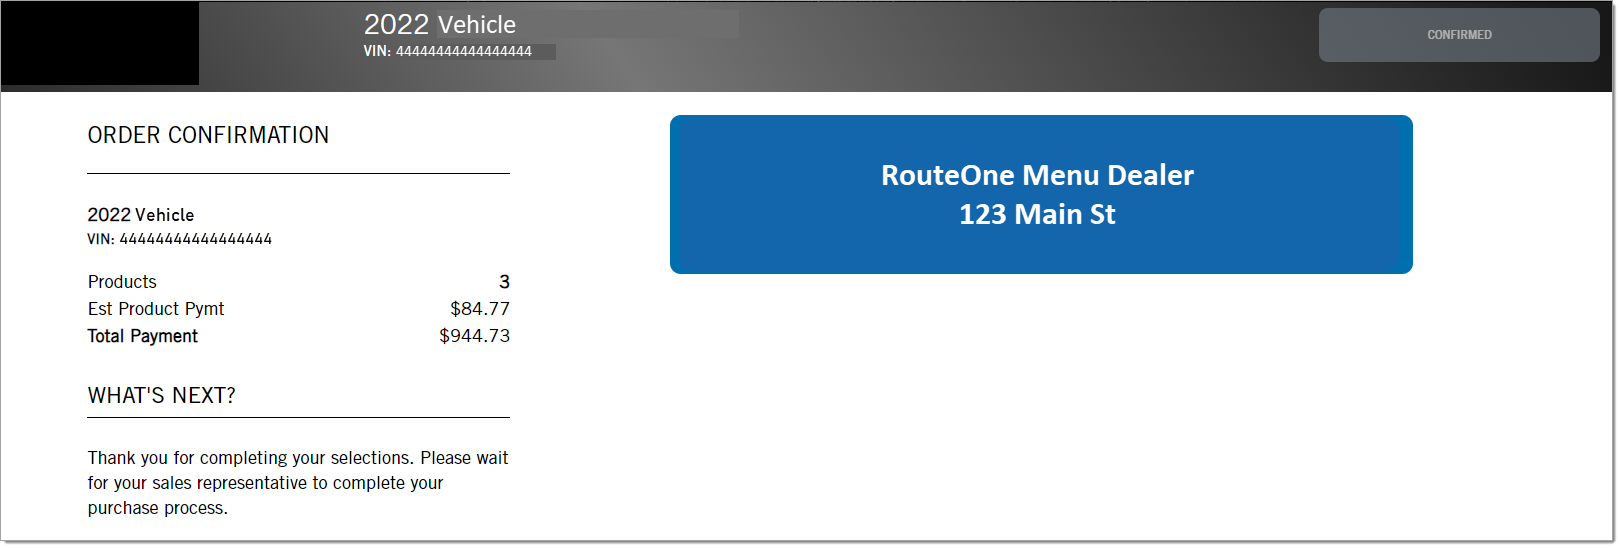
Clicking the ‘Done’ button will take the customer to the Order Confirmation page, and the end of the Digital Menu process.
ROUTEONE SUPPORT
Hours (EST)
Monday - Friday: 6:00am – Midnight
Saturday: 9am – 9pm
Can’t find what you need?
Try our search
