In This Guide:
Related Guides:
Menu
Using the Paper Menu
What is Paper Menu?
The Paper Menu is the menu of products that can be printed out and presented to the customer in the dealership.
The Paper Menu is generated in Step Two of the Deal Wizard, allowing the user to customize the deal before presenting it to the customer. Users can change the display and disclosure of the products, the products offered, and the product pricing.
For Step One of the Paper Menu process, see Creating Deals in RouteOne Menu.
Customizing the Paper Menu
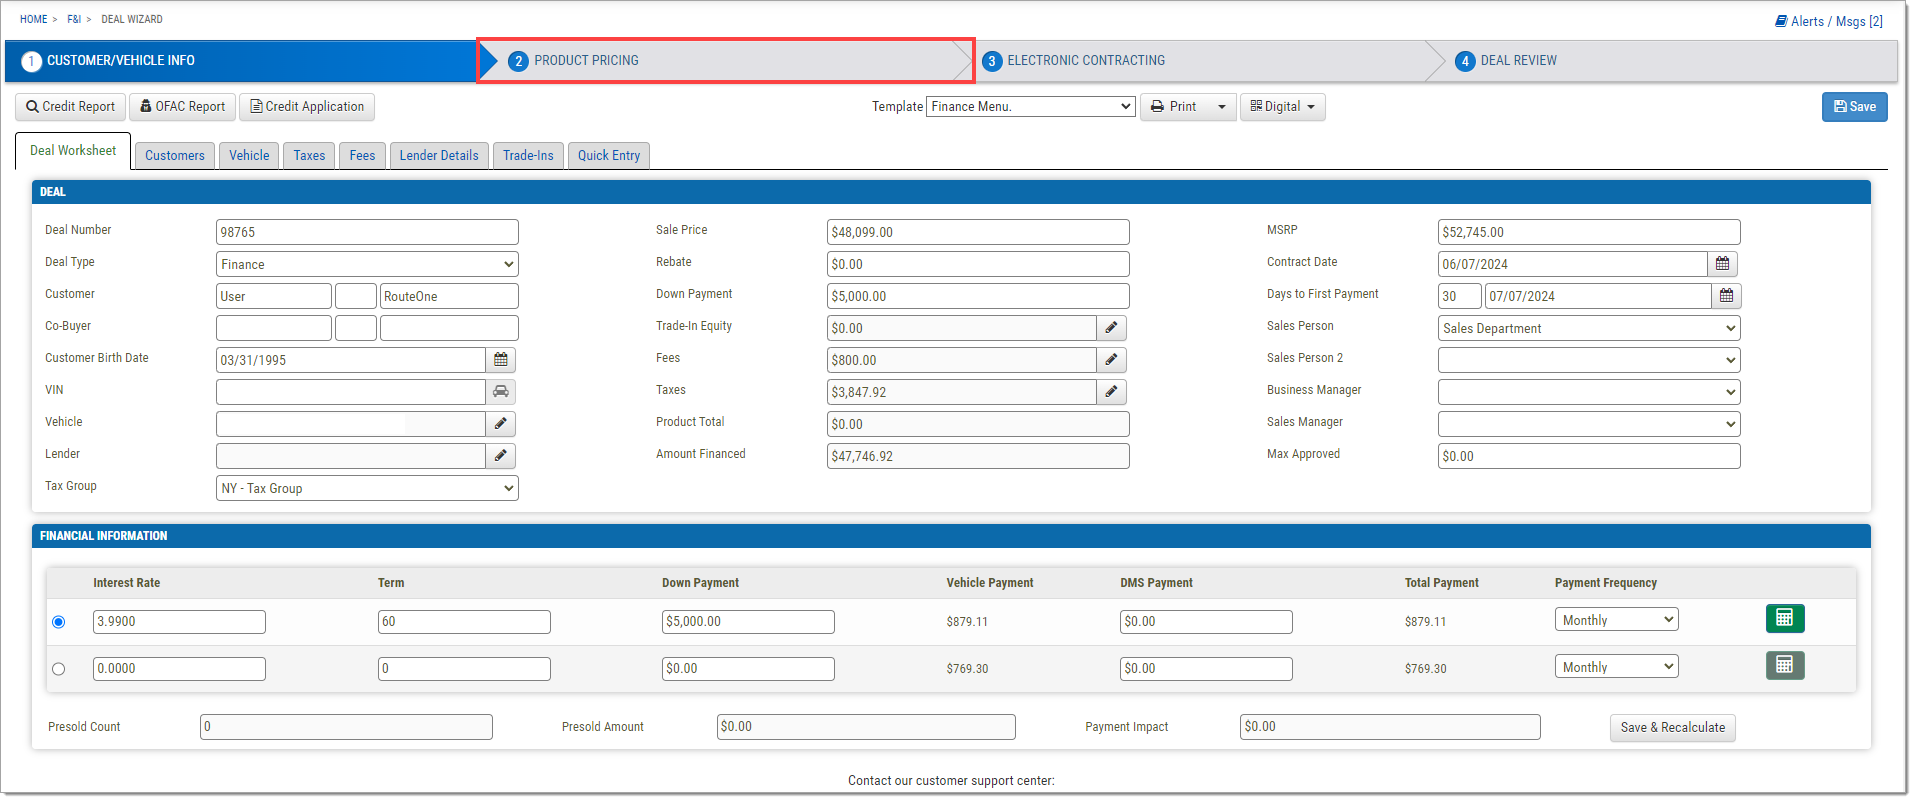
Once the Deal Worksheet is confirmed and saved in Step One, move on to Step Two by clicking the Step 2 ‘Product Pricing’ bar at the top of the Deal Wizard screen.
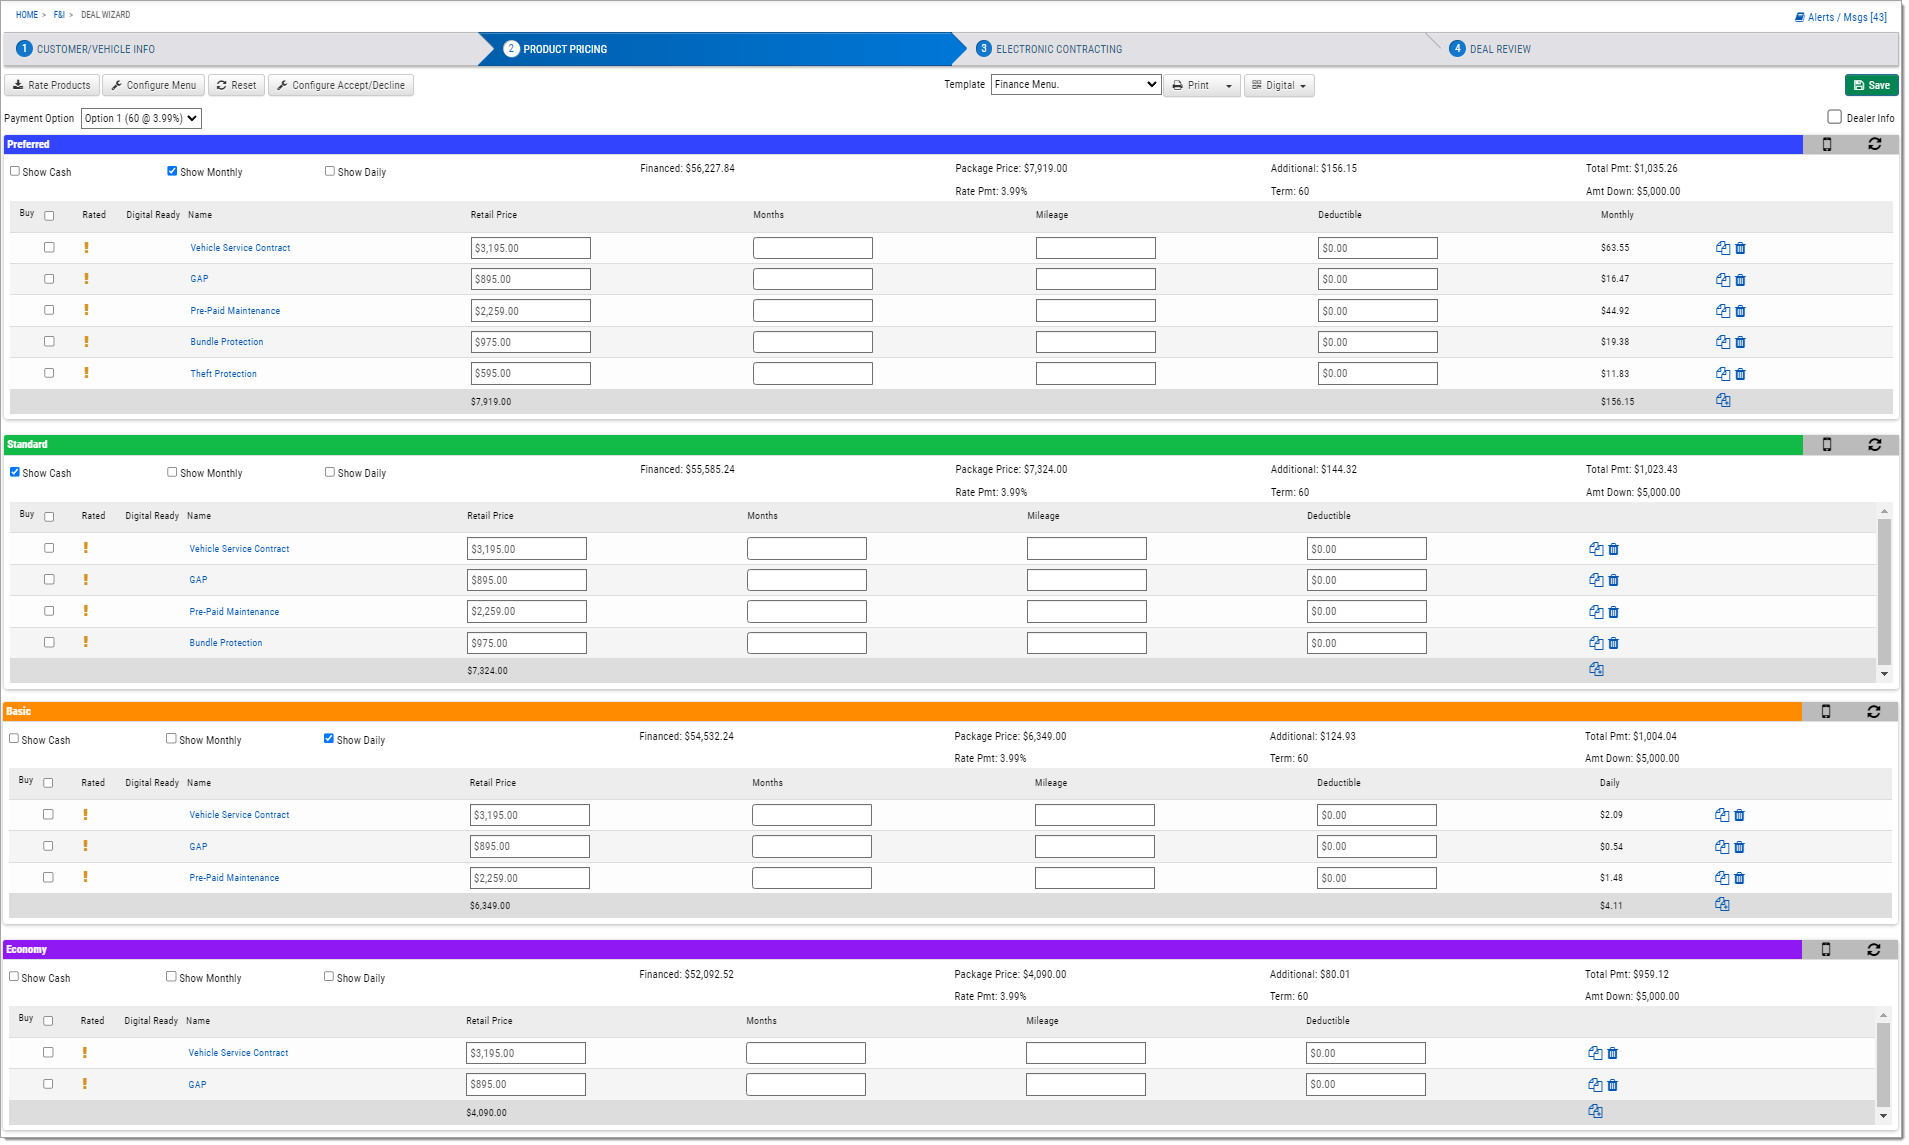
The checkboxes along the top of each section allow the user to select what will be visible on the Menu for the customer, including cash, the monthly cost, and the daily cost.
At the top of the screen, there are options to change the Payment Option and the Menu type. Changes to these menus will reflect throughout the entire page, allowing you to easily adjust the Menu to the deal, or test how different options affect the values.
In the upper right-hand corner of the screen, there is a checkbox for ‘Dealer Info.’ Checking this box adds Gross Profit information and the Cost of each product to the page.
To remove a product from a package, click the trash can icon on the far right-hand side of the screen. This will only remove it from that specific package.
To change the pricing of any one of the products, the user can edit the listed price of the product in any of the packages. By clicking on the ‘Copy Prices’ icon at the end of the product line, the changes will copy to the same product in every package. If multiple products are altered, the ‘Copy All Prices’ icon at the bottom of the package will copy all changes to the other packages.
Configuring the Menu
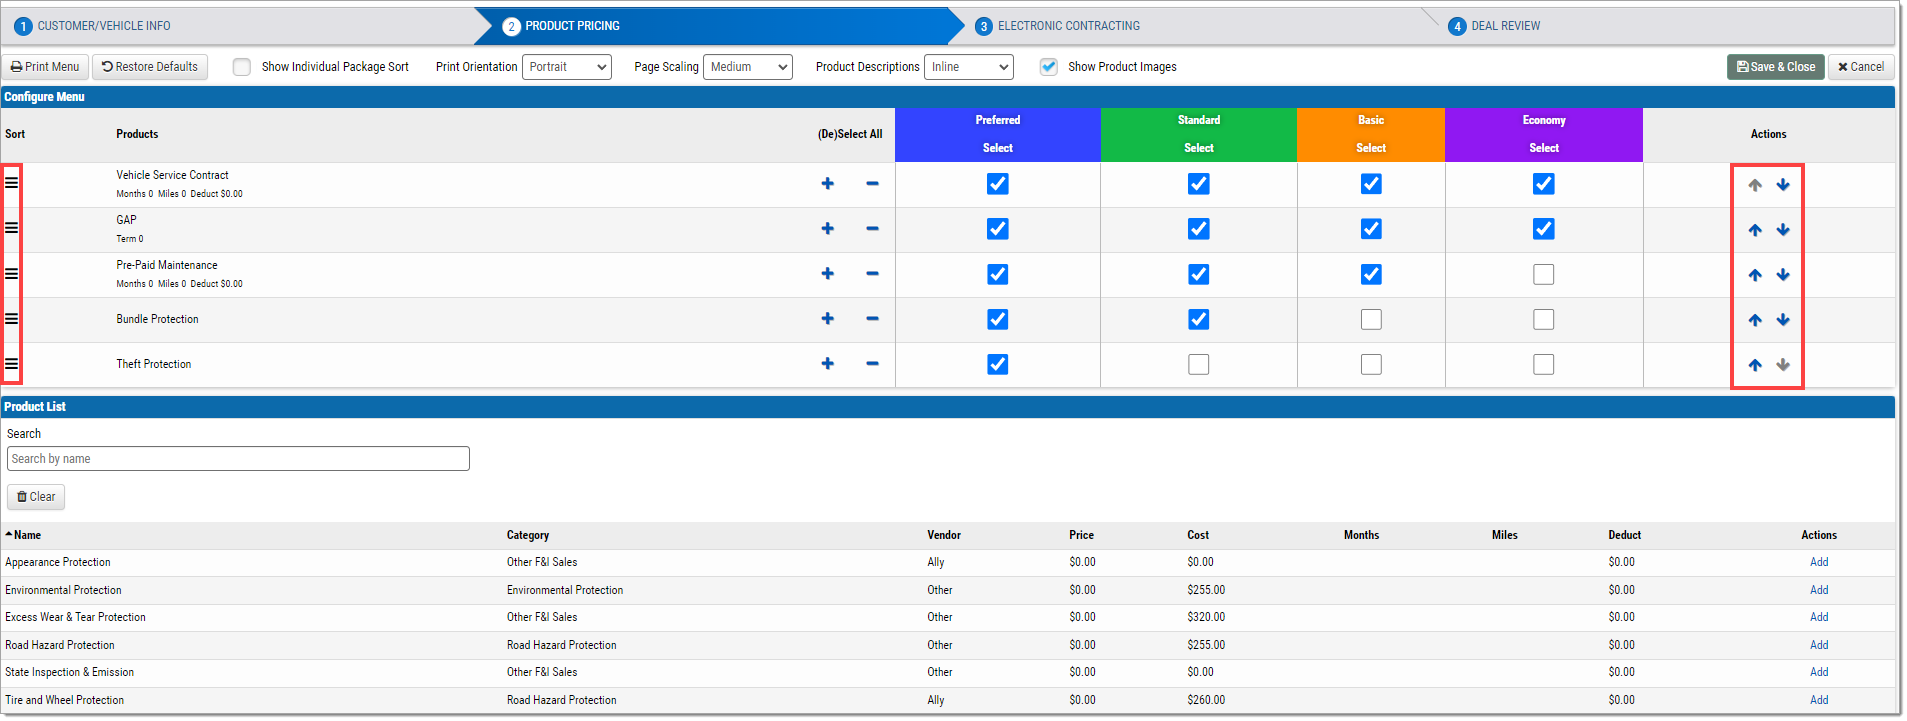
To make sweeping changes to the Menu and product offerings, click the ‘Configure Menu’ button at the top of the screen. This will load a new screen where users can edit the formatting of the Menu.
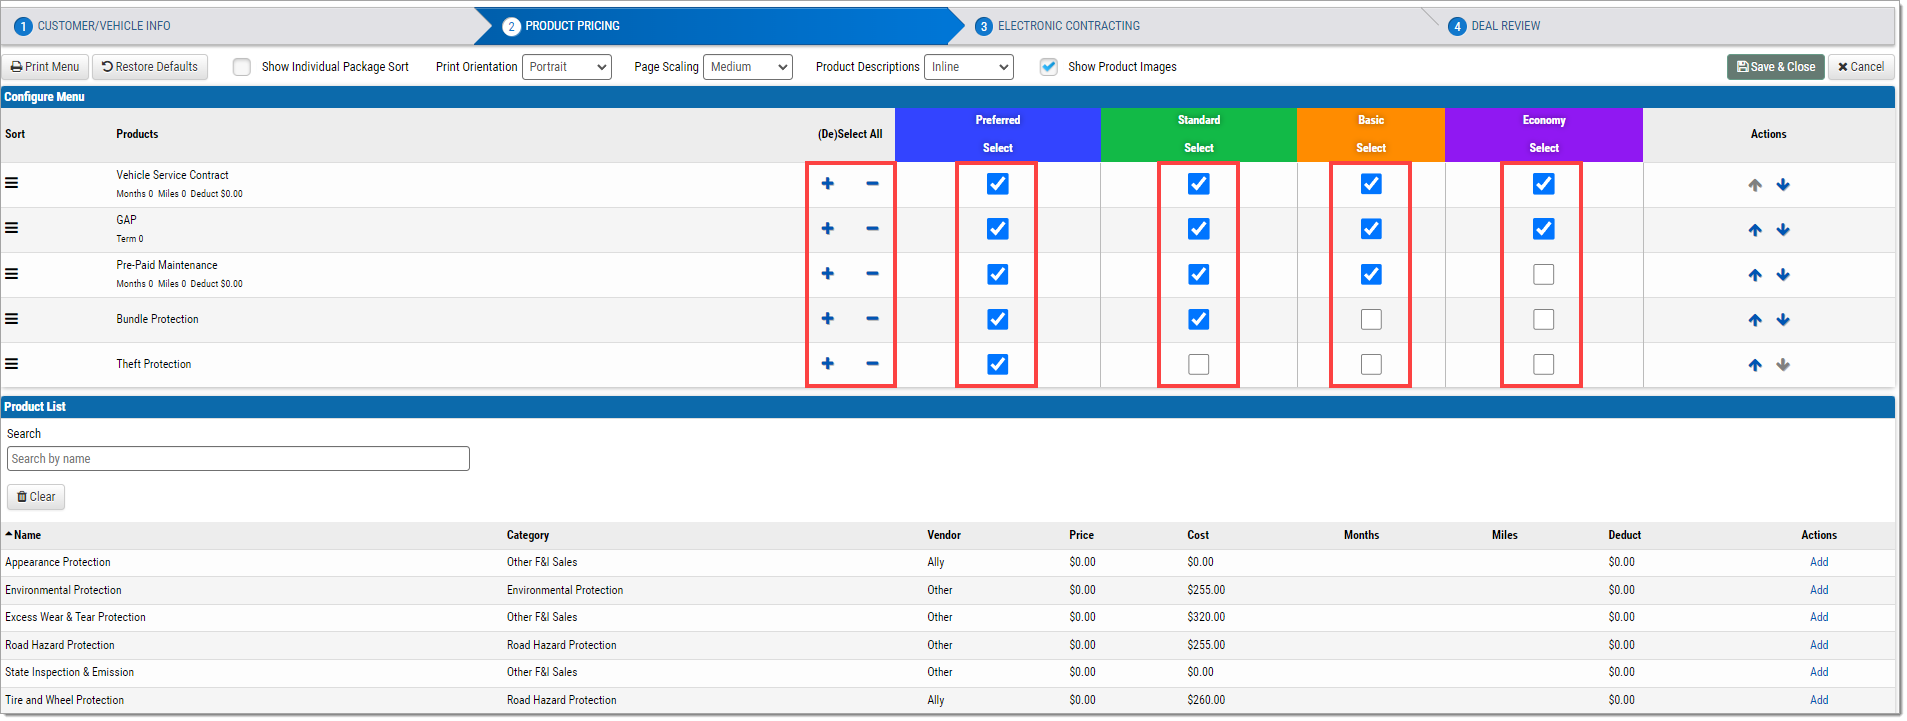
To remove a product from a specific package, use the checkboxes under each package’s column.
To remove a product from all packages, click the ‘-’ icon to the right of that product. To re-add it, click the ‘+’ icon.
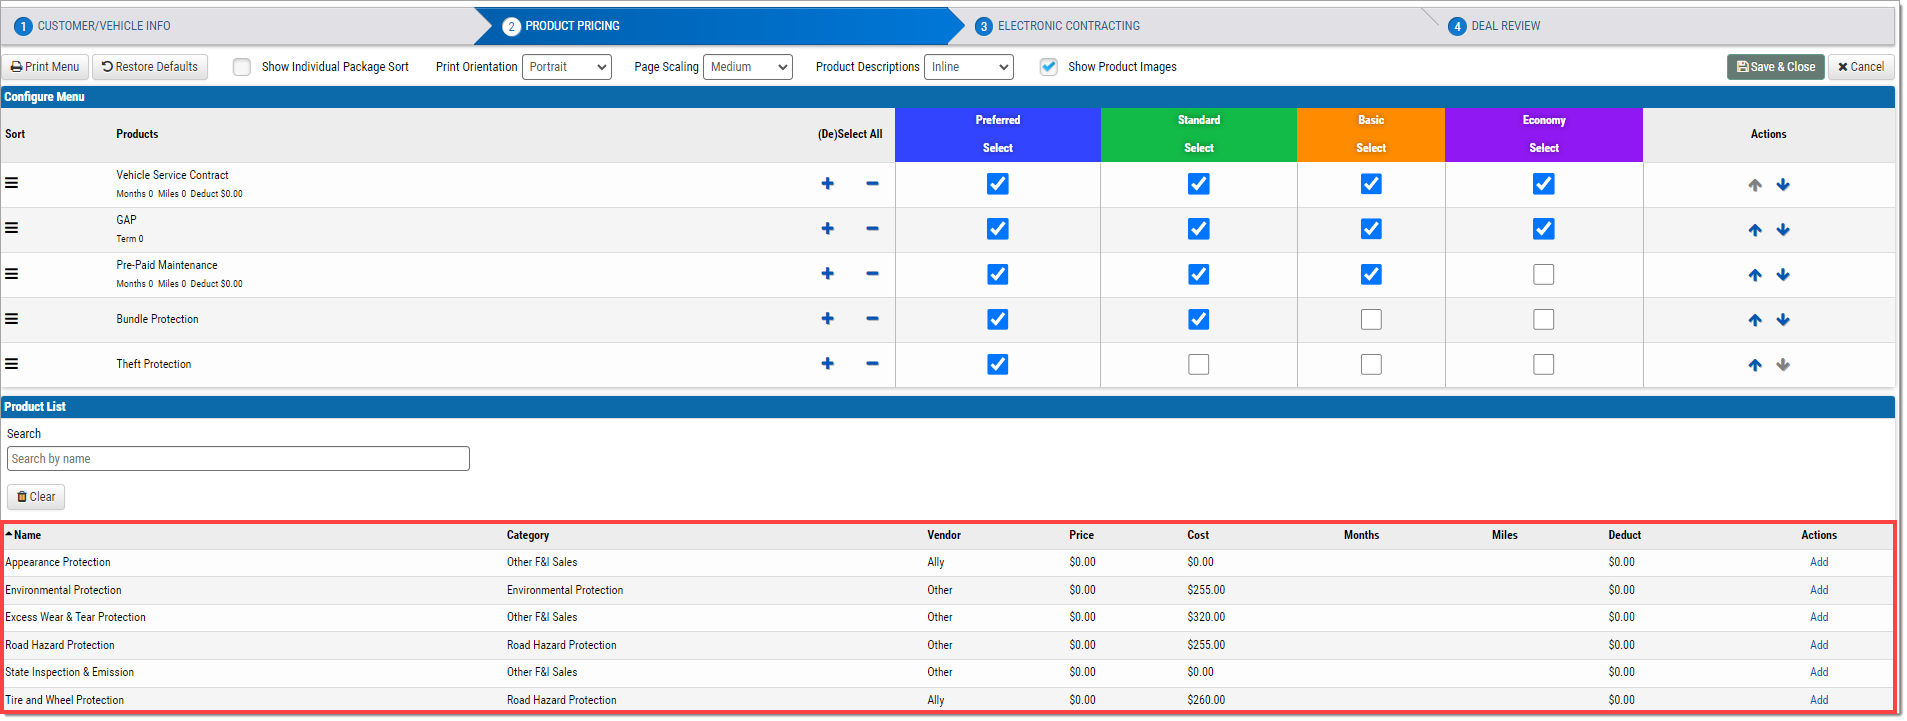
To add a product that isn’t currently in any package, go to the ‘Product List’ at the bottom of the screen. Scroll or use the search to find the desired product, then click on the name of it. The product will then move up to the ‘Configure Menu’ section.
- Once added, it won’t be immediately visible in the Menu. Click the ‘+’ icon or use the checkboxes to make the product visible in the Menu.
To change the order that the products will appear in each package, either use the up and down arrows in the ‘Actions’ column or drag and drop using the ‘Sort’ icons in the far-left column.
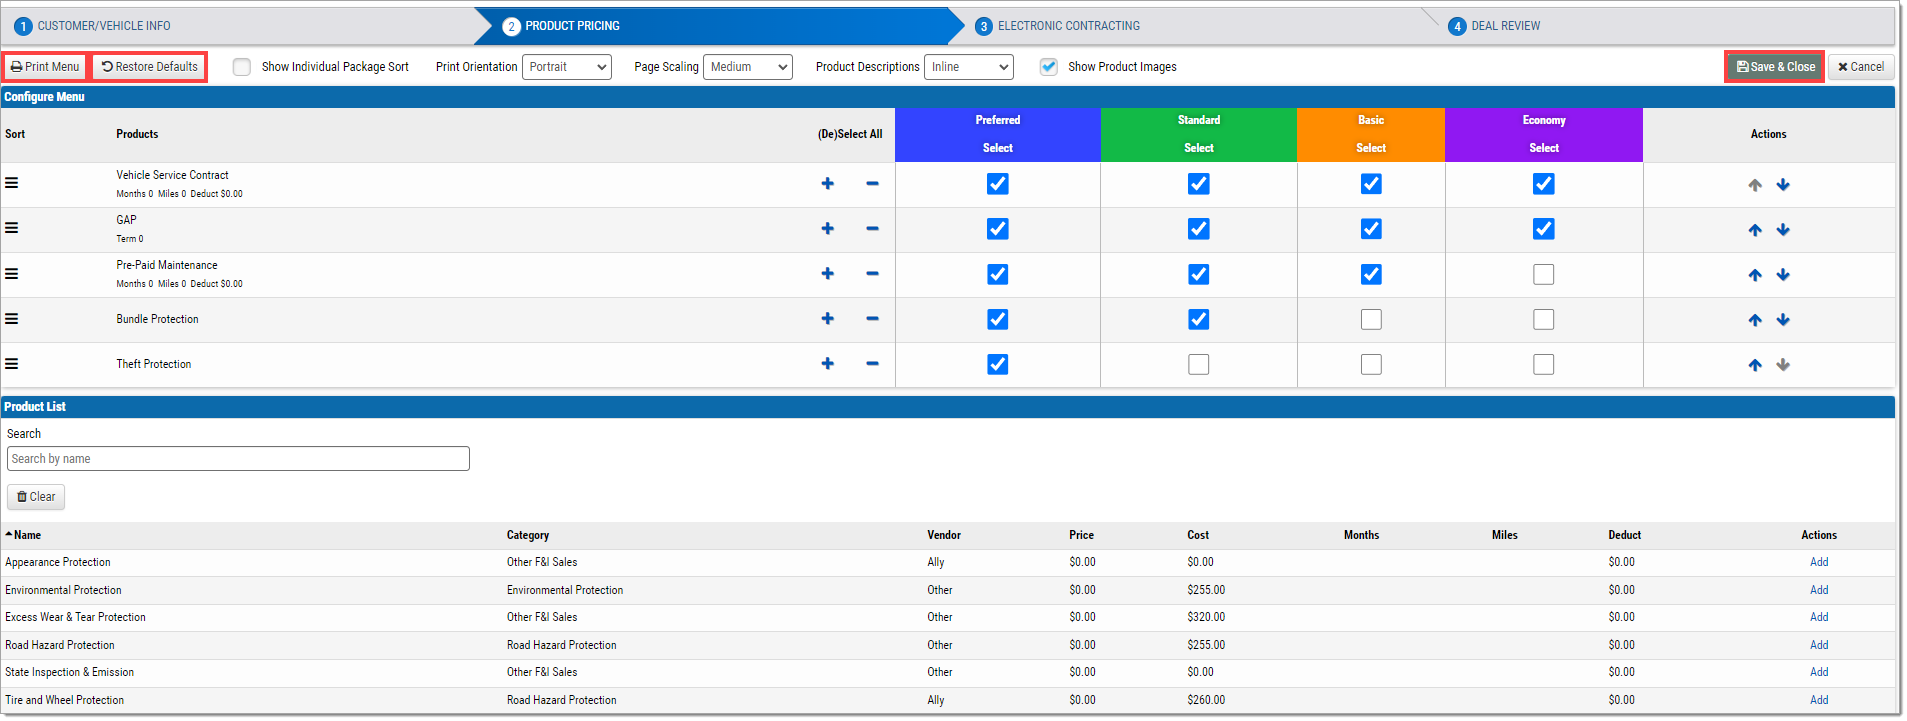
Click ‘Save & Close’ in the upper right-hand corner to lock in the changes and return to the Product Pricing screen.
If needed, use the ‘Restore Defaults’ button in the upper left-hand corner to restore all of the settings to their default state.
The Menu can be printed from this screen by clicking the ‘Print Menu’ button in the upper left-hand corner.
Rate Products
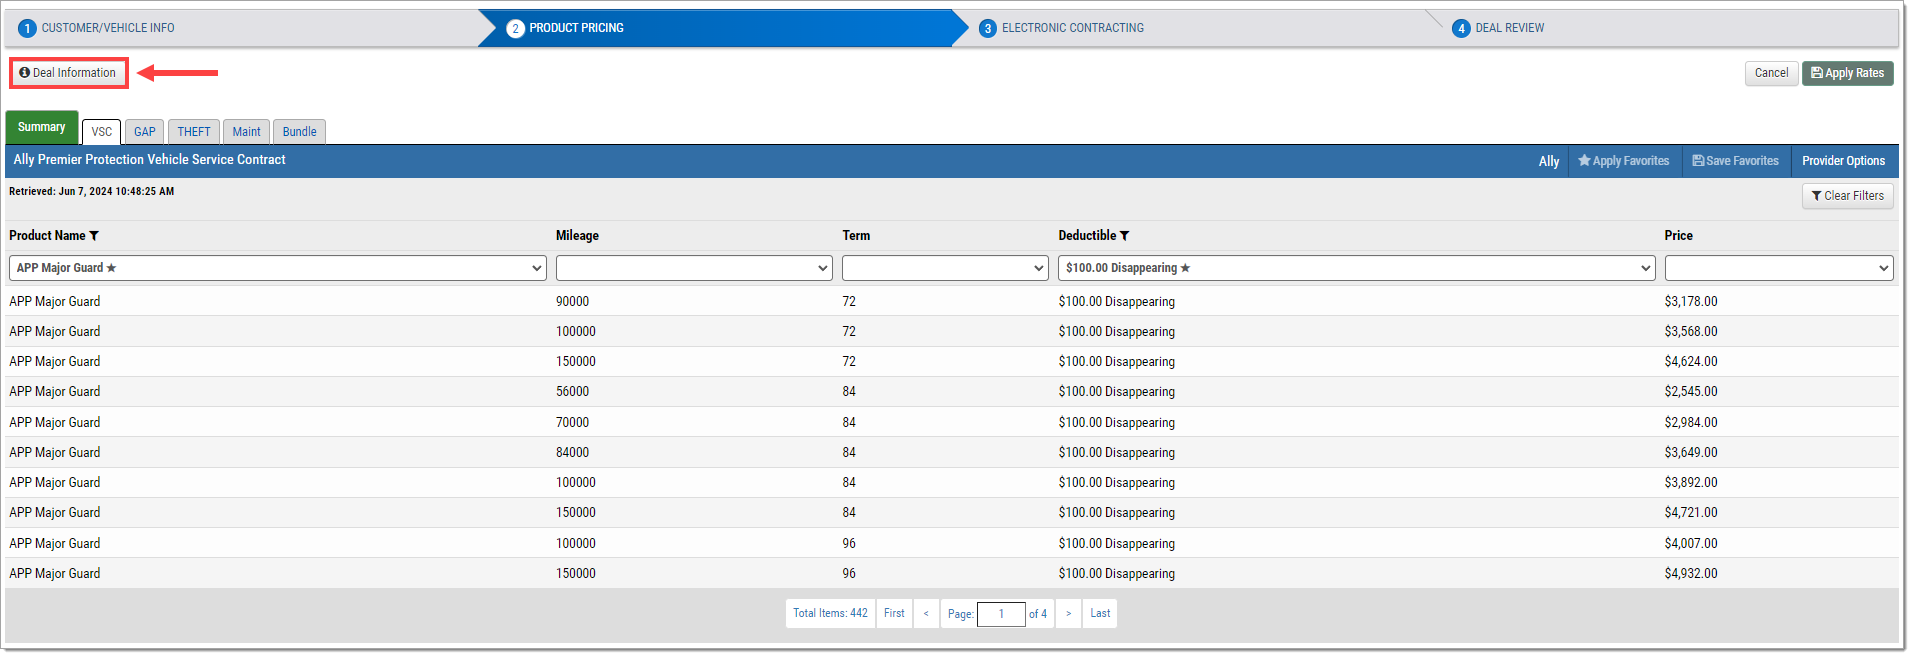
Some dealers also have the ability to update all available products using the VIN rating option. From the Product Pricing screen, click the ‘Rate Products’ button at the top left-hand corner.
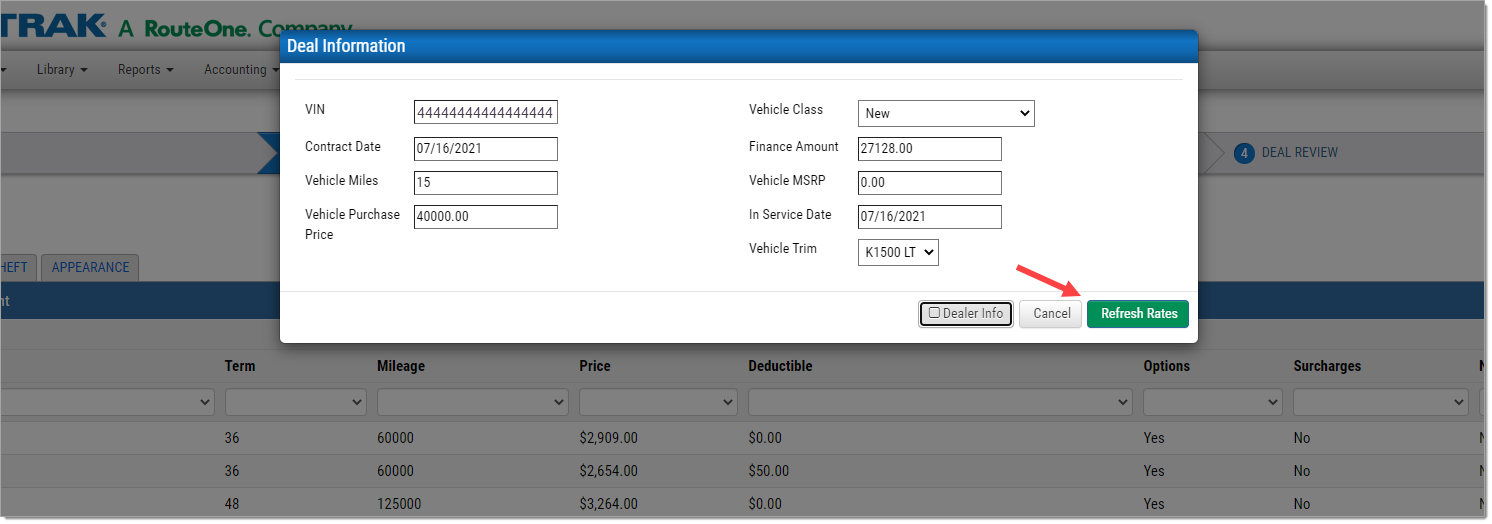
If information is missing, click ‘Deal Information’ in the upper left-hand corner.
Input or change information as necessary.
Click ‘Refresh Rates.’
The system will send the VIN to the product provider, and the options available for that vehicle will populate on the page.
Navigate through different product types using the tabs along the top of the page.
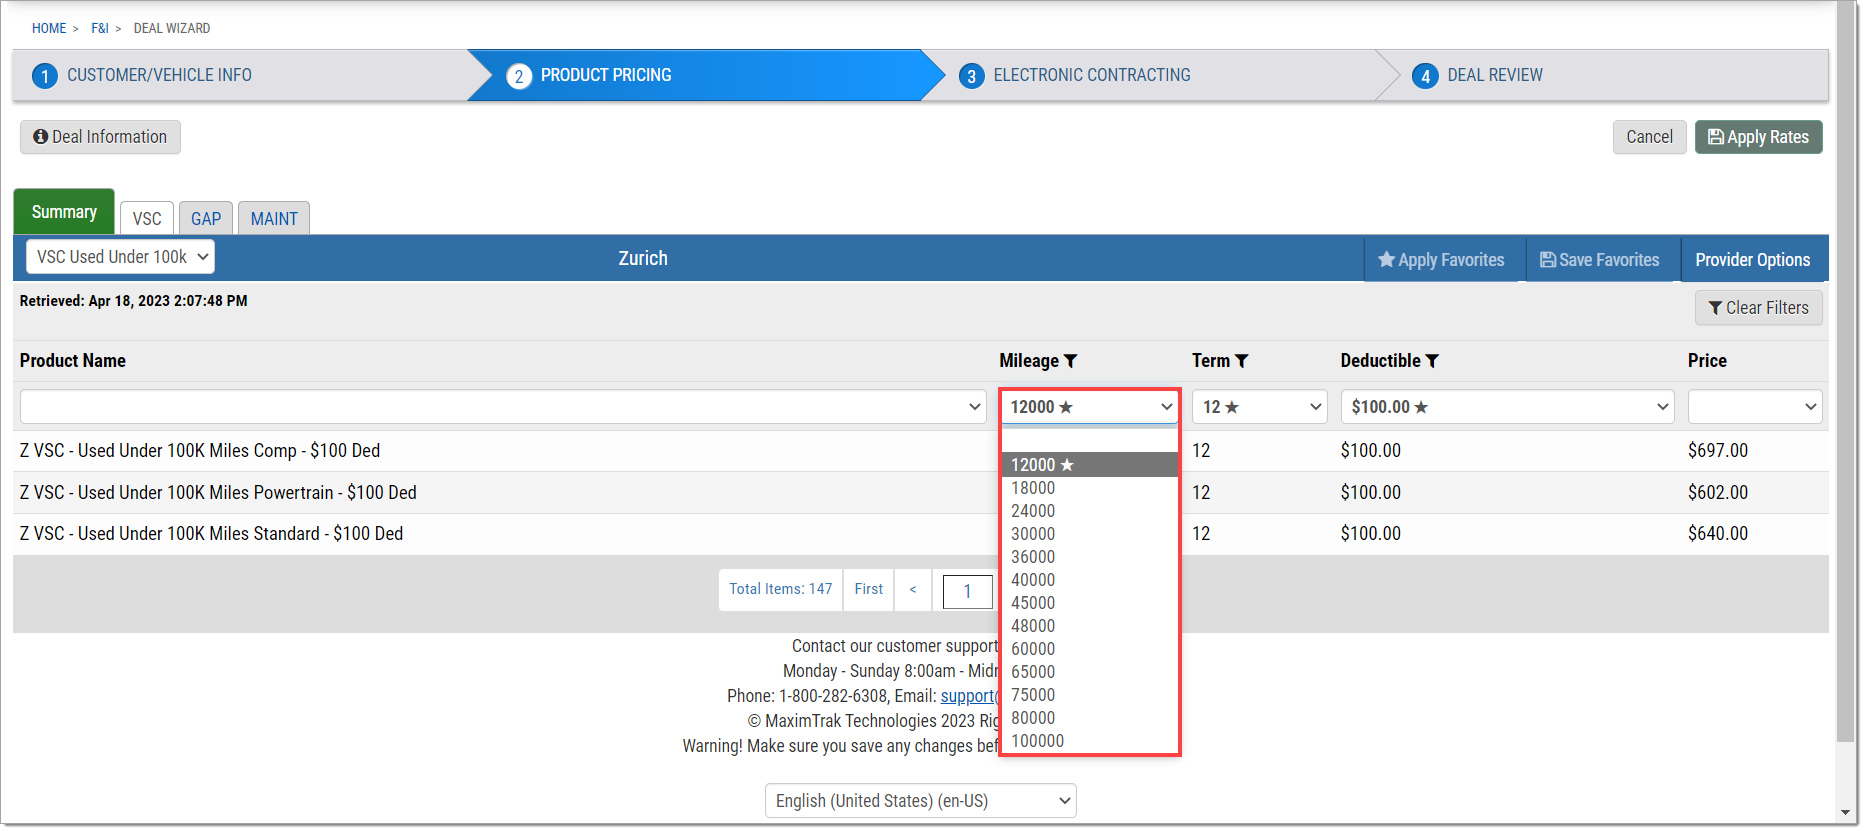
Use the filter drop-down menus at the top of the page to locate products more specific to the customer’s needs.
Users have the option to set rates for specific products as ‘favorites,’ and the ‘favorite’ rates will then display each time the user rates that product.
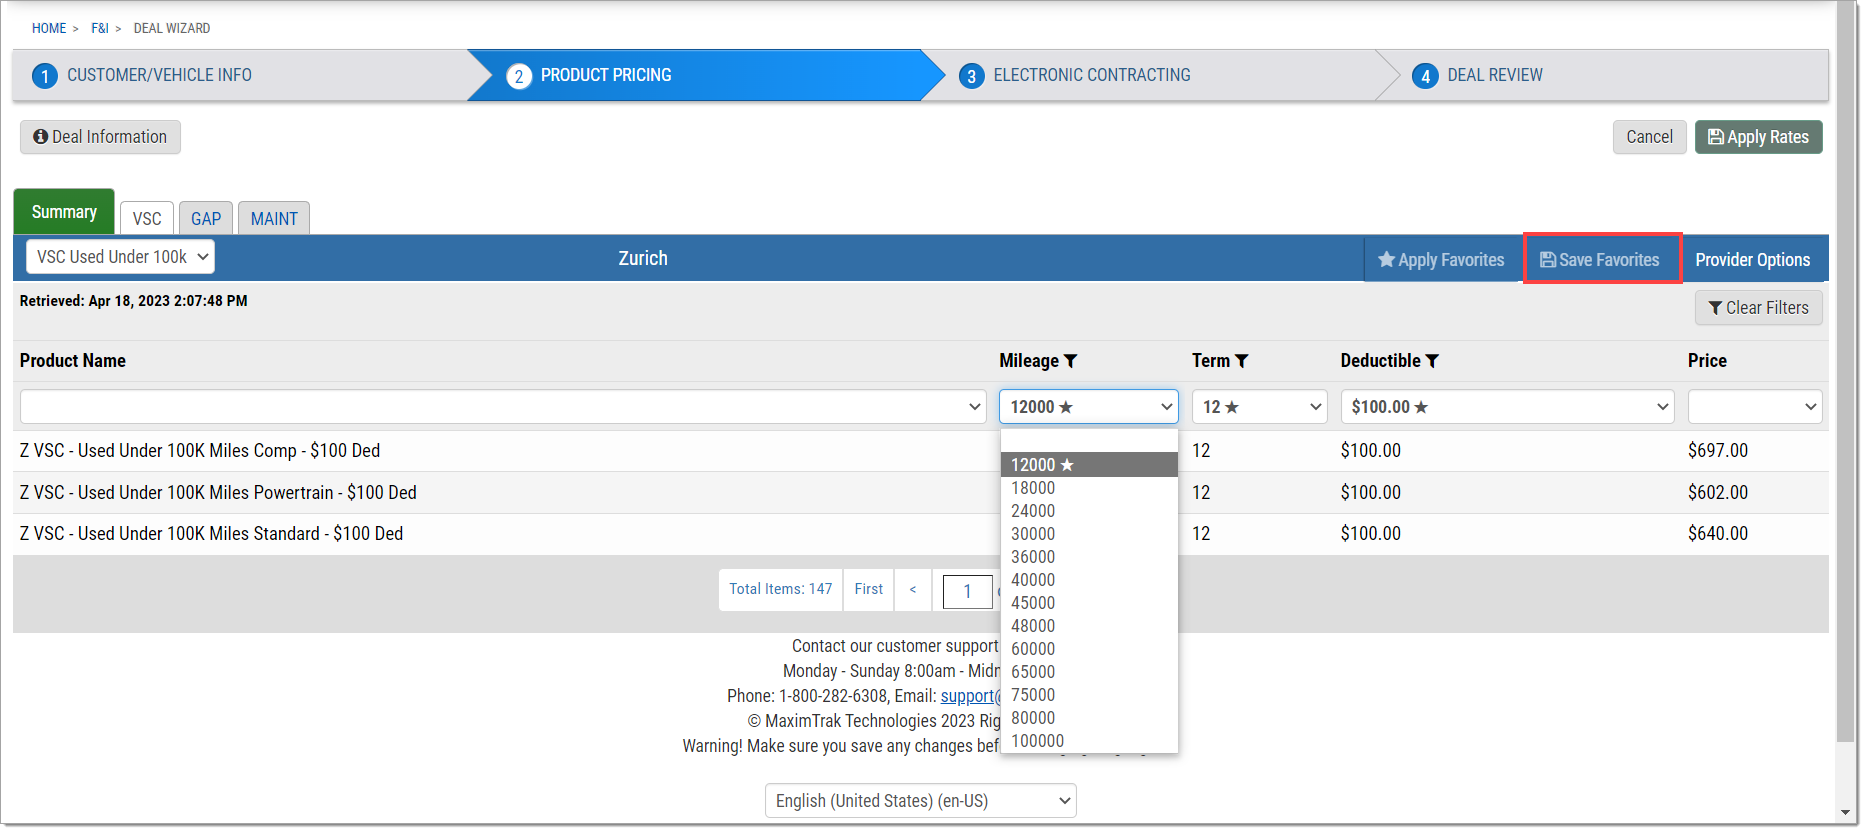
To set a rate as a ‘favorite,’ use the drop-down menus to select the desired rates. After all selections are complete, click the ‘Save Favorites’ button. A star will appear next to all favorited options, indicating that favorite filtering is enabled.
To change previously saved favorites, use the drop-down menus to select new ‘favorite’ options, then click the ‘Save Favorites’ button.
To permanently remove saved favorites, click the drop-down menu, select the first blank selection, and click the ‘Save Favorites’ button.
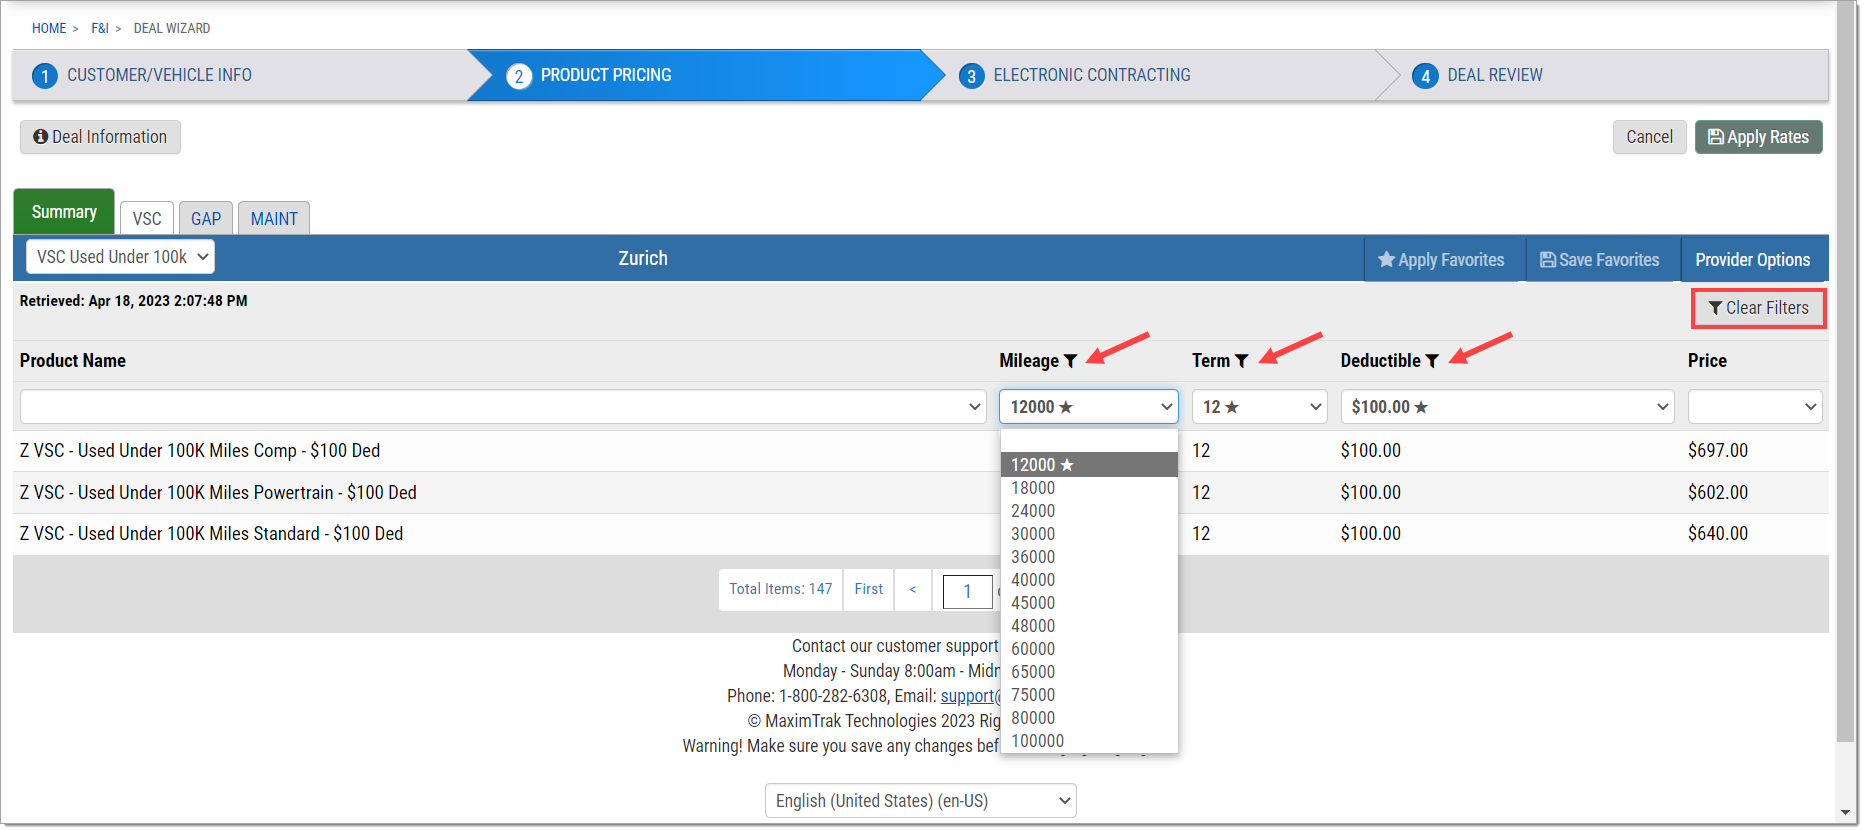
If a category is being filtered, a ‘filter’ icon will appear next to the column header. If there are no rates being filtered for that column, this icon will be absent.
To remove all filters and see all options, click the ‘Clear Filters’ button.
This action does not delete any saved ‘favorites,’ it only clears the current filters.
To return to saved favorites, click the ‘Apply Favorites’ button.
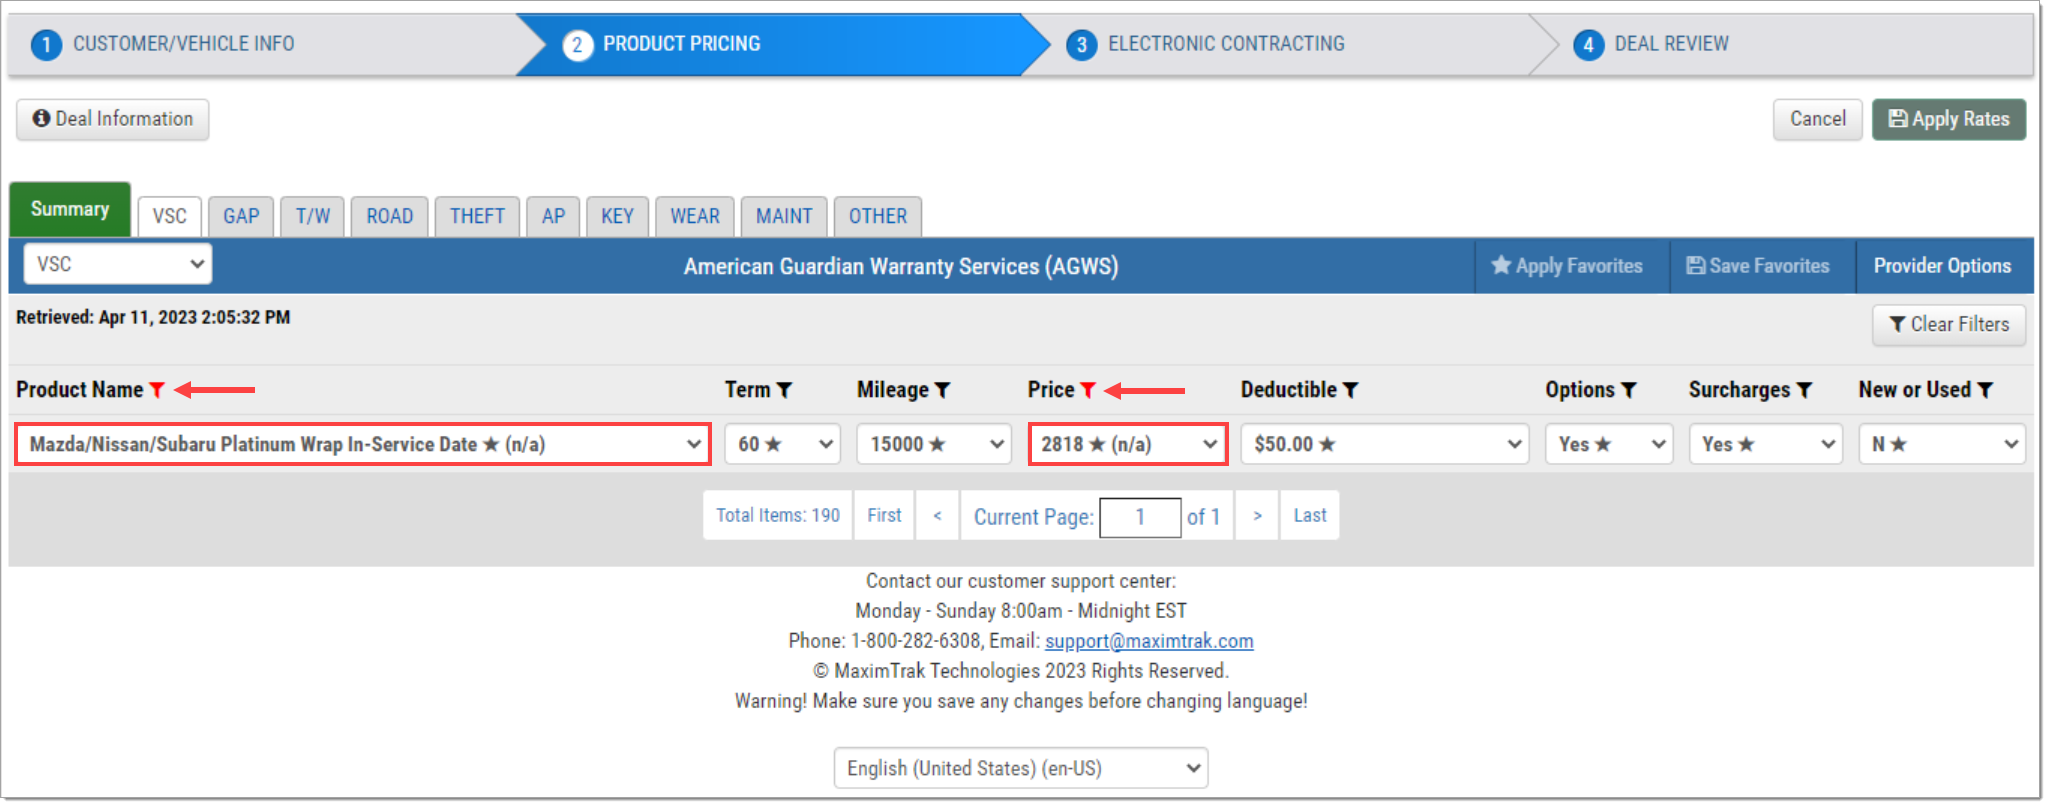
If a rate selection that has been set as a favorite no longer exists due to Product Provider rate changes, no rate will show. The filter icon will appear red, and the favorited rate option selection will appear with an ‘n/a’ beside it, indicating that the rate offering no longer exists. In this case, users will need to update their favorite selections as detailed above.
Select a product by clicking on the title.
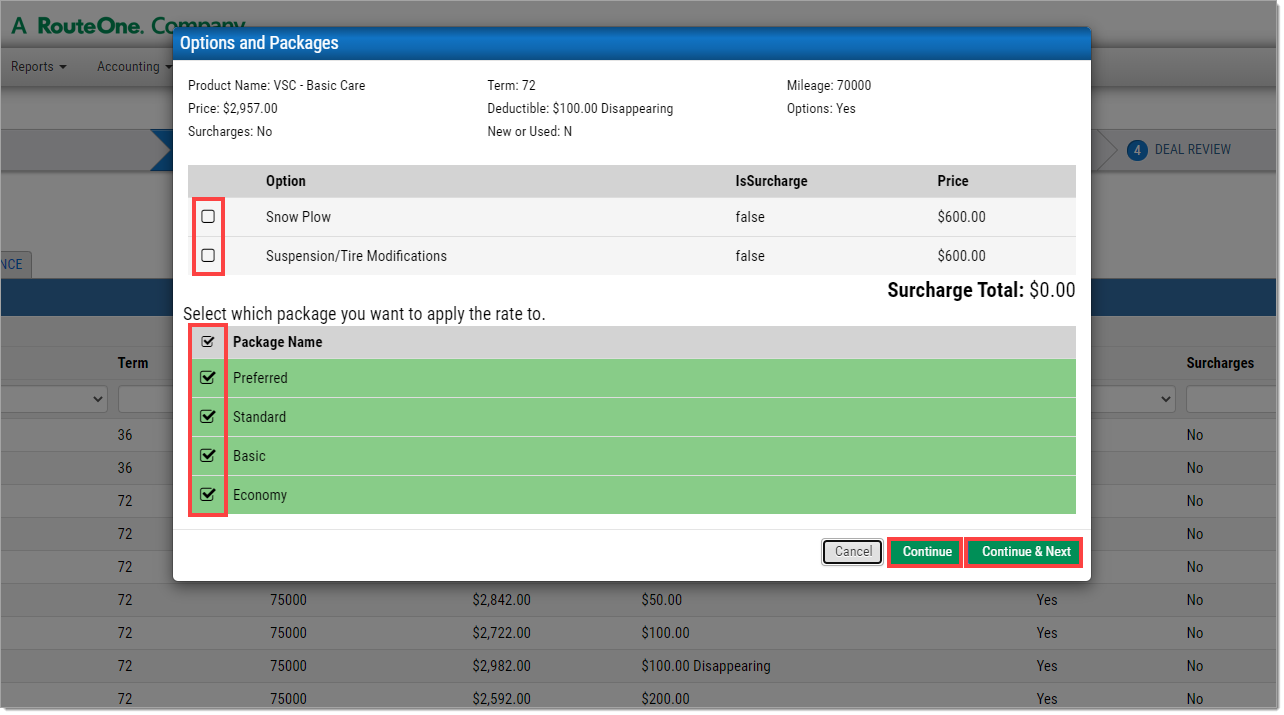
A pop-up will appear.
Select any relevant options as well as what packages to add the product to using the checkboxes. Then, click ‘Continue’ if you would like to remain on the same page, or ‘Continue and Next’ to move on to the next tab in the ‘Rate Products’ screen.
Repeat the same process for the TW/RH, THEFT, and APPEARANCE tabs.
Click the ‘Summary’ tab to see all of the selected products.
Click the ‘Apply Rates’ button in the upper right-hand corner to save the selections and return to the Product Pricing screen.
On the Product Pricing page, rated products will show a check mark in the ‘Rated’ column.
Configure Accept/Decline
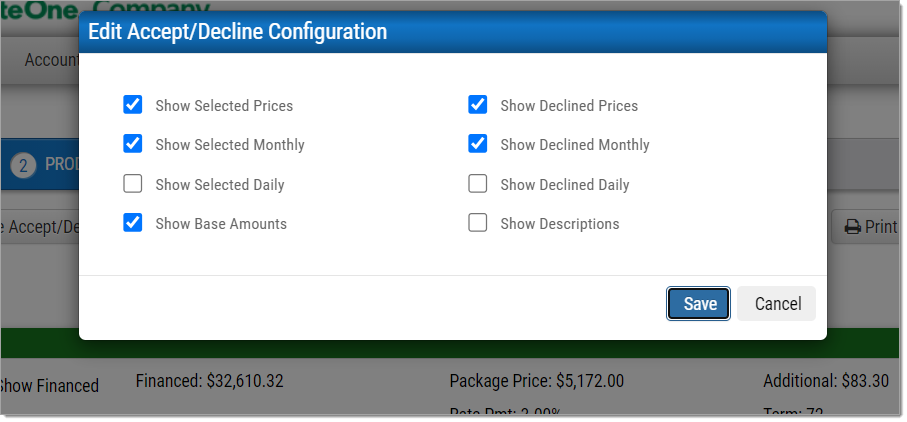
To adjust what appears on the Accept/Decline sheet, click the ‘Configure Accept/Decline’ button at the top of the screen.
A pop-up window will appear with checkboxes for each item on the Accept/Decline sheet.
Use the checkboxes to indicate which items will appear on the sheet.
Click ‘Save.’
Printing the Menu
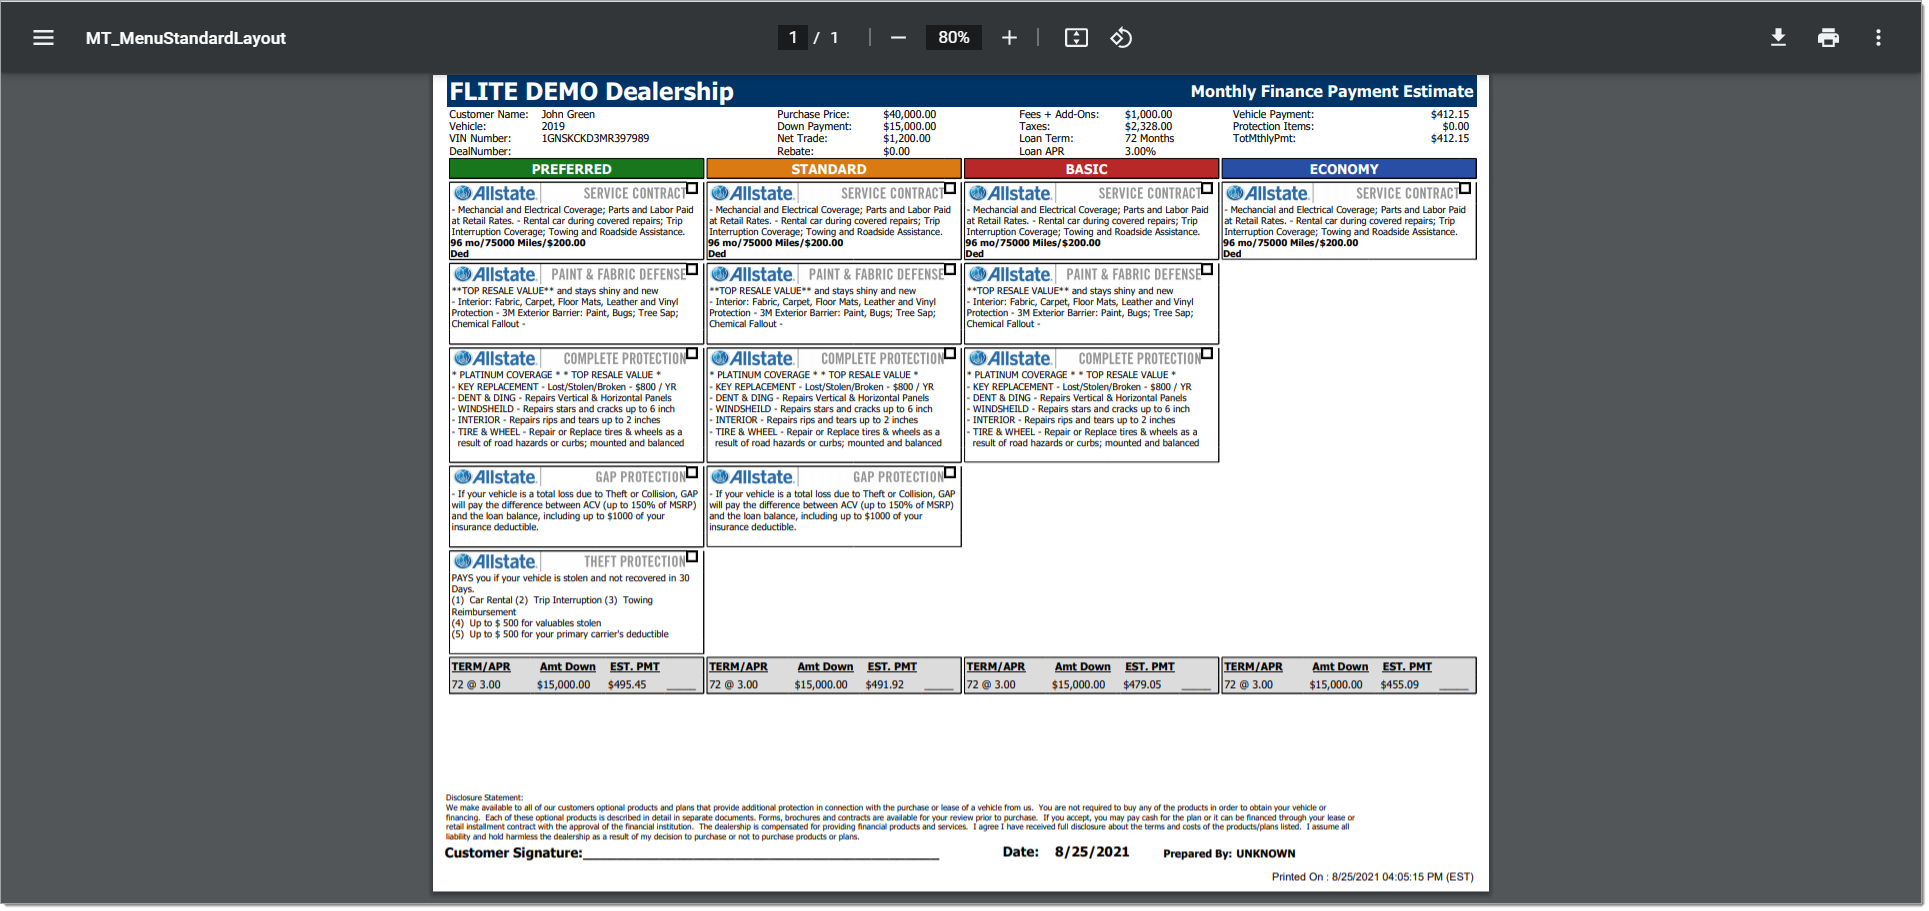
To print the Menu to show to the customer, click the ‘Print’ drop-down button at the top of the Product Pricing screen and select the ‘Print Menu’ option.
This will automatically download the Menu as a PDF.
After presenting the Menu to the customer, select which packages or products the customer has decided to purchase using the checkboxes on the Product Prices page.
If the customer decides to purchase an entire package, click the checkbox next to ‘Buy’ under the appropriate package heading.
If the customer does not wish to buy an entire package but would rather buy an individual product, or multiple products not grouped together in the same package, select the checkboxes next to the individual product(s) in any of the packages on screen and then click ‘Save’ in the upper right-hand corner.
Click the ‘Print’ drop-down button near the top of the Product Pricing screen and select the ‘Print Accept/Decline’ option.
This will automatically download the Customer Verification Waiver as a PDF.
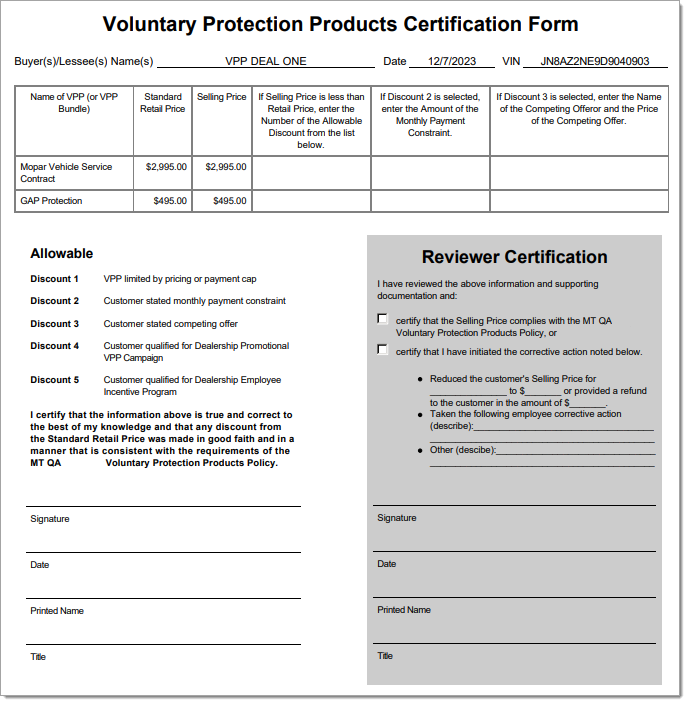
Once this step is completed, the customer can be presented with the Voluntary Protection Product Form (VPP).
Printing the Voluntary Protection Product (VPP) Form
The VPP policy aims to assist auto dealerships in developing and maintaining a compliant, consumer-friendly process for marketing and selling voluntary protection products (VPPs). Implementing VPP in Menu will position dealerships to follow the NADA VPP guidelines and standards for voluntary protection products.
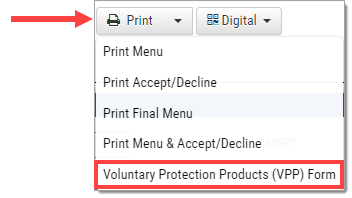
In the Deal Wizard, click the 'Print' drop-down and select 'Voluntary Protection Policy (VPP) Form' to generate a printable PDF.
This form should be pre-populated with information from the deal. After printing, the dealer will then complete the bottom left-hand section of the form.
ROUTEONE SUPPORT
Hours (EST)
Monday - Friday: 6:00am – Midnight
Saturday: 9am – 9pm
Can’t find what you need?
Try our search
