In This Guide:
Related Guides:
Menu
Reporting in RouteOne Menu powered by MaximTrak
Available Reports
There are many reports generated in the system:
-
Personnel Reports give PVR and Gross information on Sales or F&I Managers’ sales for the selected dates.
-
Dealership Reports show a broad view of the dealership in terms of sales and profit.
-
Summary Reports show an overall picture of sales and store progress for the selected dates.
-
Detail Reports give an in-depth look into sales, finance sources, products sold, and trade information.
-
Detailed Excel Logs are the most in-depth, giving every detail of every deal.
Menu Reports
Users can pull reports from any deal with a closed date.
To access Menu Reports, click ‘Reports’ on the top navigation bar and select ‘Menu Reports’ from the dropdown.

There are three sections of reports, though there can be overlap among them:
- ‘My Reports’ shows any deals associated with the user.
- ‘Dealership Reports’ shows any deals associated with a specific store.
- ‘Dealer Reports’ shows all deals across stores, as long as they are associated with the same dealership.
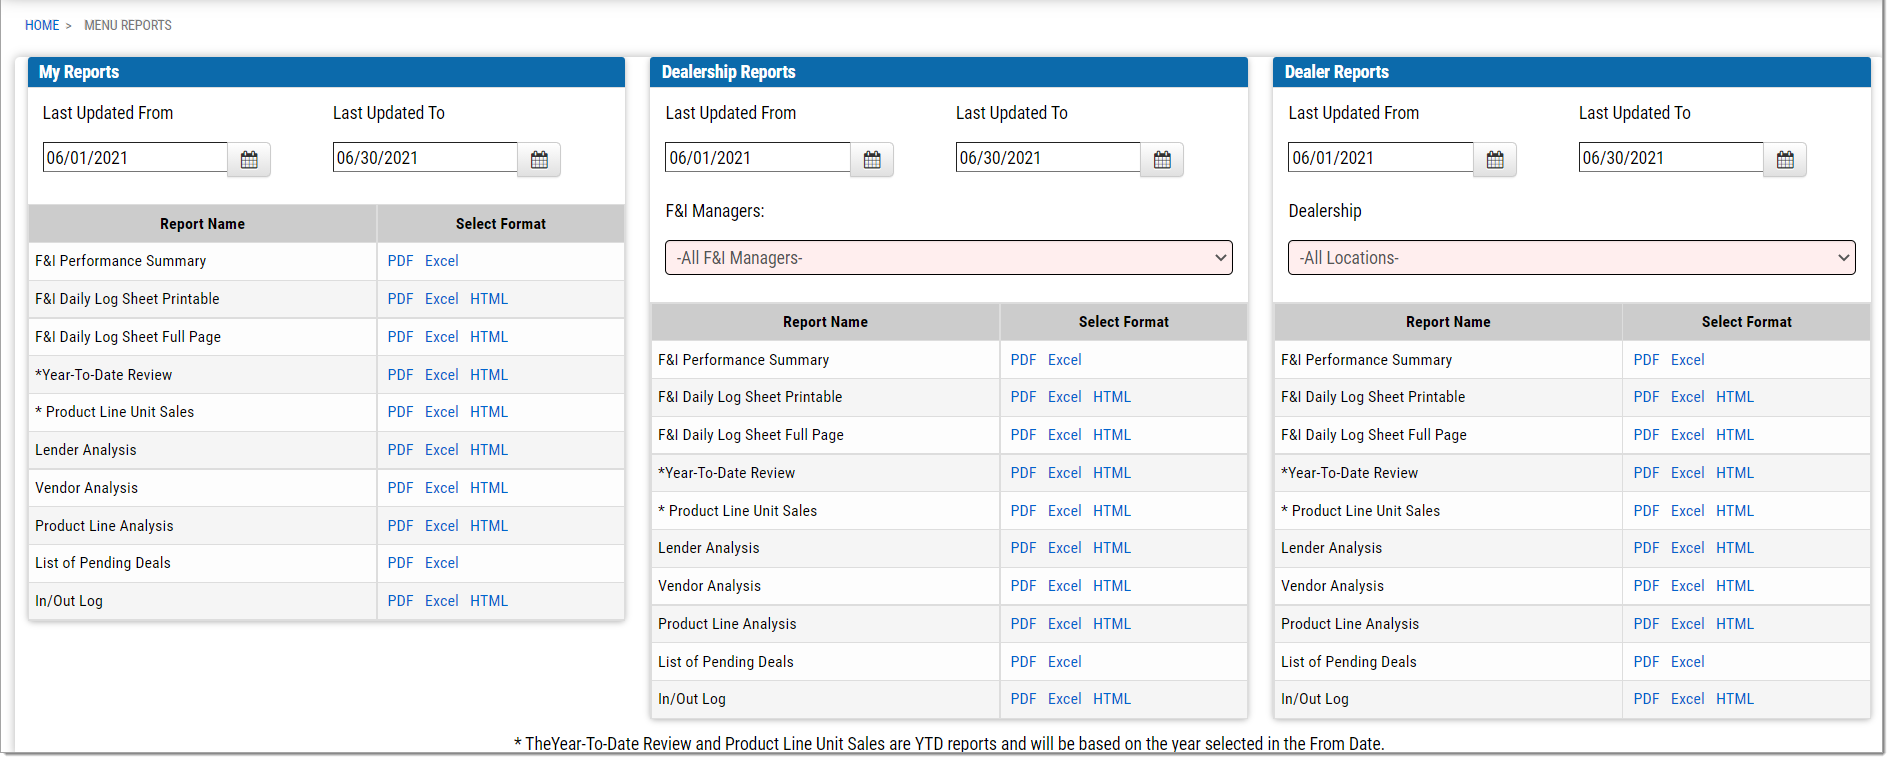
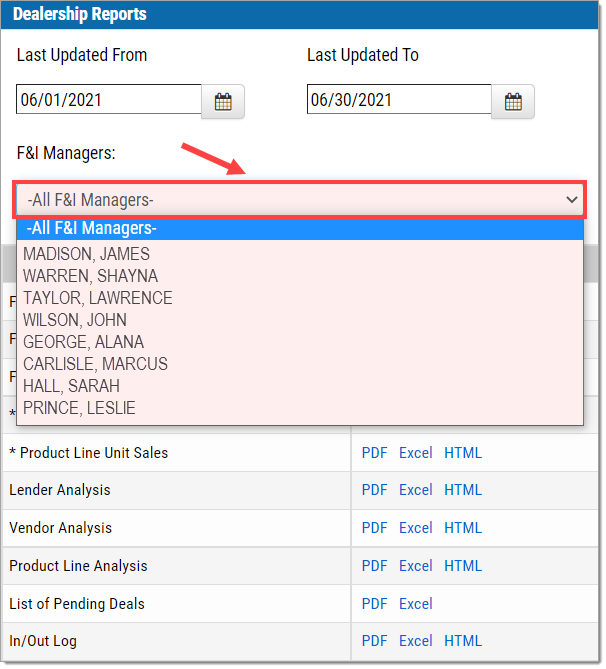
In the Dealership Report section, use the ‘-All F&I Managers-’ dropdown menu to filter results by the associated manager.
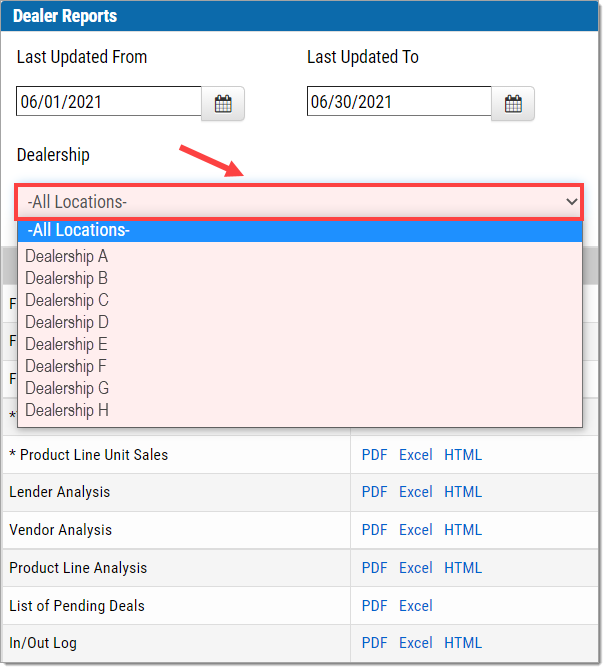
In the Dealer Report section, use the ‘-All Locations-’ dropdown menu to filter results by location.
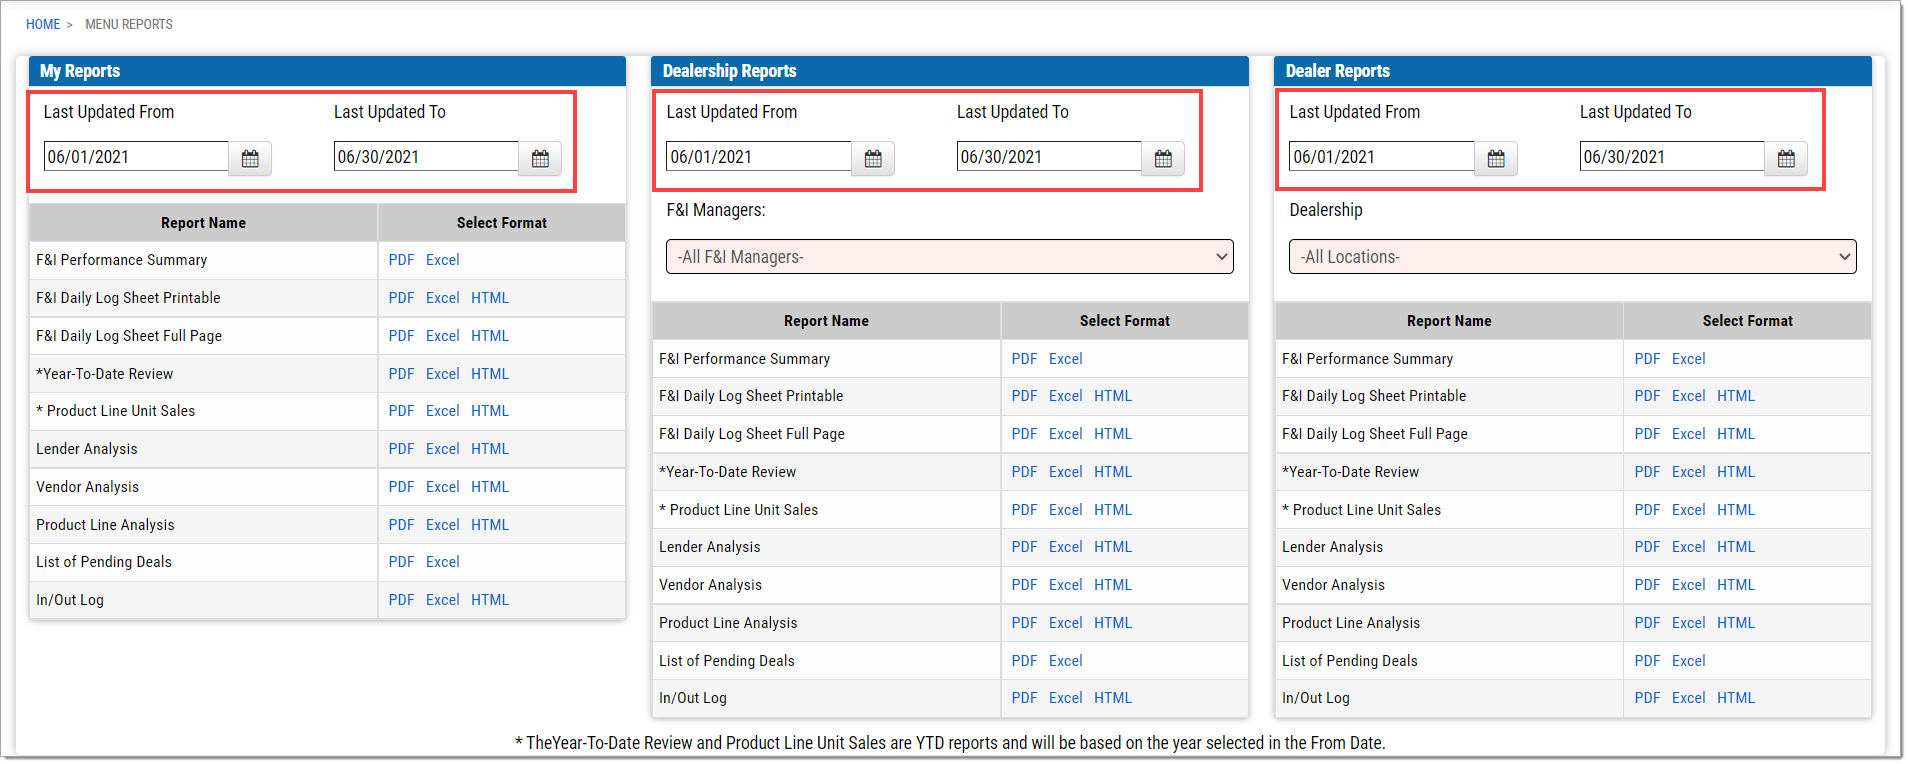
Reports in each of the sections can be filtered by date by using the ‘Last Updated From’ and ‘Last Updated To’ fields.
Reports can be viewed in a PDF, Excel, or HTML format.
Dashboard Reports
MaximTrak Dashboards allow users to view comprehensive MaximTrak sales reports, populated with information directly from the dealer management system.
Dashboards are separated into the ‘Reports’ and ‘Quick View’ tabs.
-
The ‘Quick View’ tab organizes the information into a concise, visual format, either as a chart or summary.
-
The ‘Reports’ tab goes more in-depth, allowing the user to filter reports through several different criteria, as well as view them as printable PDFs or Excel spreadsheets.
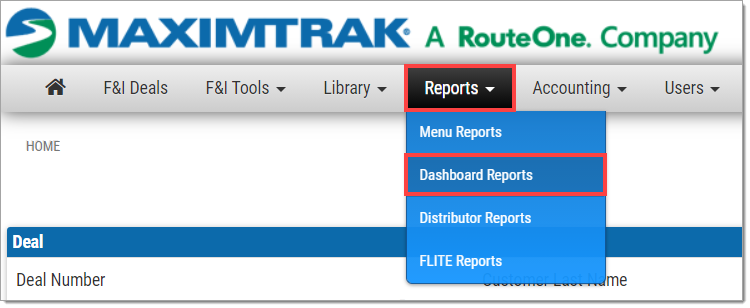
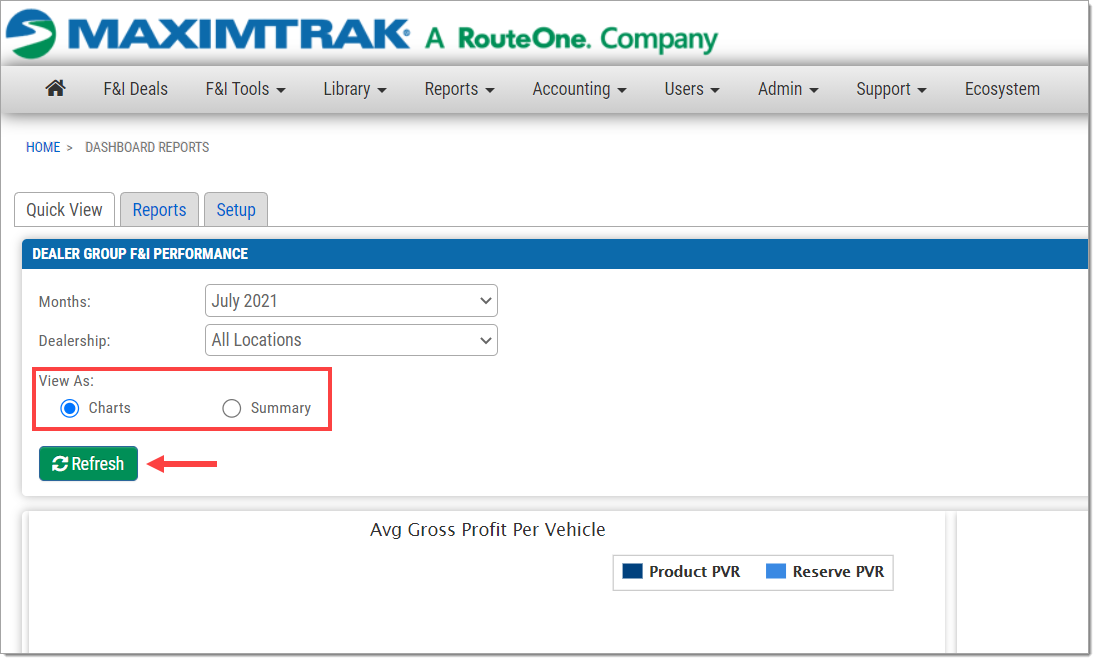
To access Dashboard reports, click on ‘Reports’ on the top navigation bar and select ‘Dashboard Reports.’
Navigate between the ‘Quick View,’ ‘Reports,’ and ‘Setup’ pages using the tabs under the top navigation bar.
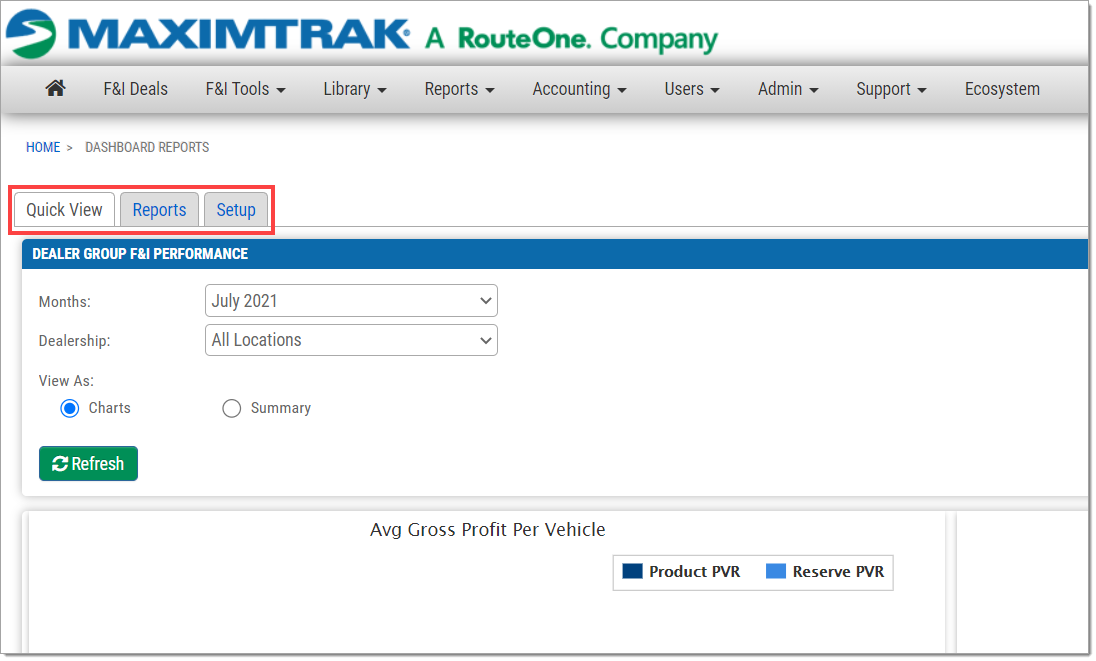
Quick View
The ‘Quick View’ tab organizes the information into a concise, visual format, either as a chart or summary.
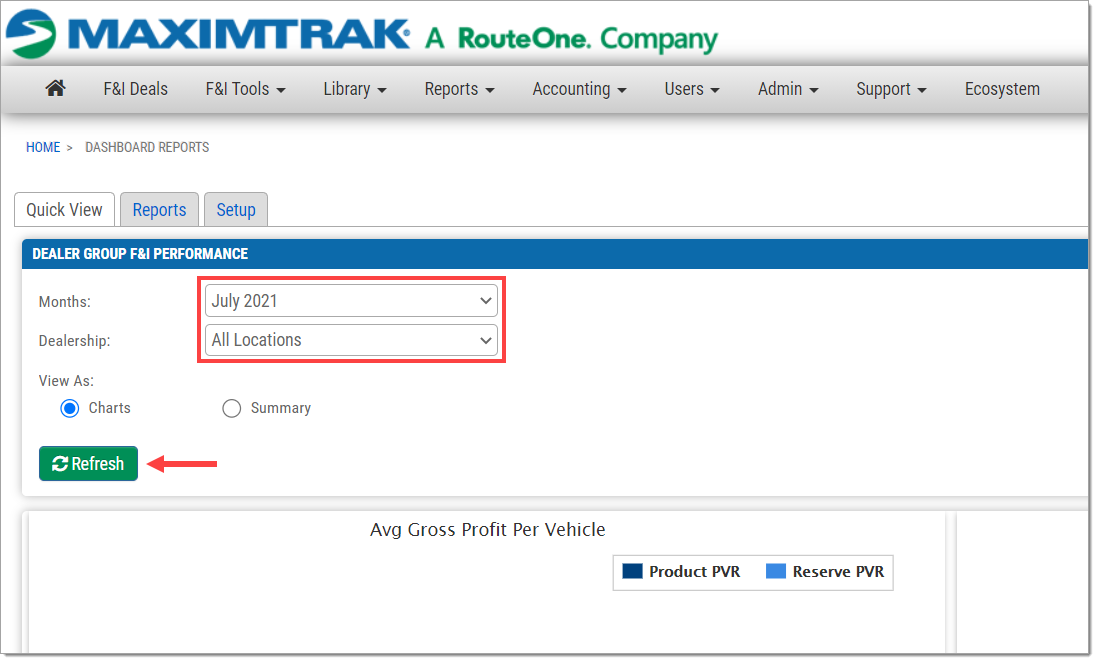
Users can easily change the month and/or location of the data presented using the dropdown menus at the top.
Click ‘Refresh’ to update the data.
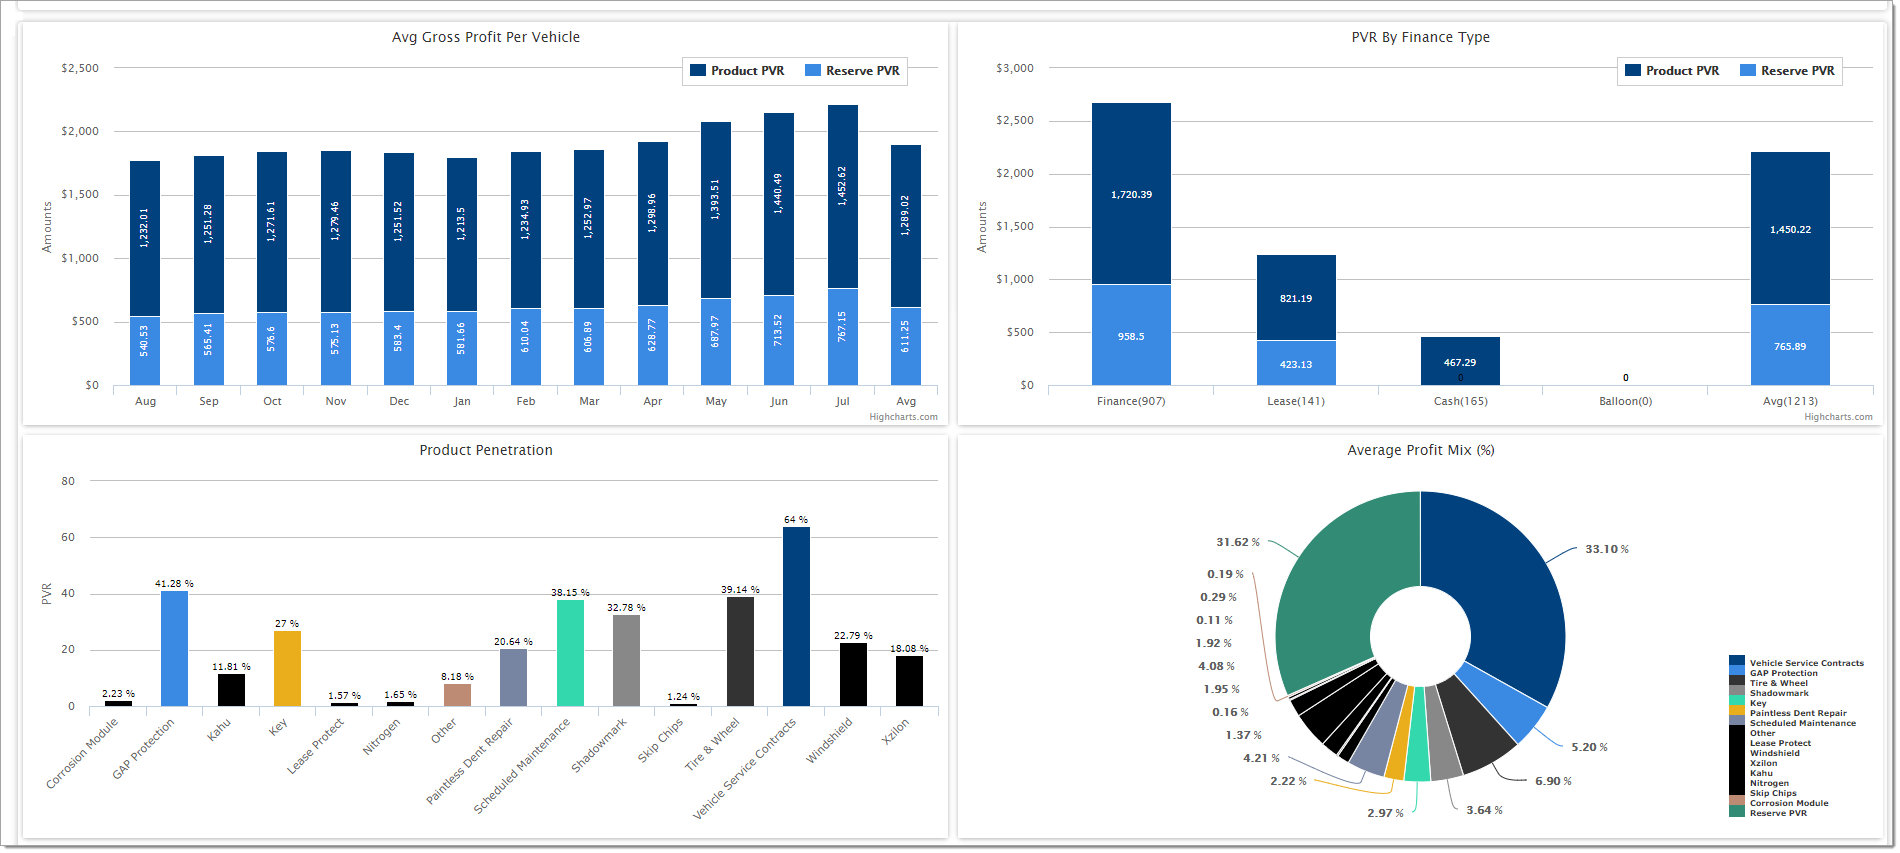
In the Chart view, there are several charts representing different data:
-
Average Gross Profit per Vehicle shows profit trends over the course of the calendar year, separating the gross profits from reserve profits and product sales.
-
PVR by Finance Type shows the monthly gross income separated into finance, lease, or cash deals.
-
Product Penetration shows how often a product was attached to a deal across different product categories.
-
Average Profit Mix (%) shows Product Penetration in a pie chart form.
-
PVR by F&I Managers shows the monthly gross income separated by F&I Manager.
-
PVR and Rate Spread by GSM shows the monthly gross income separated by General Sales Manager.
-
Banks by Reserve Average shows the average reserve gross which was returned by each finance source.
-
Banks by Finance Volume shows the volume of finance sent to each finance source.
To switch to Summary view, click the radio button next to ‘Summary’ under the month and location dropdown menus, then click ‘Refresh.’
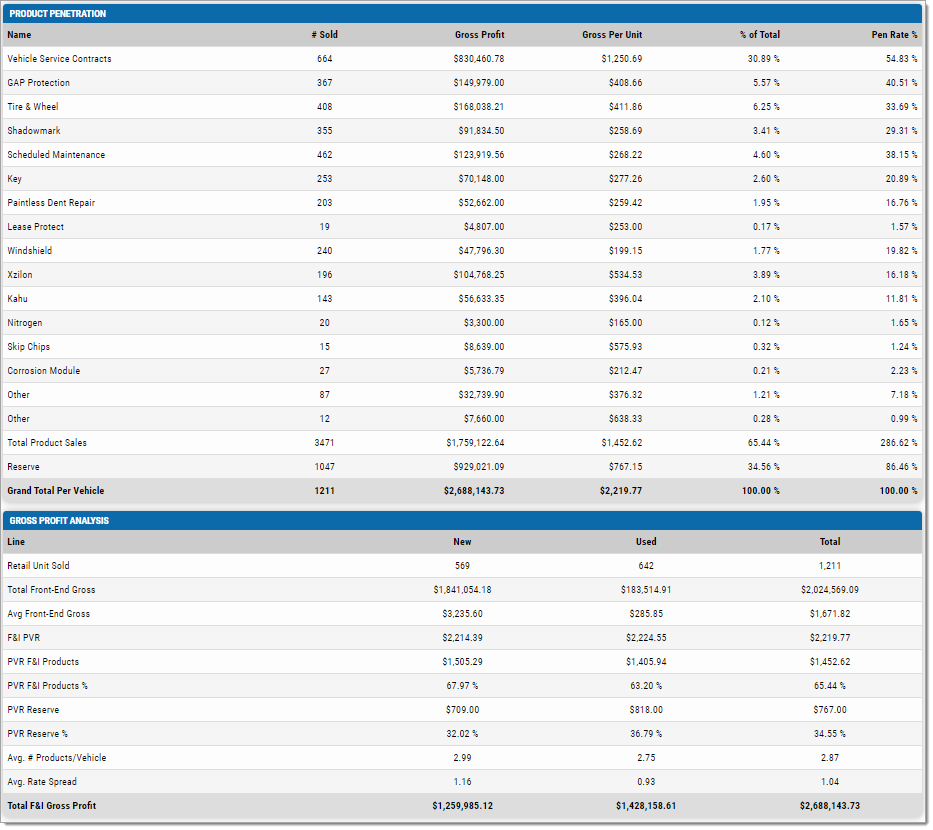
In the Summary view, information is presented as numerical data. There is some information which overlaps with the Chart view, as well as information which doesn’t transfer well into a chart.
-
Product Penetration tracks policies sold and gross statistics
-
Location records units sold and average gross front-end profits by location
-
Gross Profit Analysis analyzes the gross from front-end and back-end profits, separated into product and reserve gross profits.
-
Personnel records units sold and average gross profits by Sales, F&I, and GSM which can be sorted further by category.
-
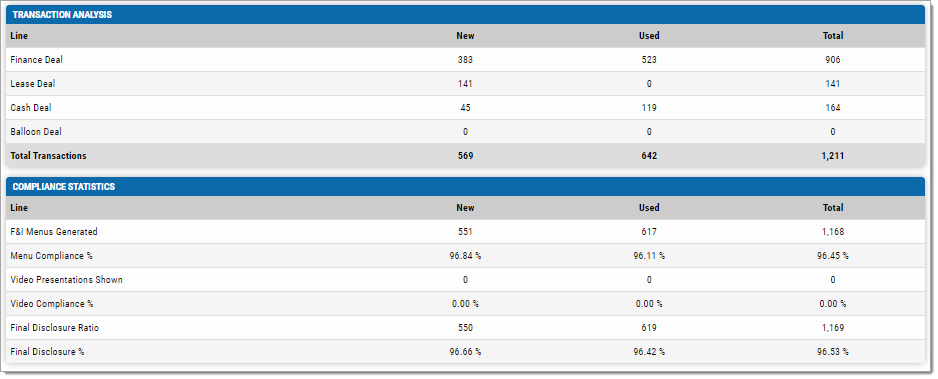
Transaction Analysis records units sold, separated by transaction type.
-
Compliance Statistics compares the number of units sold to the number of menus and disclosures generated in the system in order to give a compliance ratio.
Reports
The ‘Reports’ tab allows users to view the full reports, as well as filter them through several different criteria. Reports can be viewed as PDF or Excel files.
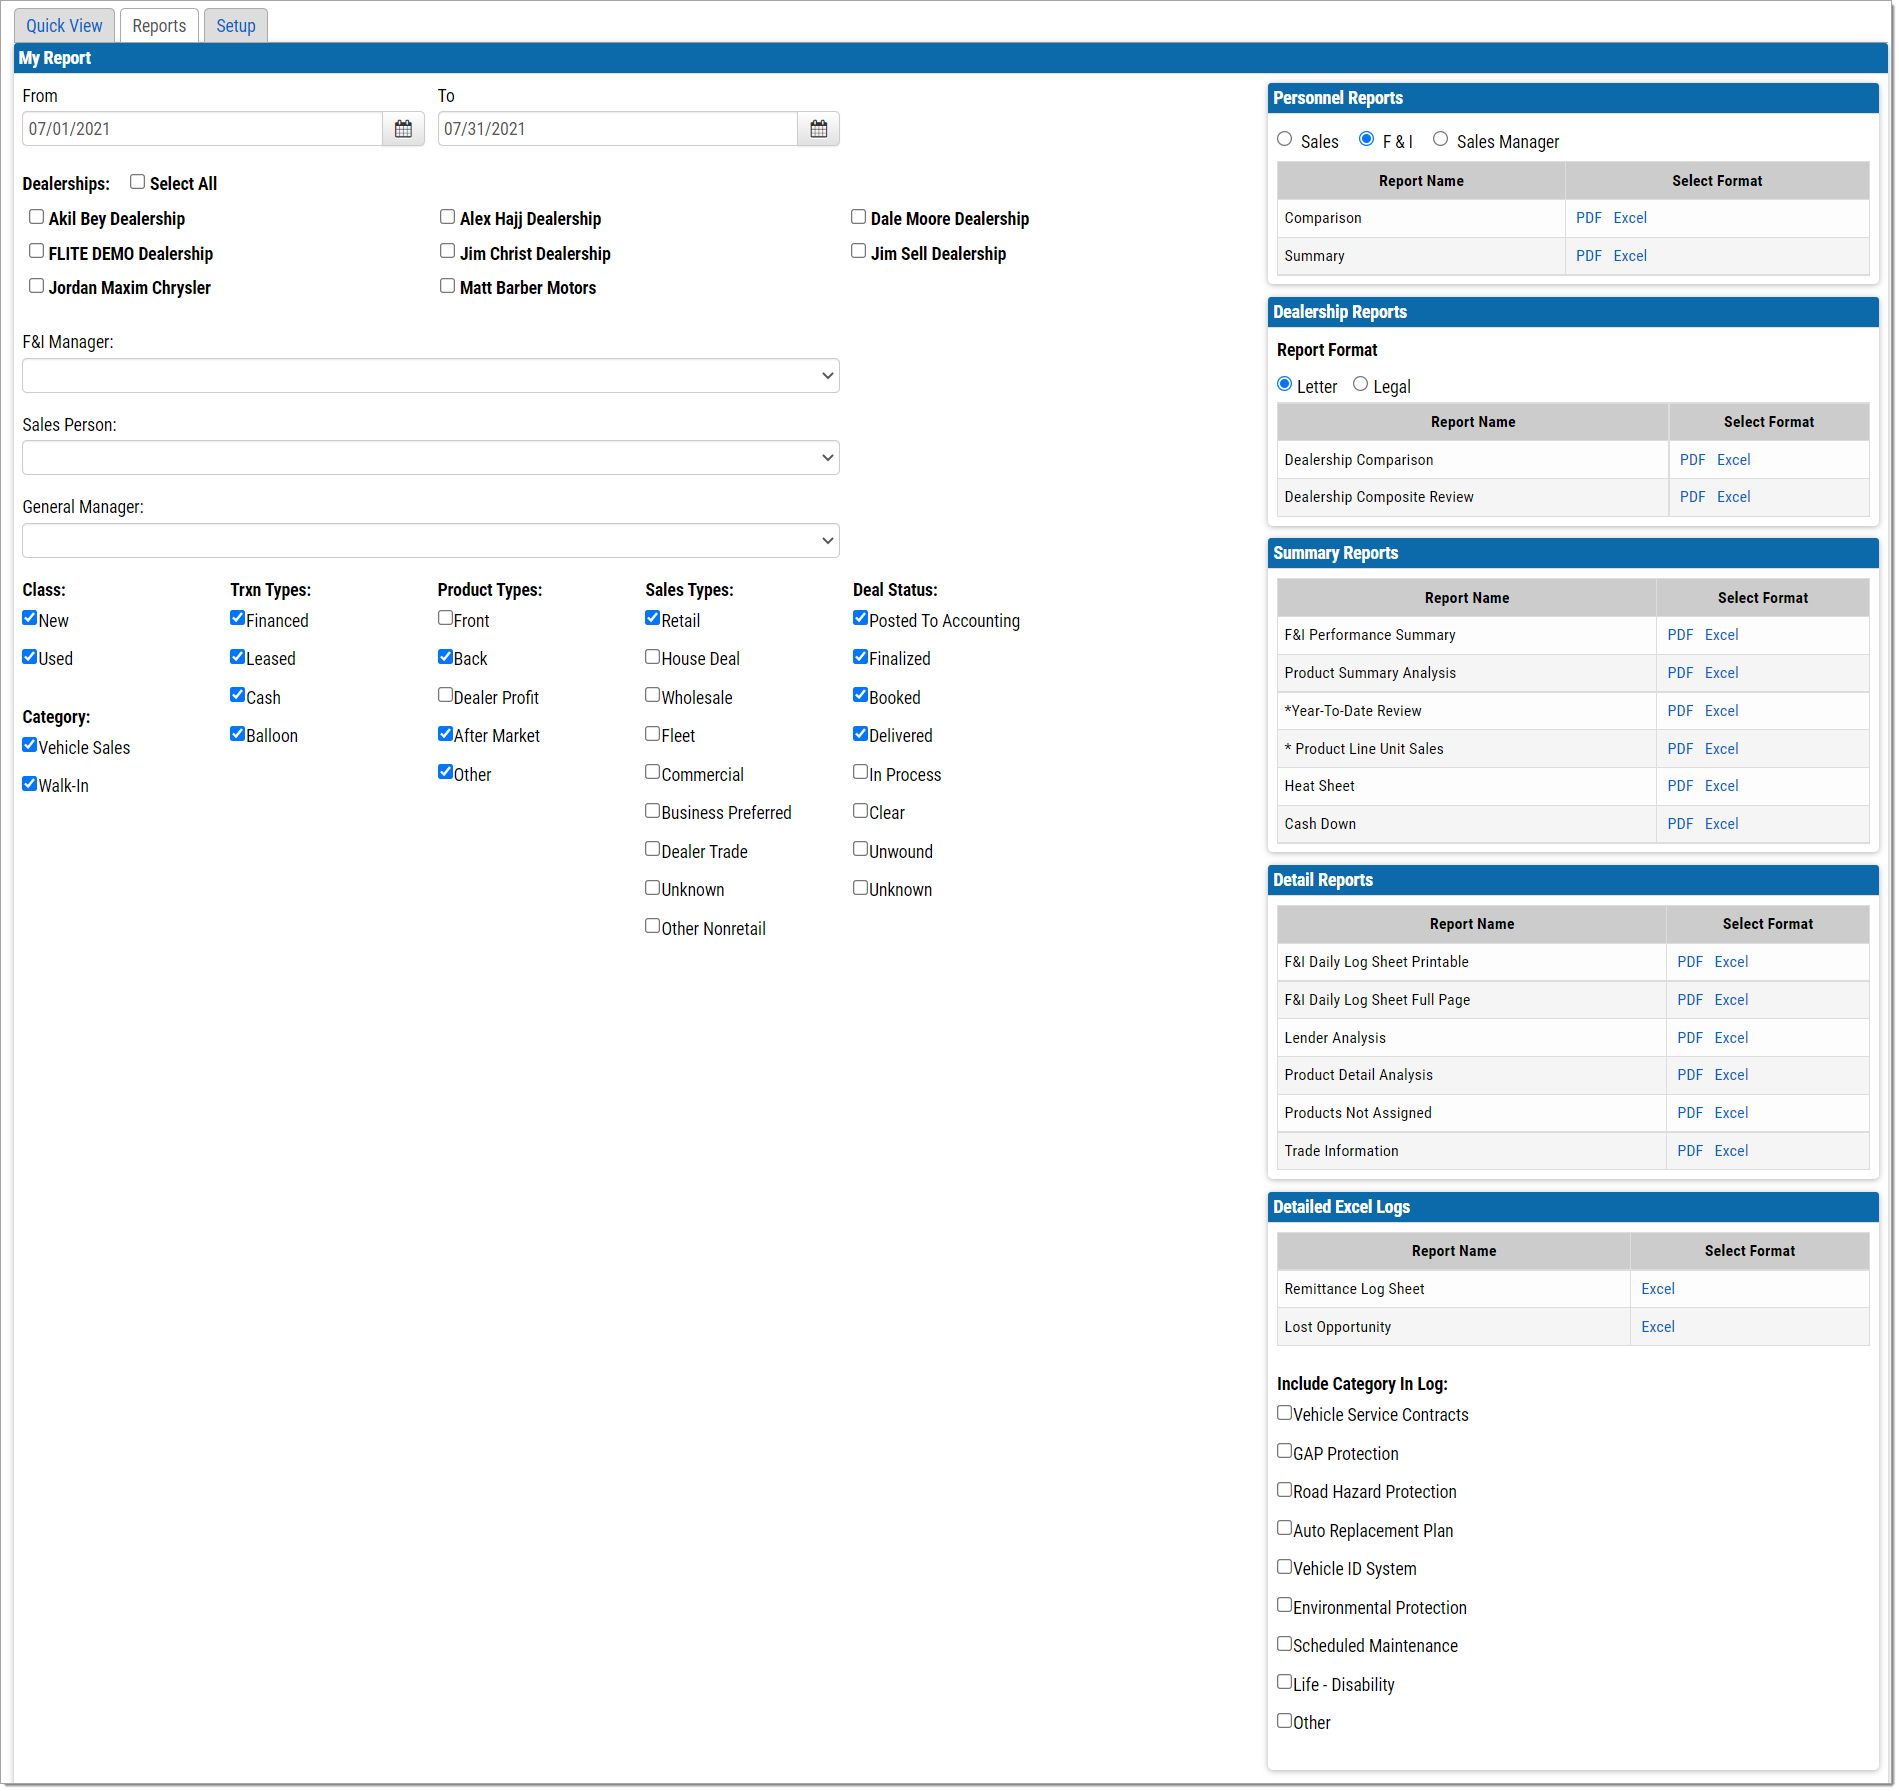
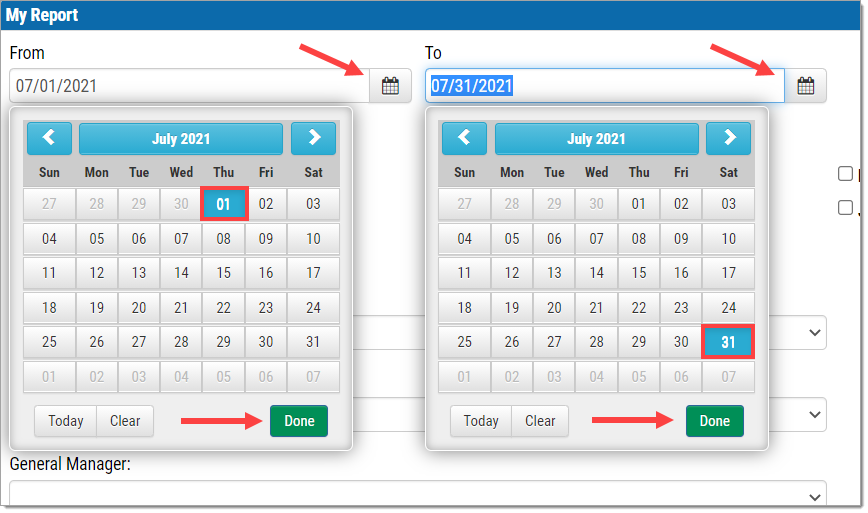
To adjust the date range of the reports, click the calendar icon under ‘From’ and ‘To,’ click the desired dates, and click ‘Done.’ The dates can also be input numerically.
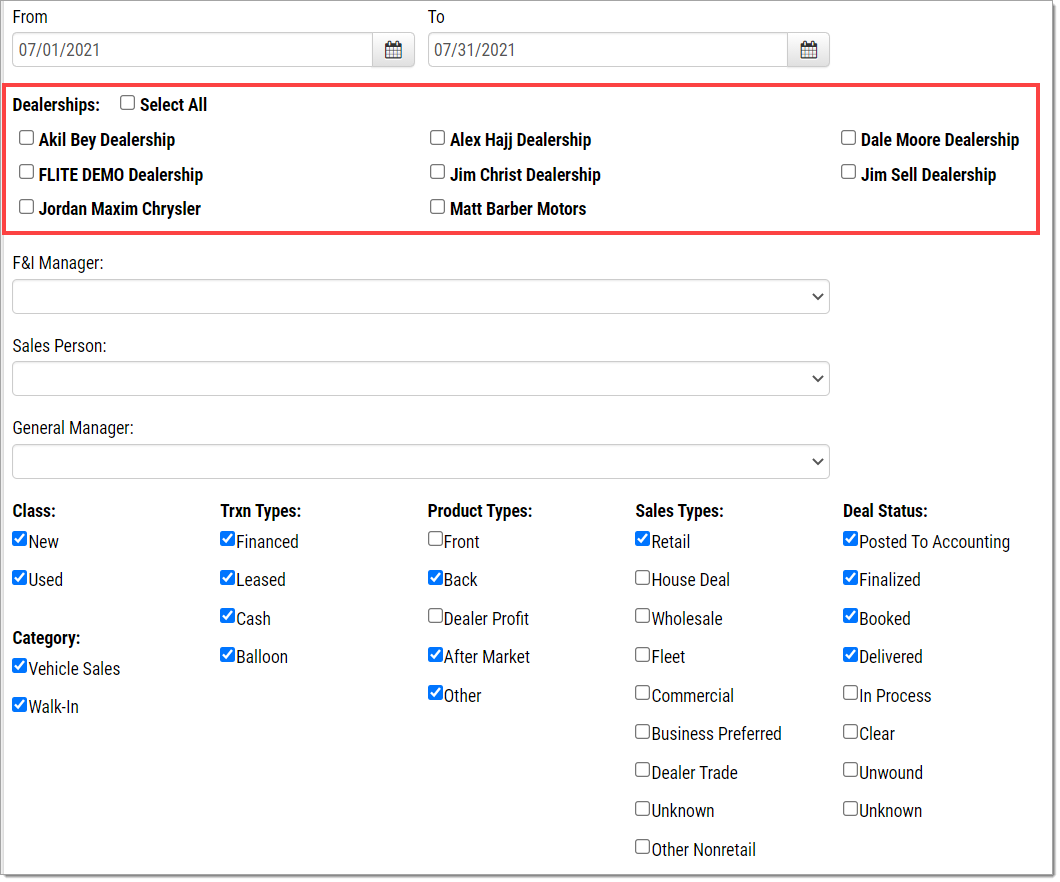
Select dealerships to include in the reports by clicking the checkbox next to each or ‘Select All.’
If no dealerships are selected, the report will be blank.
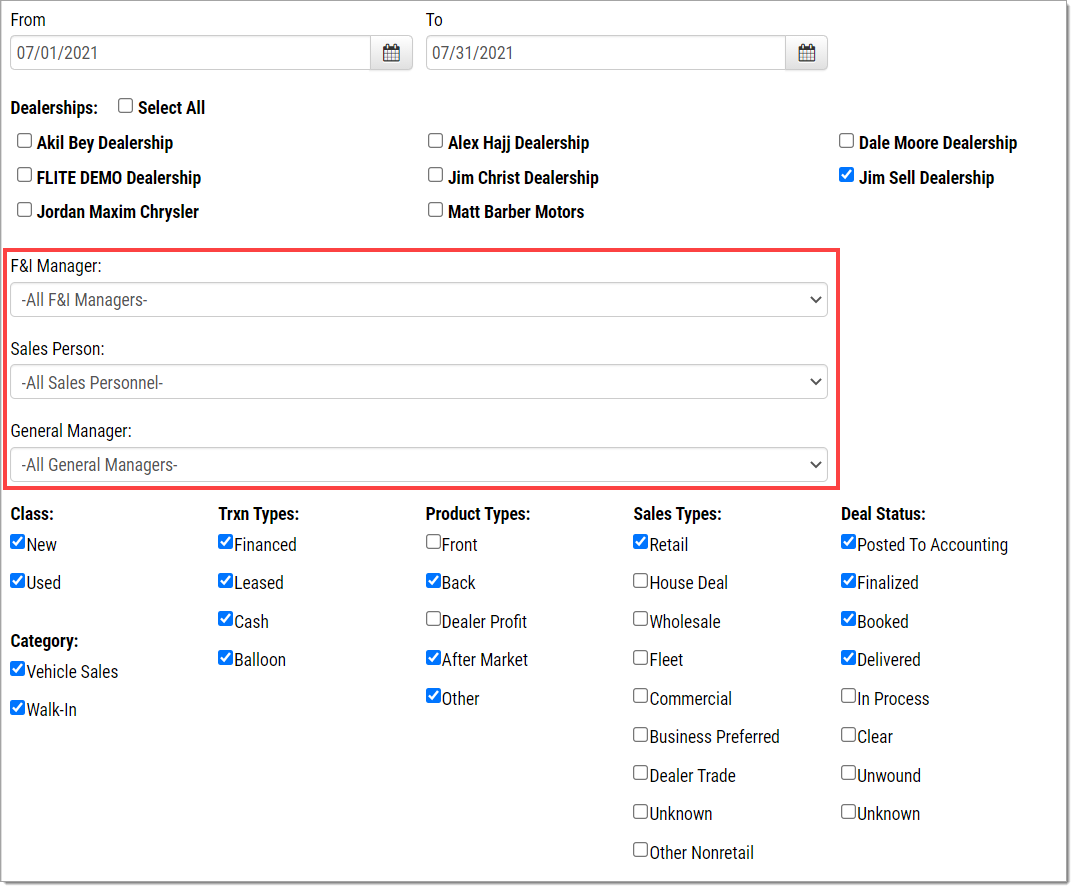
Once dealerships are selected, the F&I Manager, Sales Person, and General Manager dropdown menus will automatically populate with the relevant individuals.
To generate reports based on a single person, use the dropdown menus to select an individual.
Only one individual can be selected. Once an individual is selected, the other two categories will deactivate.
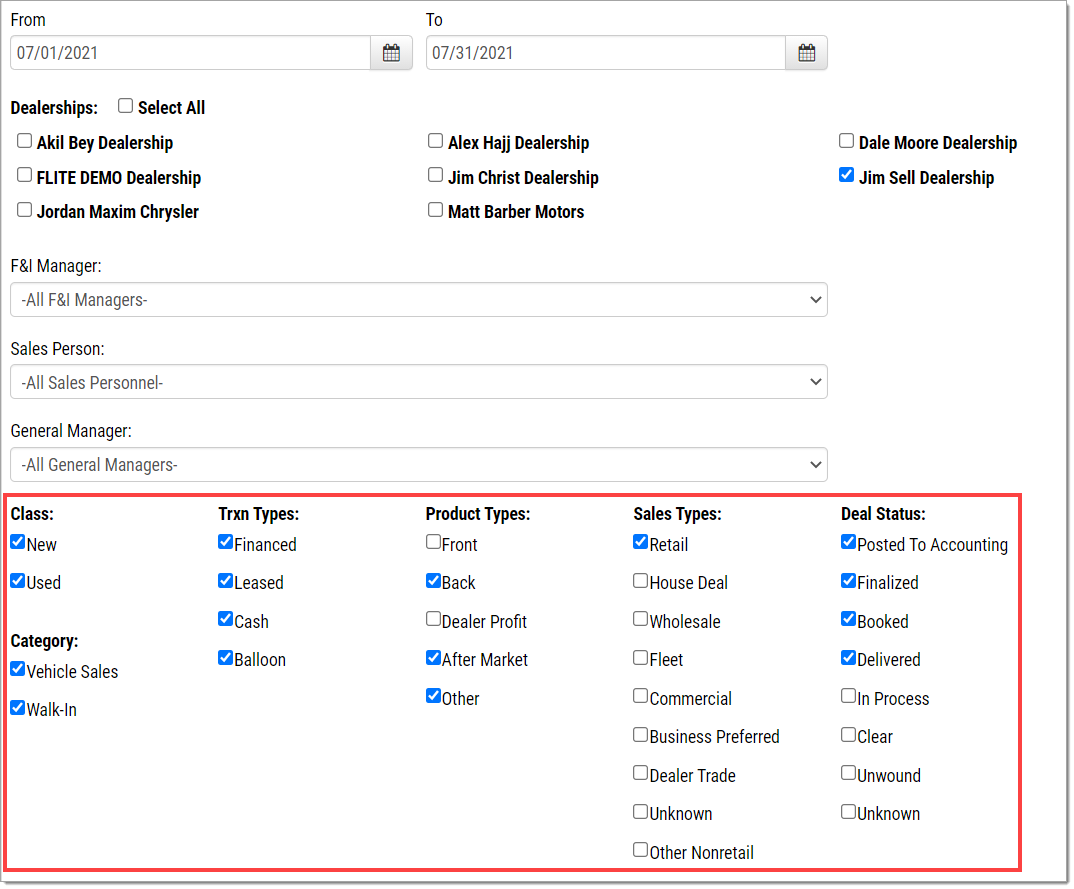
Filter the deals shown in the report based on Class, Category, Trxn Types, Product Types, Sales Types, and Deal Status.
At least one from each category has to be selected, otherwise no data will be generated.
Once all of the criteria are specified, select the desired report to view.
-
If selecting a Personnel, Dealership, or Detailed Excel Report, complete the additional respective criteria. Only the criteria under that specific category must be completed for that report, i.e., just ‘Report Format’ for Dealership Reports.
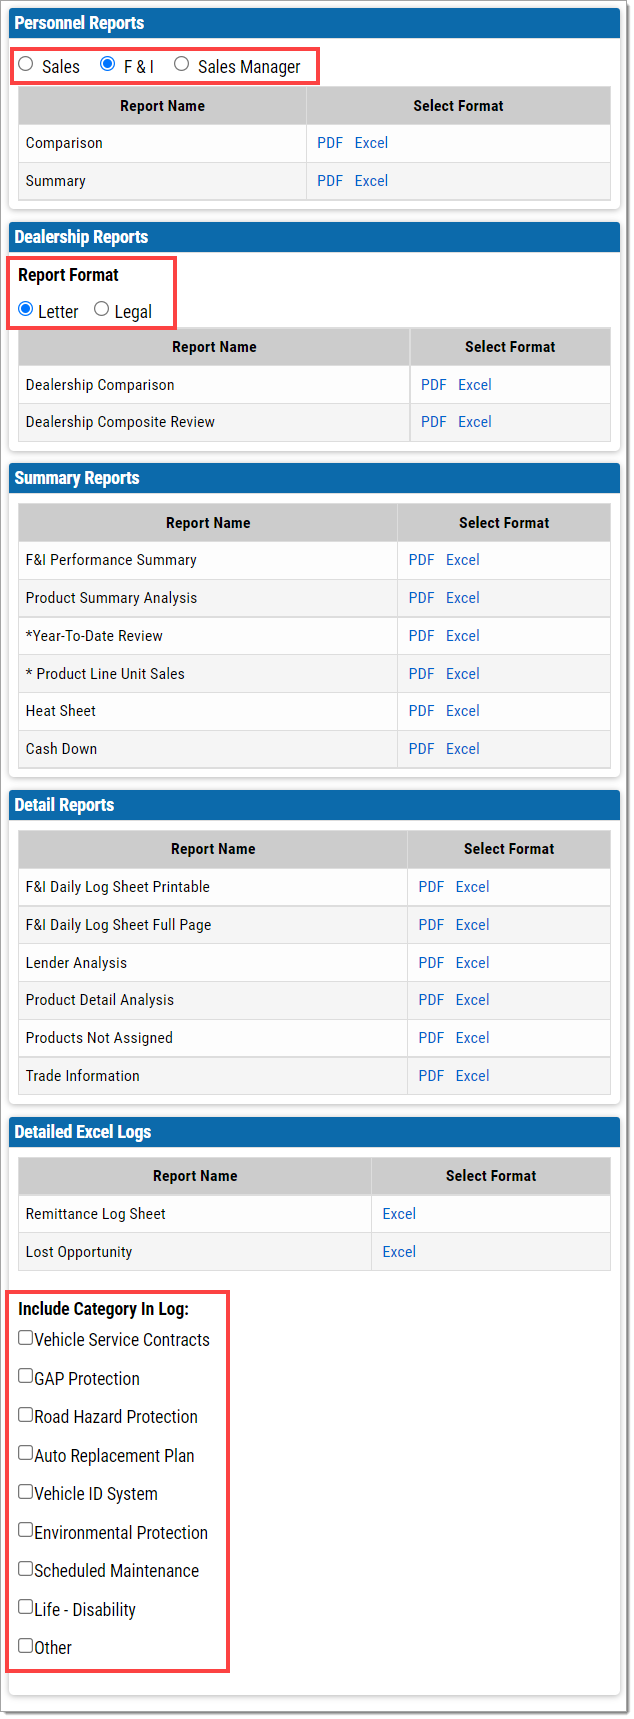
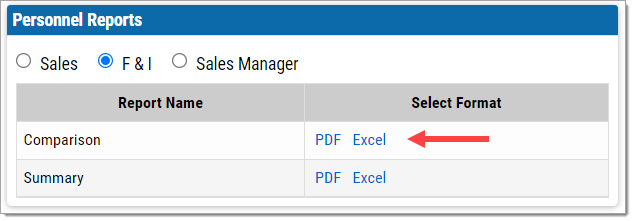
To open the report, click either ‘PDF’ or ‘Excel’ in the ‘Select Format’ column of the desired report.
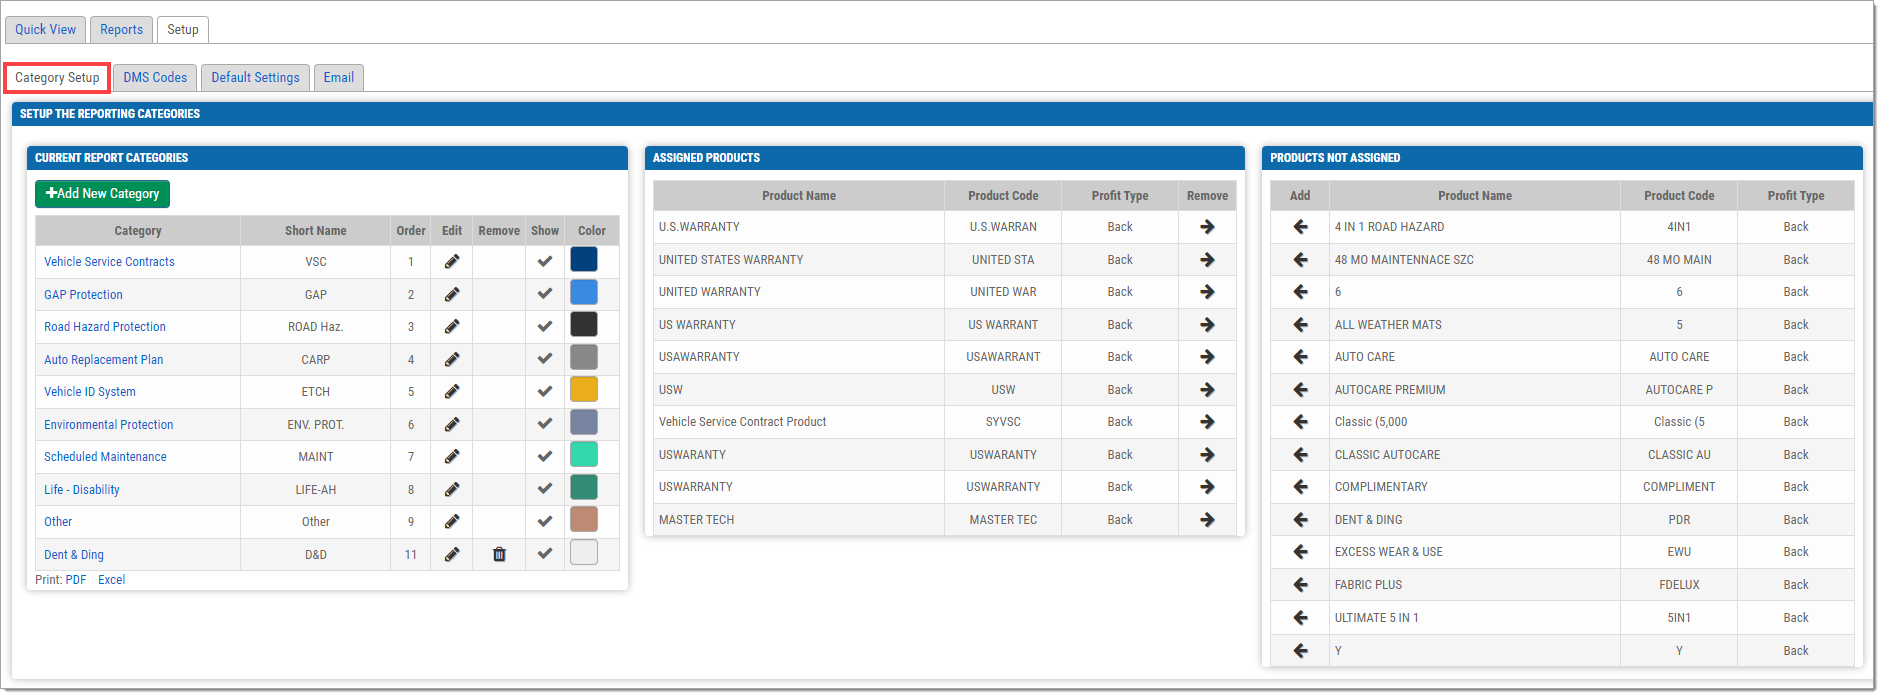
Setup
The ‘Setup’ tab allows you to customize the dashboard reports that are generated.
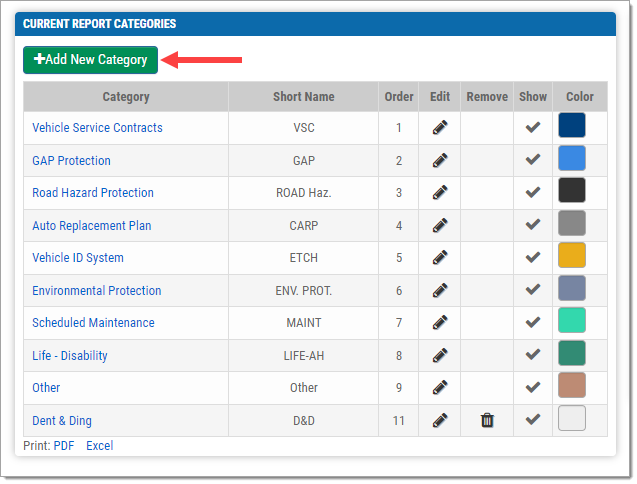
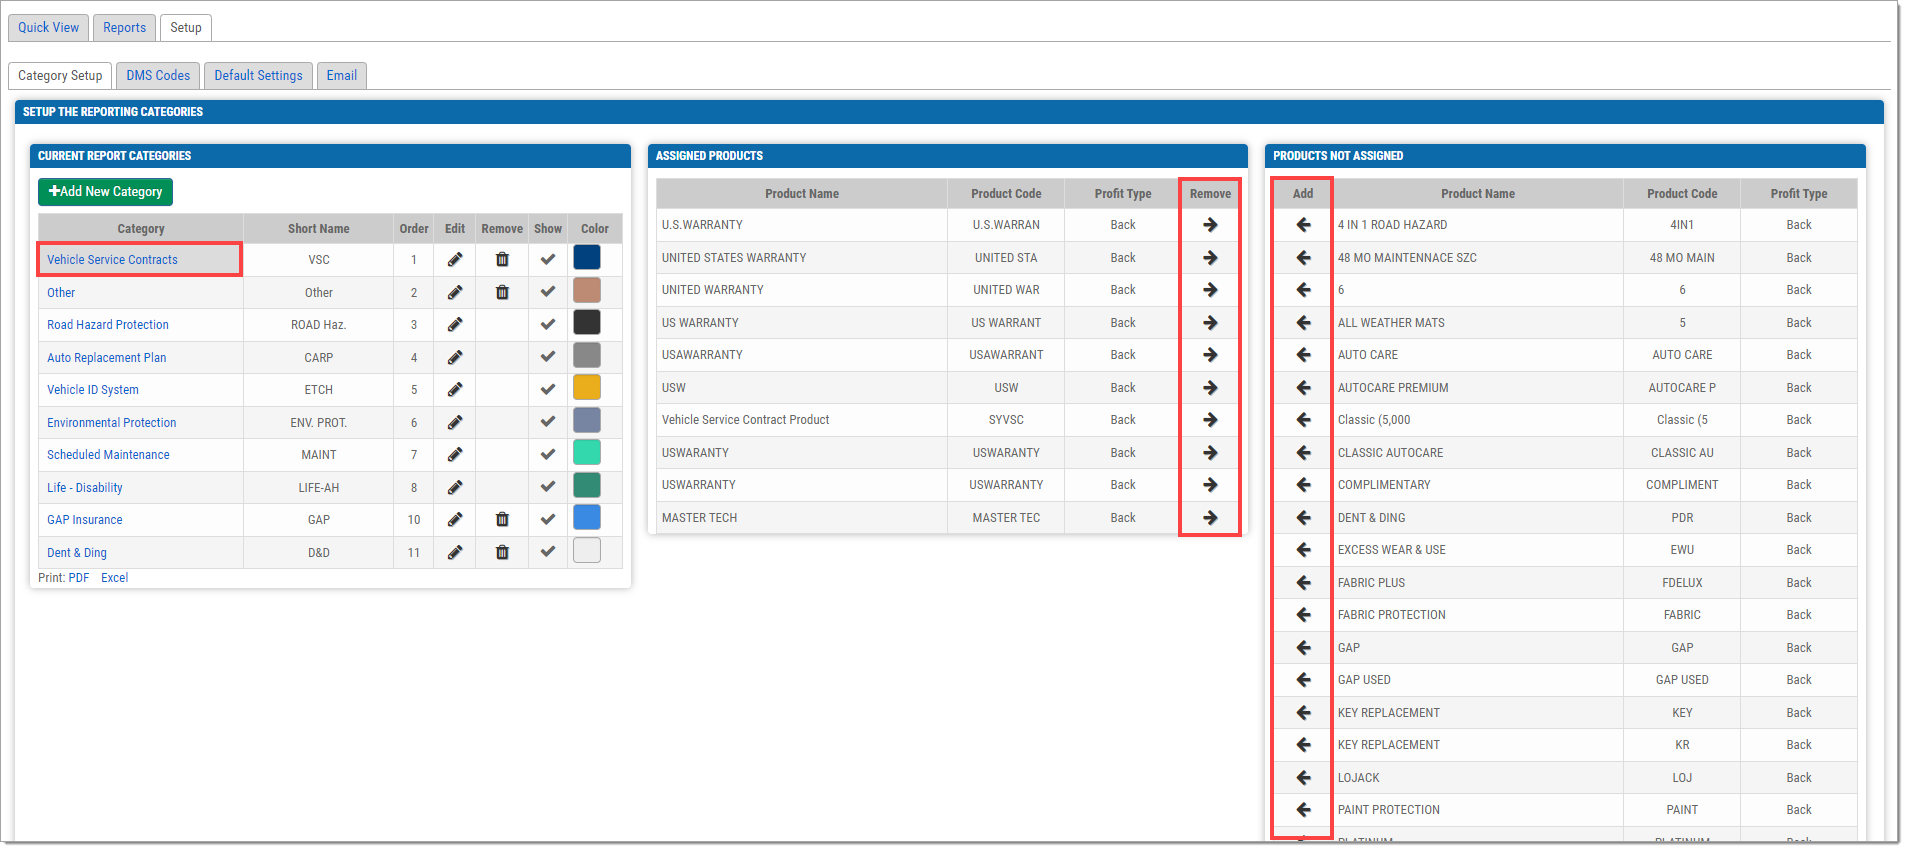
The ‘Category Setup’ tab shows the current report categories, and both the assigned and unassigned products in the selected category.
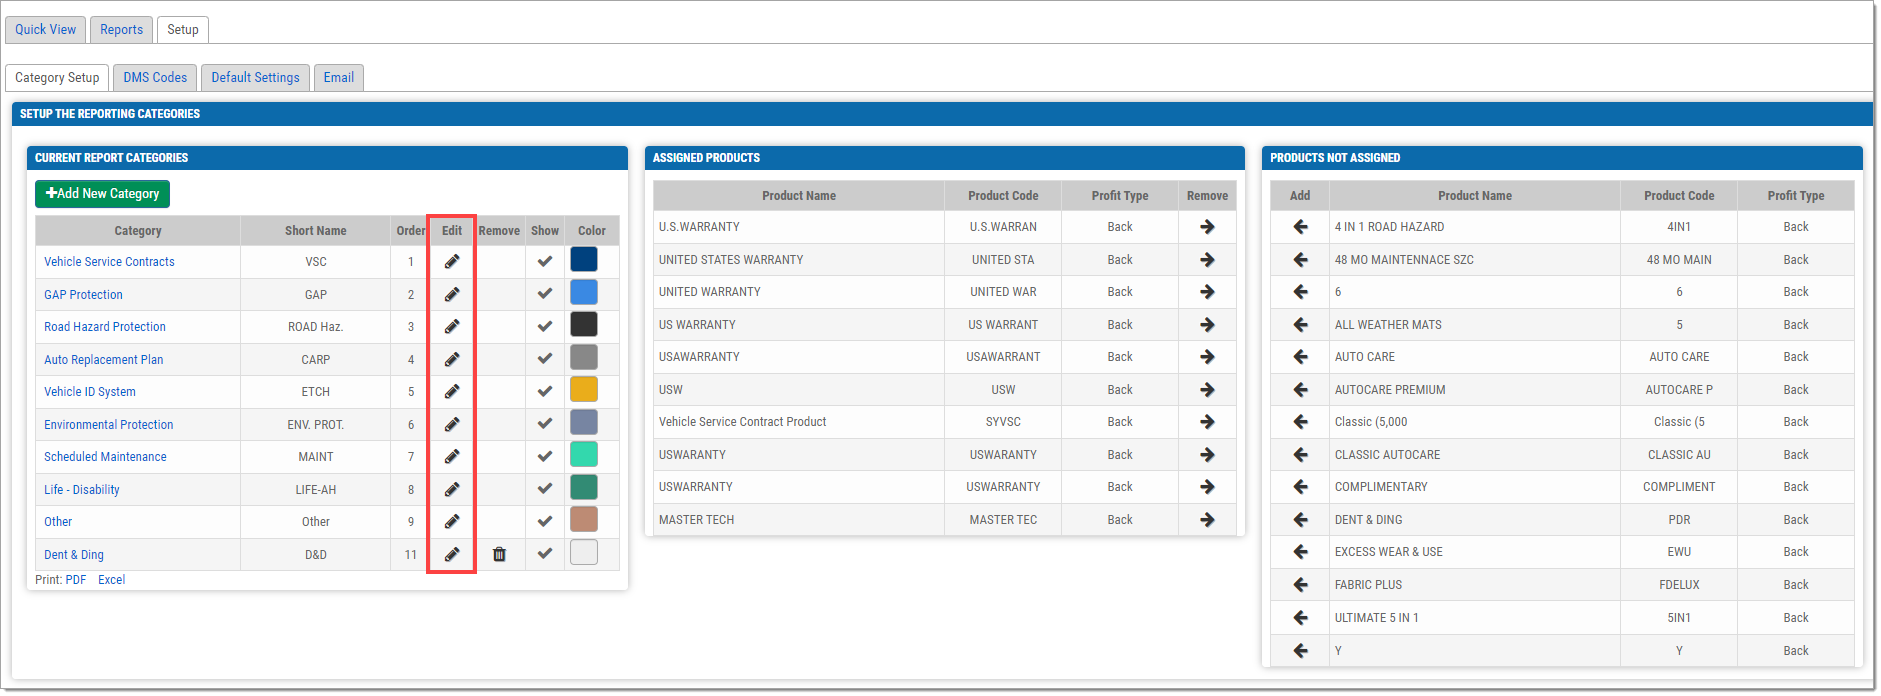
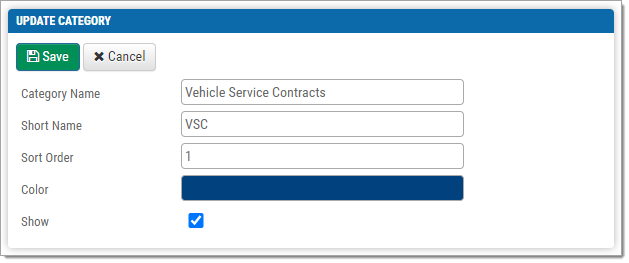
To edit a category, click the pencil icon in the ‘Edit’ column.
-
Update the Category Name or Short Name by editing the field.
-
To change the category’s position in the order, update the ‘Sort Order’ field. Make sure to update the category that is being replaced as well.
-
Update the color by clicking on the current color and using the cursor to select a new one, inputting RGB and HSV values, or inputting a hex code (e.g. #31be9f).
-
To remove a category from the report without deleting it altogether, uncheck the ‘Show’ checkbox.
Click ‘Save.’
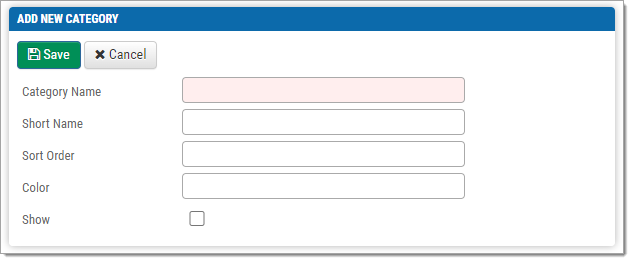
New categories can also be added. To do so, click the ‘+Add New Category’ button.
Fill in the fields.
Click ‘Save.’
To assign or unassign products to a category, first select a category by clicking the corresponding row. The active category will be highlighted in grey.
Move products back and forth between the Assigned and Not Assigned sections by using the arrow buttons.
Products can only be in one Category at a time. To move a product from one Category to another, you must first remove the product from the original Category.
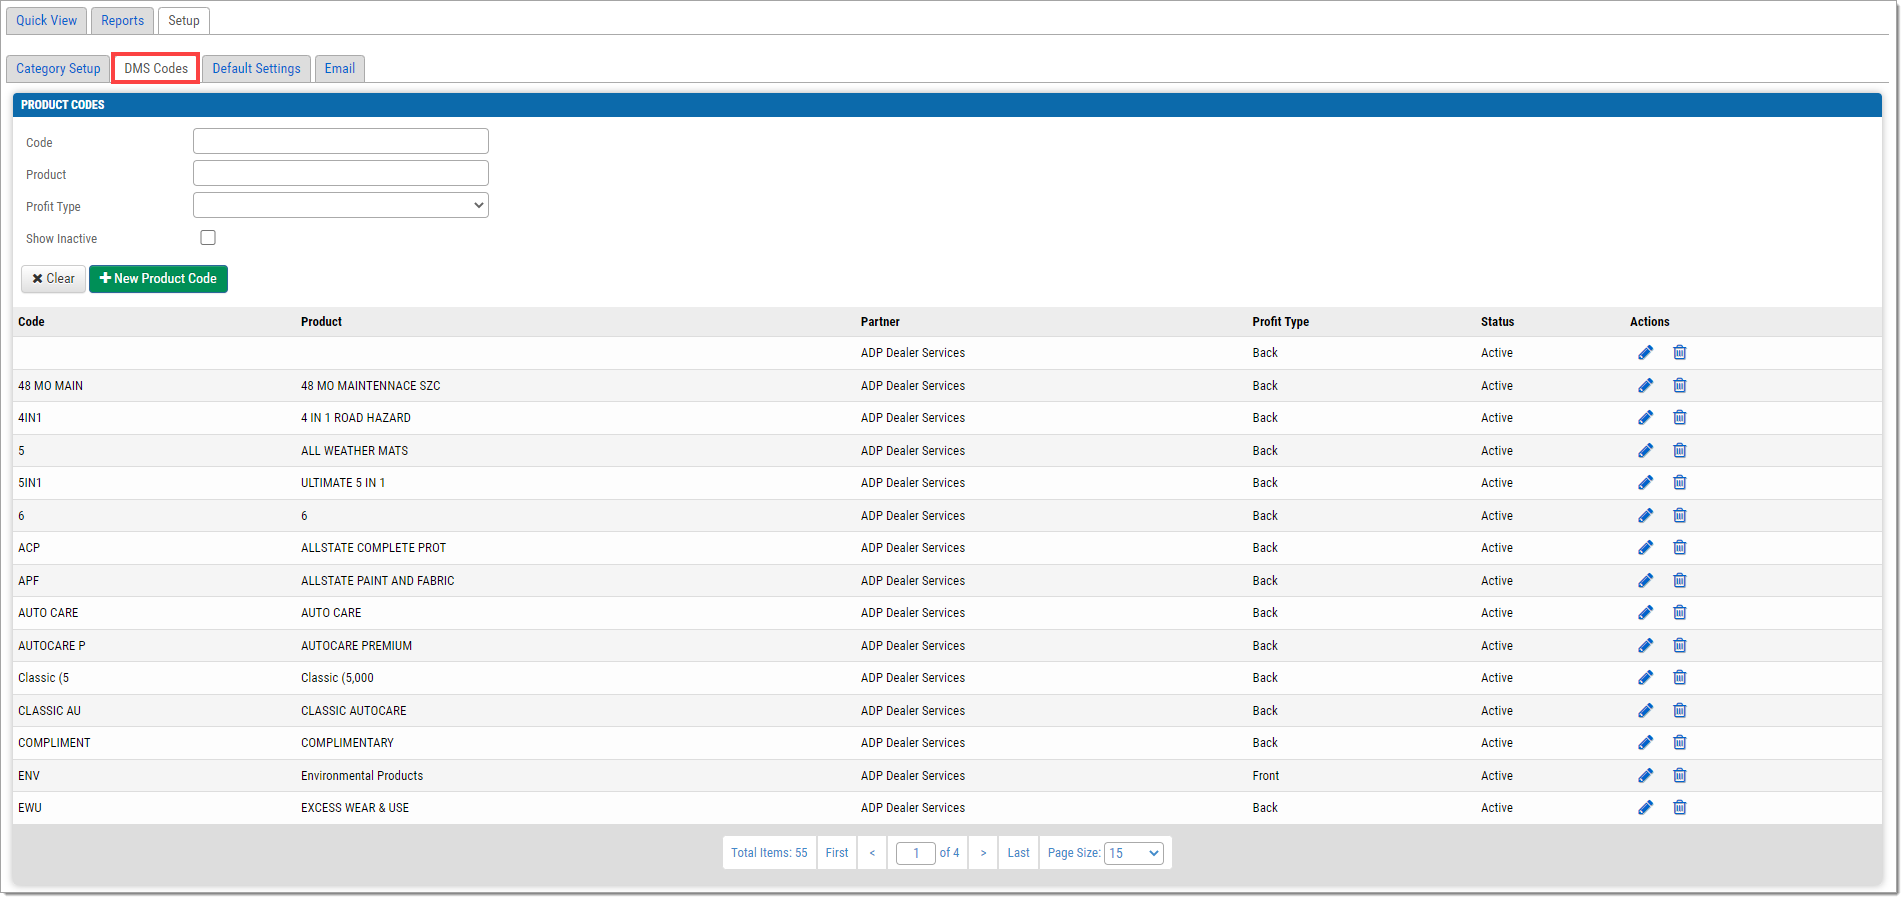
The ‘DMS Codes’ tab allows you to search and edit available product codes, as well as add new ones.
Codes can be searched by Code, Product, or Profit Type. When inputting search criteria, the list will automatically update. To reset the list, click ‘Clear.’
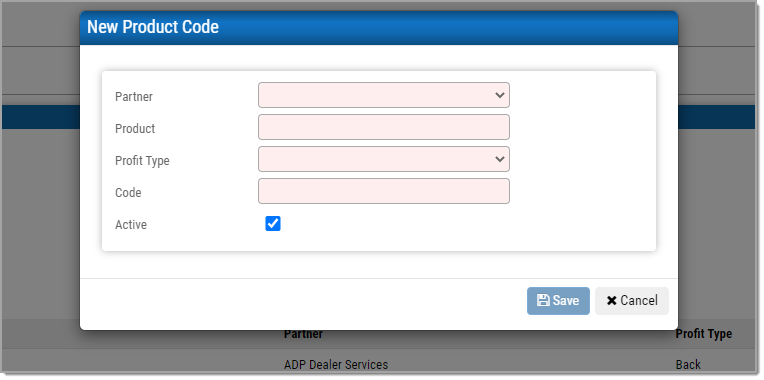
To add a new code, click ‘+New Product Code.’
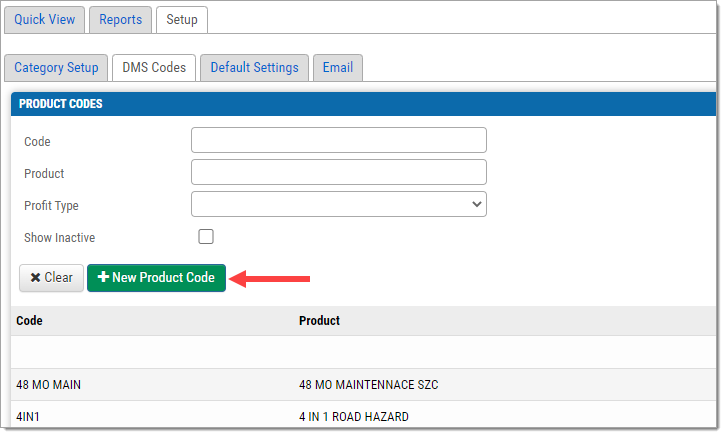
Fill in the fields and click ‘Save.’
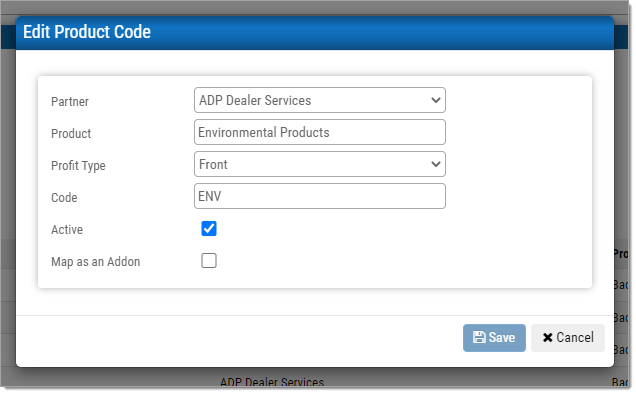
To edit an existing code, click the pencil icon under the ‘Actions’ column of the code.
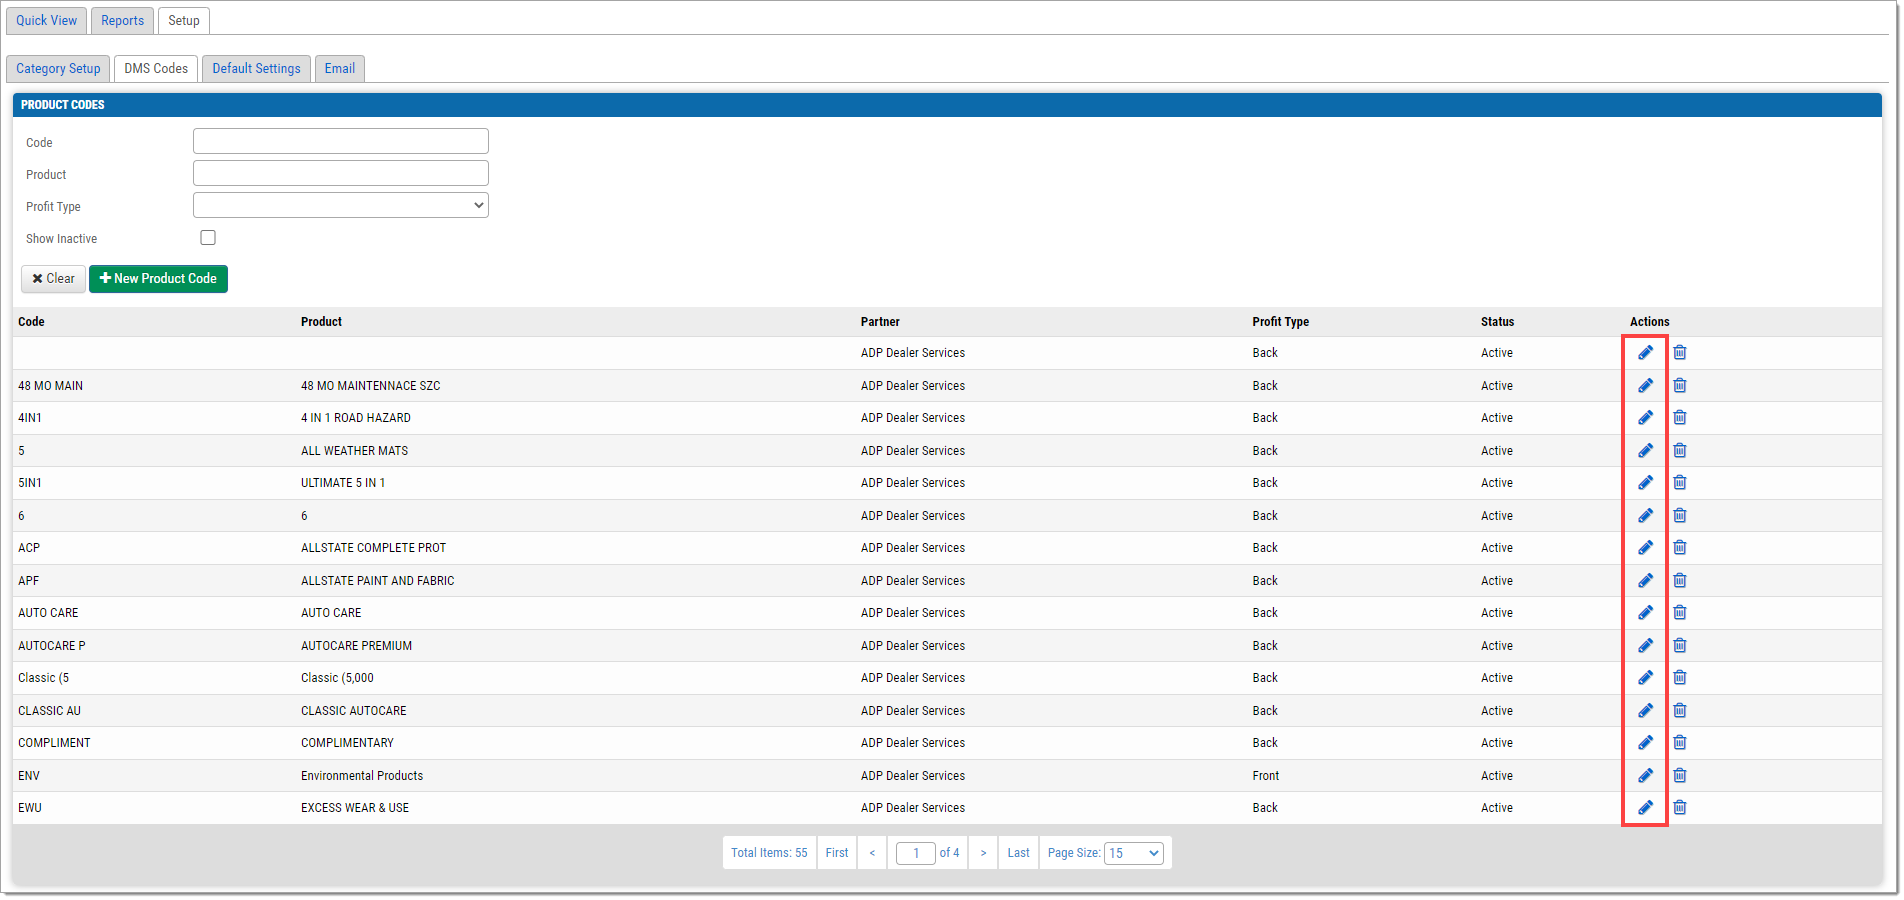
Once the edits are complete, click ‘Save.’
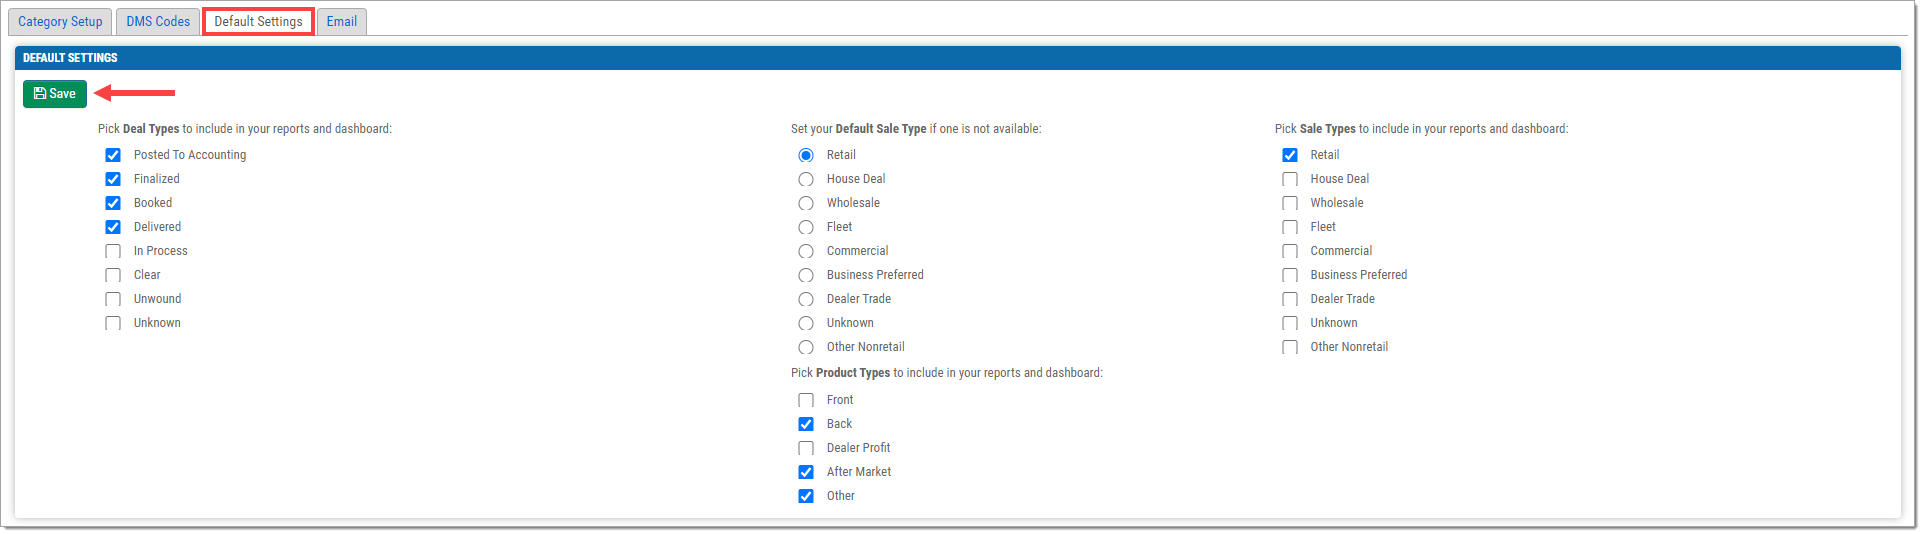
The ‘Default Settings’ tab allows you to customize what kind of information appears in the reports and dashboard. Use the checkboxes and radio buttons to select your preferred Deal Types, Default Sale Type, Product Types, and Sale Types, then click the ‘Save’ button.
The ‘Email’ tab allows you to add and edit Email Events, where reports can be emailed to designated recipients at specific times.
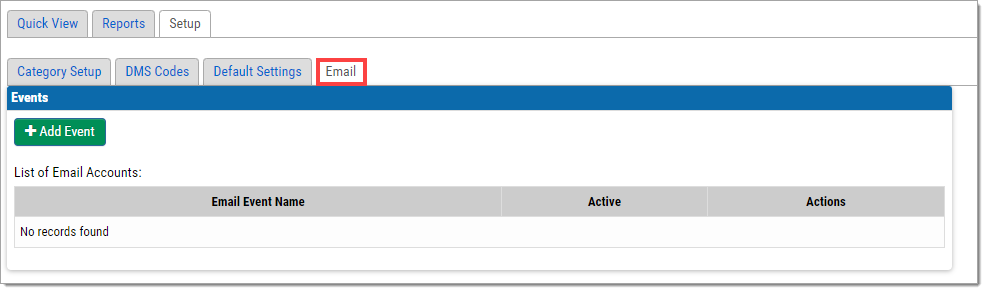
To add a new Email Event, click ‘+Add Event.’
-
The fields ‘Email Event Name,’ ‘Frequency,’ and ‘Start Date’ are required. The ‘Time of Delivery’ defaults to 7:00 AM if not otherwise indicated and is based on the time zone of the dealership as it was set up in Menu.
-
Use the checkboxes to indicate which Reports and Graphs to attach, as well as the Reports Parameters (Sales, F&I, or Sales Manager).
-
If necessary, add an End Date.
-
Click ‘Select Recipients’ to add recipients. This can also be done later.
- Emails from activated dealership users will be available to select. Use the checkboxes to select recipients, then click ‘Save.’
Double check the fields for accuracy and click ‘Save.’

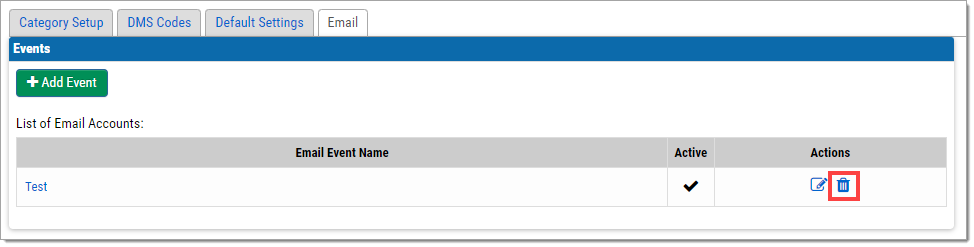
If the current date is within an Email Event’s time window, a check mark will appear under the ‘Active’ column in the Events section.
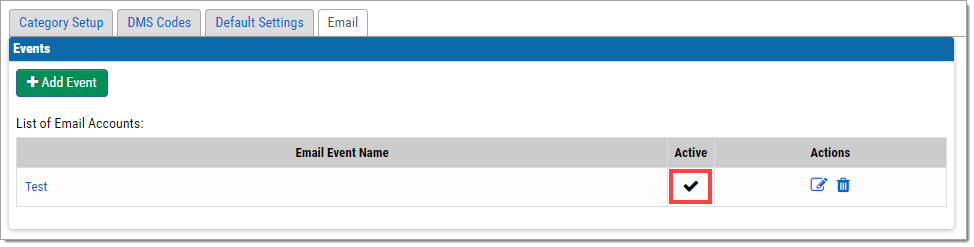
To edit an Email Event, click the pencil-on-paper icon under the ‘Actions’ column. Every aspect of the Event can be edited. Once finished, click the ‘Save’ button.

To remove an Email Event, click the trash icon under the ‘Actions’ column.
There is no confirmation message for deleting an Email Event, so please make sure the correct Event is being deleted.
ROUTEONE SUPPORT
Hours (EST)
Monday - Friday: 6:00am – Midnight
Saturday: 9am – 9pm
Can’t find what you need?
Try our search
