In This Guide:
Related Guides:
Menu
Product Category Mapping
Category Mapping
It is important for reporting accuracy to properly assign (map) all available product categories to your user. Categories that are not assigned (mapped) will be reported in a system category titled ‘Unassigned Products.’
There are two types of categories, ‘Parent Categories’ and ‘Child Categories.’
Parent Categories: These categories are used in all reports that contain product-related data. Users can choose to use the system-provided categories or create custom categories at the parent client level.
Child Categories: These categories exist at each individual dealership level that your user has reporting access to. Only Child Categories must be mapped.
For example, if you have access to DealerGroup1 and this dealer group has five dealerships (stores) within it, the Parent Categories represent the DealerGroup1 and the Child Categories are for each of the five dealerships’ products.
The Category Mapping Setup Page
To access the Category Mapping Setup page, click the Navigation Menu button.
Click ‘Settings’ and select ‘Category Mapping Setup.’
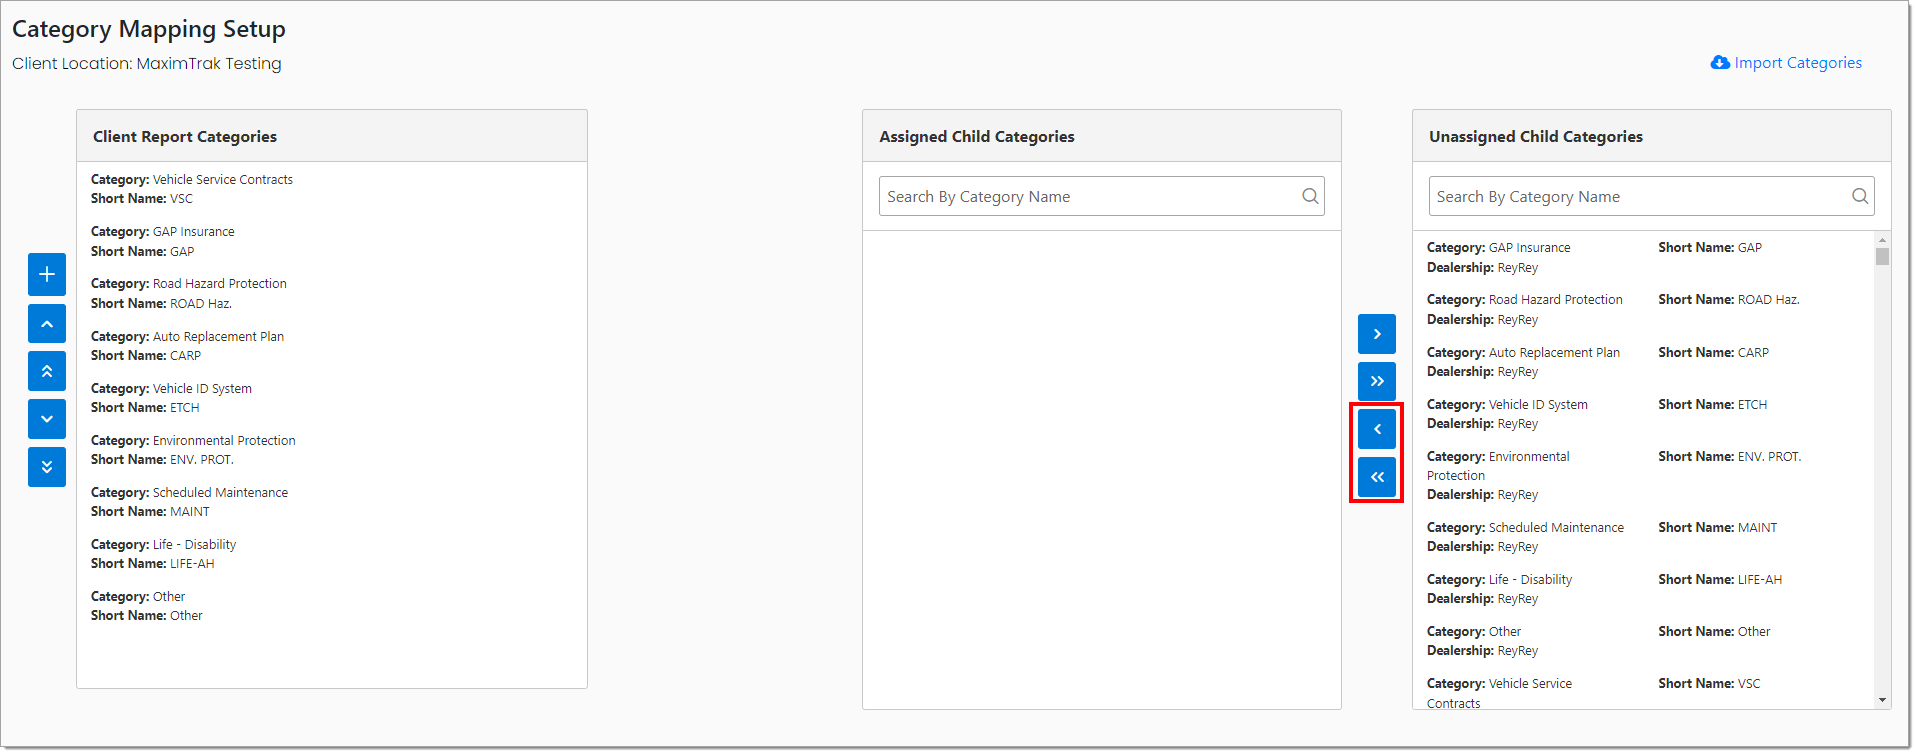
On the Category Mapping Setup page, there are three panels.
Client Report Categories: Displays the nine default system categories, as well as user-created custom categories. These are the categories that will be used in all product reports. They are referred to as ‘Client Report Categories.’
Assigned Child Categories: When a ‘Client Report Category’ is selected, this area displays all children categories currently assigned / mapped.
Unassigned Child Categories: Displays all child categories that have not been assigned / mapped to a ‘Client Report Category.’
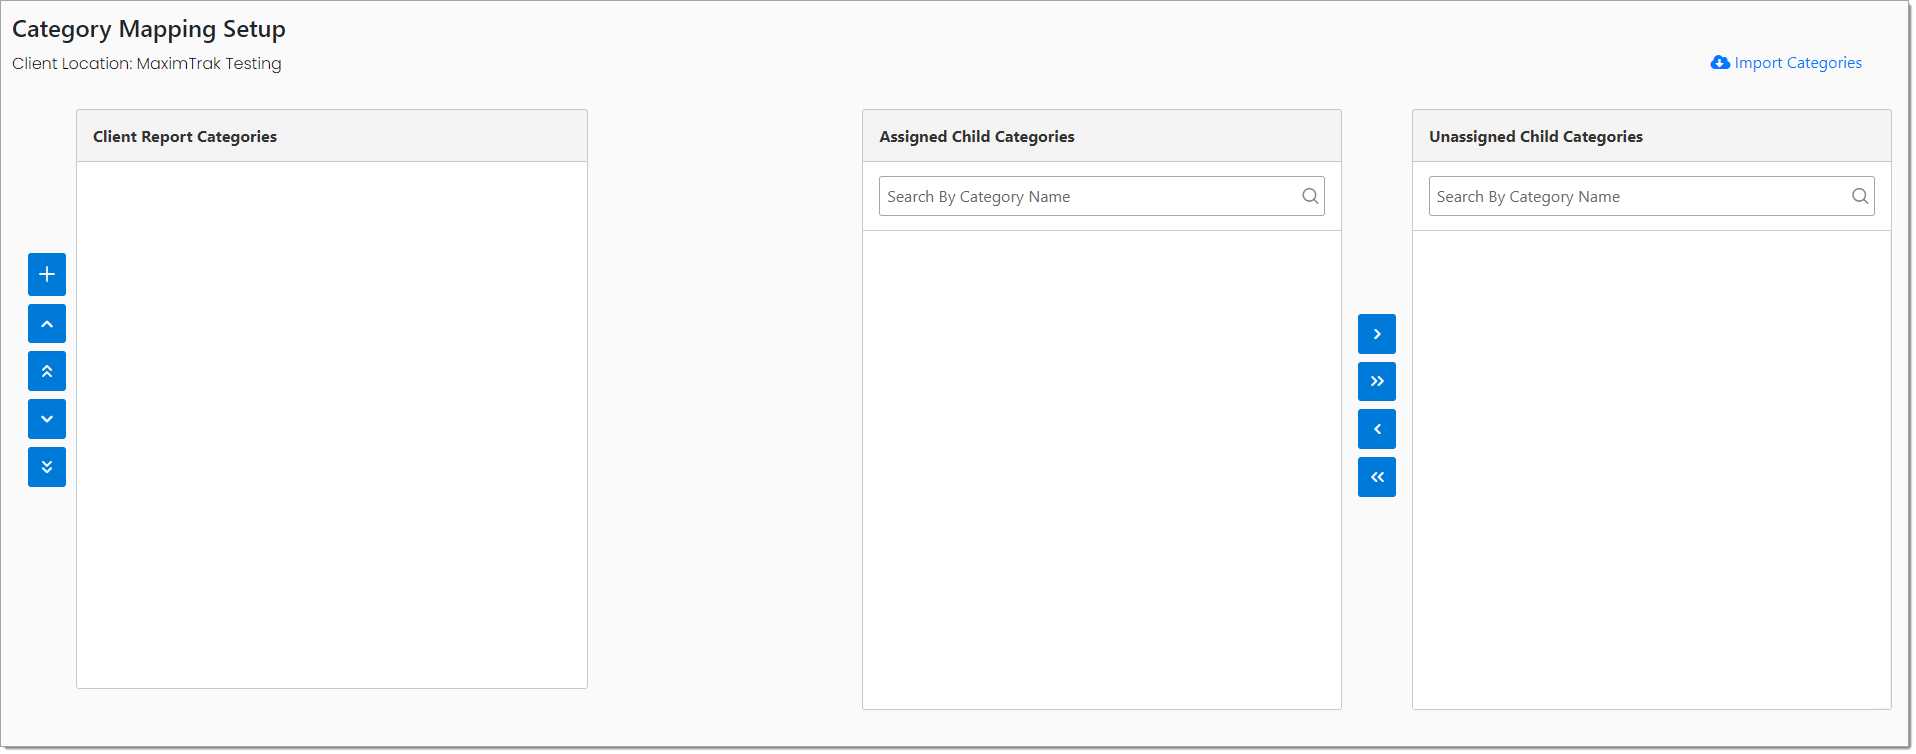
When logging in for the first time, these panels may be empty and require the user to import the data by clicking the ‘Import Categories’ button. This is only required for initial setup to ensure all current product category data from Menu is copied over.
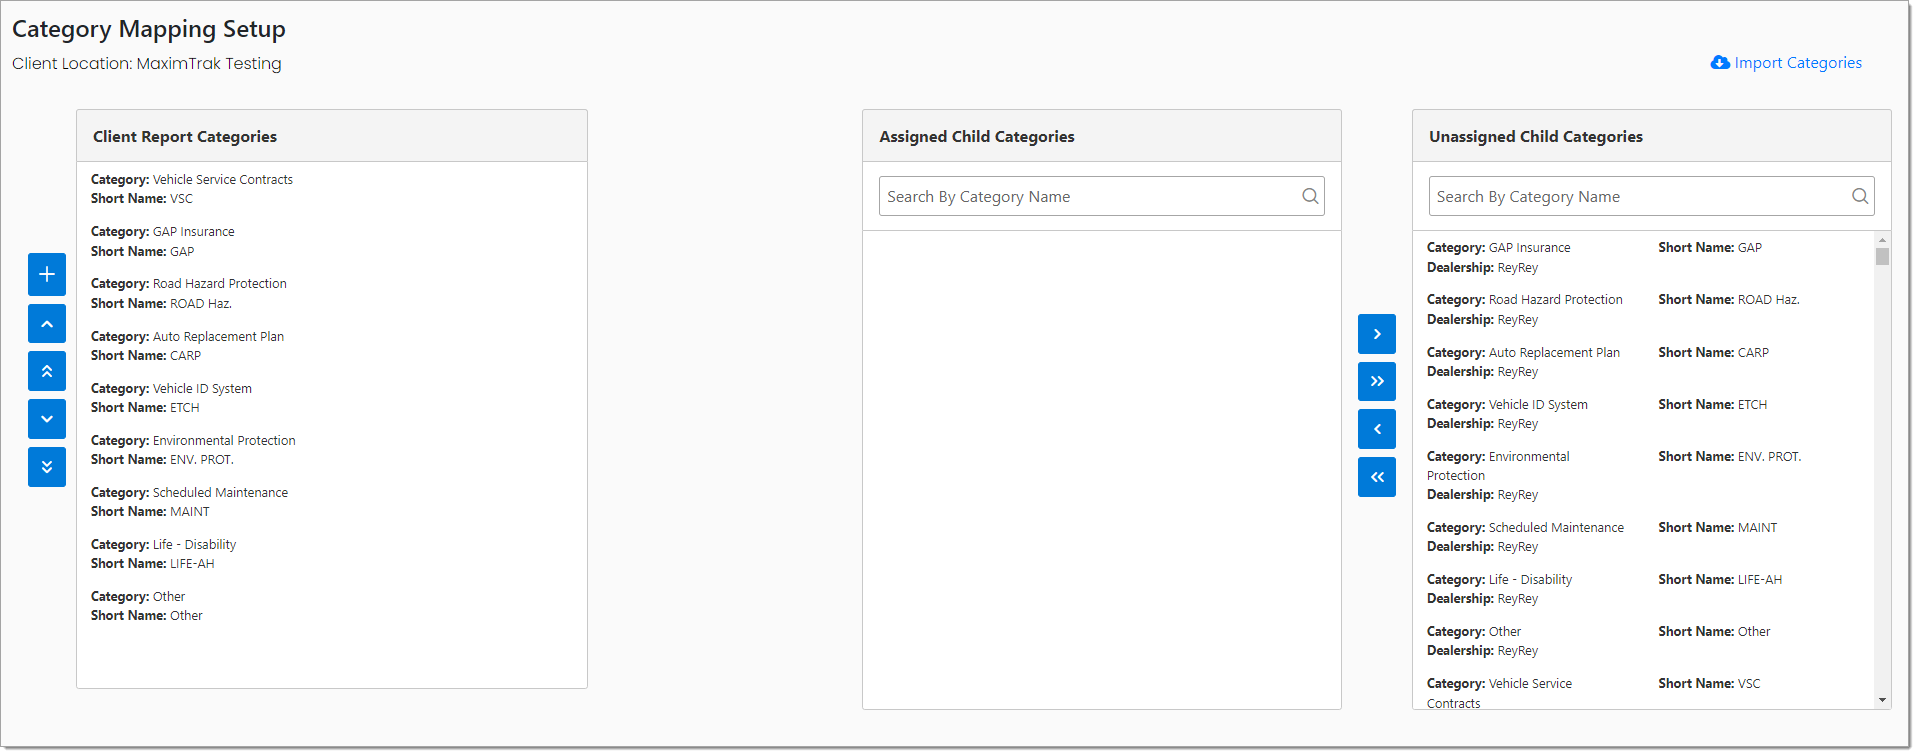
This process may take several minutes depending on how many child dealership categories are found and copied. Once completed, both the ‘Client Report Categories’ and the ‘Unassigned Child Categories’ will be displayed.
Importing Category Data
To import category data, on the Category Mapping Setup page, click ‘Import Categories.’
This will copy over existing categories from Menu.
The R1 Insights default categories will appear under the ‘Client Report Categories.’

Default Categories:
Vehicle Service Contracts
GAP Insurance
Road Hazard Protection
Auto Replacement Plan
Vehicle ID System
Environmental Protection
Scheduled Maintenance
Life – Disability
Other
Adding New Categories
In addition to the system default categories, users can also create new custom categories.
To add a new category, click the Add New Category (+) button to display the new category form.
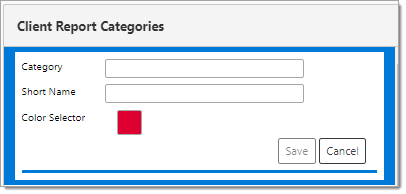
Enter a name for the new category into the ‘Category’ field. This field has a 30-character limit.
Enter a ‘Short Name.’ This is an abbreviated version of the category name and may be used in some reports in place of long category names. This field has a 10-character limit, but 4-6 characters is ideal.
Select a ‘Color’ to be used in report charts and graphs.
Click the ‘Save’ button.
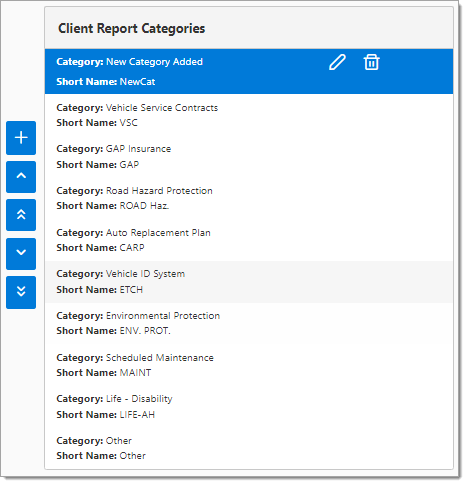
The new category will appear at the top of the ‘Client Report Categories’ panel.
Mapping Children Categories
Select a Client Report Category to map to by clicking on it. The category will be highlighted in blue and display and currently mapped categories in the ‘Assigned Child Categories’ panel.
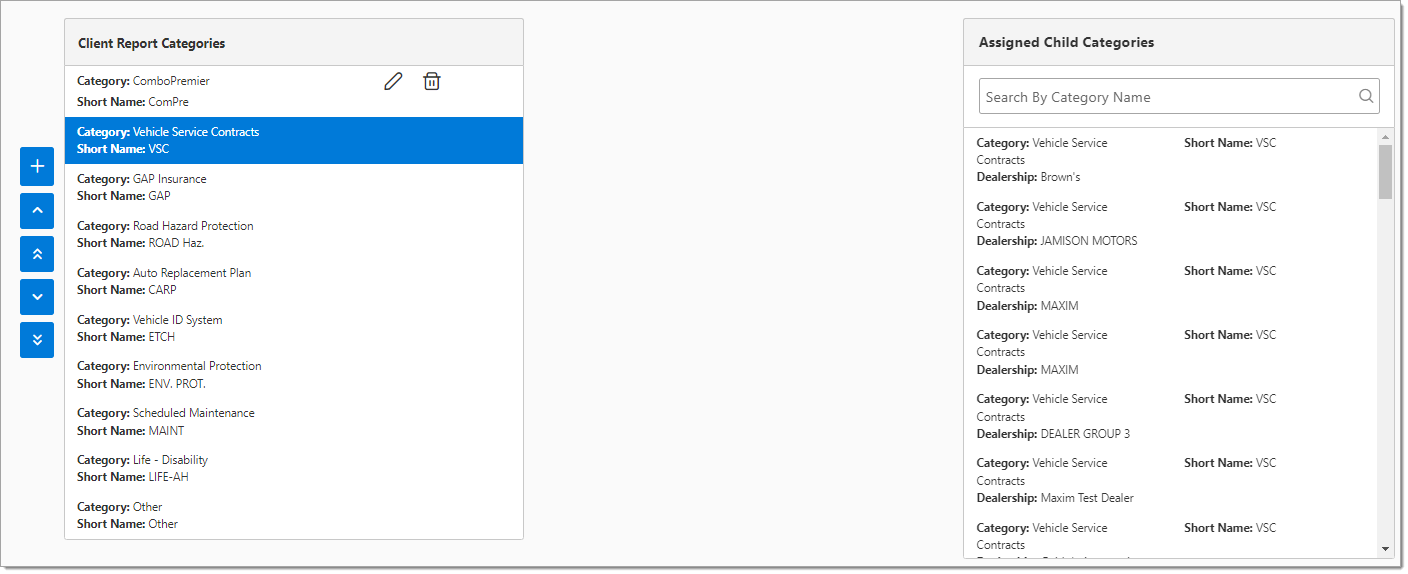
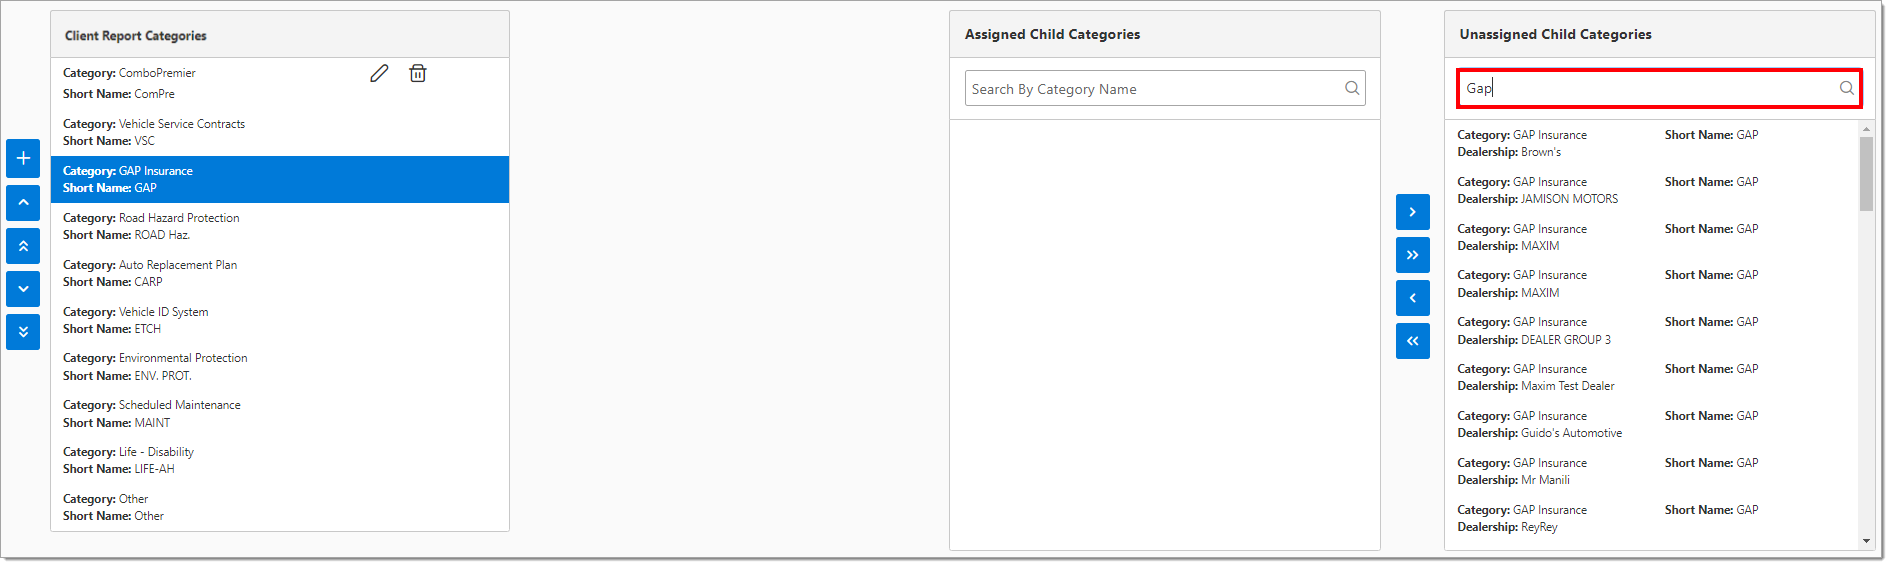
Search the ‘Unassigned Child Categories’ panel using characters or keywords for any child product categories you want to map to the selected Client Report Category.
Use the directional arrow buttons to move one, multiple, or all categories shown to the Assigned Child Categories table.
Repeat this process until all unassigned child categories have been mapped.
Once all category mapping is complete, the system will automatically save the changes.
ROUTEONE SUPPORT
Hours (EST)
Monday - Friday: 6:00am – Midnight
Saturday: 9am – 9pm
Can’t find what you need?
Try our search
