In This Guide:
Related Guides:
Integration
Reynolds & Reynolds Credit Application Quick Reference
System Requirements
In order to access Credit Application from the desktop, you must have the following:
- ERA v.8.0 or later
- Desking or F&I Menus infrastructure set up in the F&I store and branch
- Integration with a third-party vendor (if you would like to submit credit applications)
- SDC server with an internet connection for integration
Convert Credit Application to the Sales and F&I Desktop
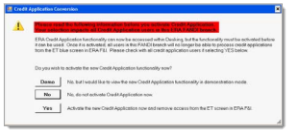
Before you convert the Credit Application module for use in the Sales and F&I desktop, the conversion dialog box displays.
To activate Credit Application, you must have access to
- ODS Utilities (4881)
- Miscellaneous F&I Specifications (4828)
- Miscellaneous F&I Specifications #2 (4829)
After you convert, all users are no longer able to use the Credit Application functionality in the ET blue screen in ERA F&I for that branch, however you can click Demo to view the Credit Application module in demonstration mode without converting it. In demo mode, you can see the screens, but cannot save information or submit an application to a third-party vendor.
Submit a Credit Application
You can access Credit Application from the Sales & F&I desktop and the Application drop-down list or the toolbar icon in Desking.
If you create a credit application for a new deal (one you have not already started in Desking), you can click the Save icon at any point in the process. The system creates a deal number for that information. If you open that deal in Desking, the information you saved in the credit application populates in the Deal/Lease Worksheet.
- Do one of the following:
- After you complete the deal in the Deal/Lease Worksheet, click Send to F&I. The system returns you to the Desking Start Page. From the Credit Application drop-down list, select New Credit Application.
You cannot access the Credit Application drop-down list from the Deal/Lease Worksheet because you cannot have a deal open in two applications at the same time. On the Sales and F&I desktop, click Credit Application and click Launch.
- Do one of the following:
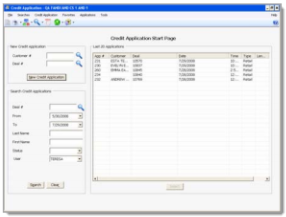
- In the Customer # field in the New Credit Application section, enter the customer number. Or, click the Search icon. Click New Credit Application.
- In the Deal # field, enter the deal number. Or, click the Search icon. Click New Credit Application.
- Select the deal number from the Last 20 Applications section of the screen, and click Select.
- Click New Credit Application.
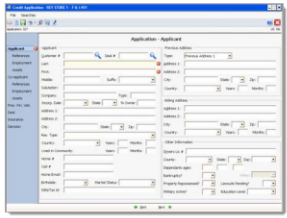
- In the Applicant window, complete the necessary fields in the Applicant, Previous Address, Billing Address, and Other Information sections. Then, click Next.
- In the Applicant – References window, complete the necessary fields n the Relatives Not Living with you #1 and #2, Personal Friends #1 and #2, and Creditor #1 and #2 sections. Then, click Next.
- In the Applicant – Employment window, complete the necessary fields in the Current Employment, Previous Employment 1, and Previous Employment 2 sections. Then, click Next.
- In the Applicant – Assets window, complete the necessary fields in the Landlord/Mortgage Information, Bank Information 1, and Bank Information 2 sections. Then, click Next.
- Repeat steps 4-11 for the Co-Applicant information.
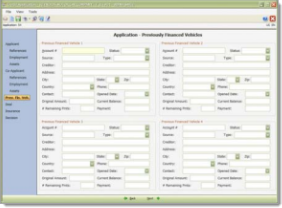
- In the Previously Financed Vehicles window, complete the necessary fields in the Previous Financed Vehicle 1, 2, 3, and 4 sections. Then, click Next.
- From the drop-down list, select the Application Type.
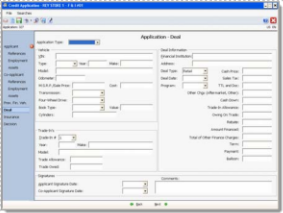
- In the Deal window, complete the necessary fields in the Vehicle, Trade-Ins, Deal Information, and Signatures sections. Then, click Next.
The fields in the Deal Information section may change depending on whether you select Retail or Lease from the Deal Type drop-down list.
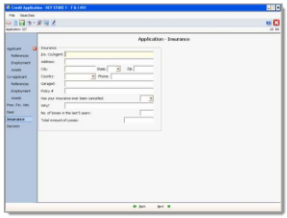
- In the Insurance window, complete the necessary fields. Then, click Next.
- On the Decision window, Click the Transmit icon. The Transmit Application dialog box displays.
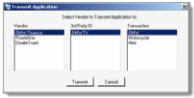
- From the Vendor column, select the vendor to which you want to transmit the application.
- From the Transaction column, select the transaction type, if applicable (Only for BMW InfoBahn).
- Click Transmit.
You must complete all the required fields before you can transmit the application. If you have not completed all of the required fields, a dialog box displays. Click OK and complete the required fields.
If the selected vendor allows notes to be transmitted, the Transmission Notes dialog box displays. After you enter the note, click OK.
The Transmission Status dialog box displays.
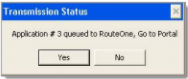
- Click Yes if you want to open the third-party vendor’s website in your Internet browser. Or, click No if you do not want to open the window.
You must have the vendor’s web address set up in the Options window to open the vendor’s website from this dialog box.
Search for a Credit Application
To search for a credit application, complete the following steps.
- On the Sales and F&I desktop, click the Credit Application icon and click Launch.
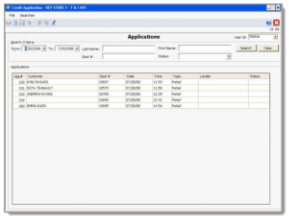
- In the Search Credit Applications section of the screen, fill in one or more of the following fields:
- Deal # — enter the deal number, or click the Search icon
- From — from the drop-down list, select the beginning date for the search date range
- To — from the drop-down list, select the ending date for the search date range
- Last Name — enter the customer’s last name
- First Name — enter the customer’s first name
- Status — from the drop-down list, select the credit application status
- User — from the drop-down list, select the username
- Click Search.
You can sort the returned list of applications in ascending or descending order by any of the columns.
Print Credit Application Forms
You can print the credit application forms from the Print Application screen. Follow the instructions for printing forms in the Desking help files.
Initially, the system displays a list of all possible forms. After you have ordered the credit application form, it returns only that form in the forms list.
View Errors
To view any Credit Application transmission errors, complete the following steps.
- Go to File>Error Reporting.

- In the From field, enter the beginning date for the date range that the error falls within.
- In the To field, enter the ending date for the date range that the error falls within.
- In the Vendor field, enter the third-party vendor to which the application was originally transmitted.
- Enter the Deal#.
- Click Search. In the Errors section of the screen, the system displays a list of applications that meet the search criteria.
You can sort the list by any of the columns in ascending or descending order.
Change Options
If you have access to the Miscellaneous F&I Specifications screen (4828) in ERA, you can change your Credit Application options.
- Click the Options icon or go to Tools>Options.
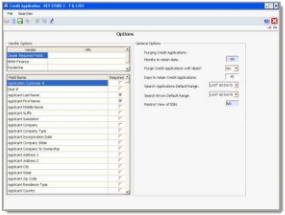
- In the Vendor Options section, enter the Vendor name and URL in the applicable fields.
If you do not enter the vendor’s URL, you cannot open the website from the Transmission Status dialog box that the system displays after you have transmitted the credit application.
- In the Required column, click the check box next to any fields you want to be required. Or, click to clear the checkmark(s) if you do not want specific fields to be required.
- In the Months to retain data field, enter the number of days you want to wait before the system purges an application.
- From the Purge Credit Applications with Data? drop-down list, select Yes or No.
- If you set the Purge Credit Application field to No, then enter the Days to Retain Credit Applications.
- From the Search Applications Default Range drop-down list, select the default date range for an application search.
- From the Search Errors Default Range drop-down list, select the default date range for an error search.
- In the Restrict View of SSN field, enter Yes or No.
- Click the save icon or go to File>Save to save the changes.
- In the Save Status dialog box, click OK.
- Click the Close icon or go to File>Close to close the Options window.
ROUTEONE SUPPORT
Hours (EST)
Monday - Friday: 6:00am – Midnight
Saturday: 9am – 9pm
Can’t find what you need?
Try our search
