In This Guide:
Related Guides:
Integration
FLEX F&I RouteOne Integration
The RouteOne integration allows you to transmit deal information to the RouteOne Website. You will then log on to the RouteOne Website, make any additions or changes, and submit the credit application or eContract.
RouteOne Integration Setup
You must verify your FLEX F&I program is set up to transfer deal information to RouteOne. This includes verifying your RouteOne ID number is added to the RouteOne integration setup. This is the ID number RouteOne assigned your dealership. This is also where you will choose to use the single sign on feature available for RouteOne.
- Click the Admin link at the top of the screen.
- Click the Integrations button in the blue bar at the top of the screen.

- If the RouteOne integration has been activated for your FLEX F&I account, RouteOne will appear in the Integrations list in the left column. Click RouteOne.
- Click the Transactions tab and check to see that RouteOne Credit Application, RouteOne SSO, and RouteOne eContract are checked.
- Click Save. A green “Success” message will appear, verifying the information has been saved.

The RouteOne Inbound and RouteOne F&I Log integrations are in development. Autosoft will provide additional information when these integrations are available for use.
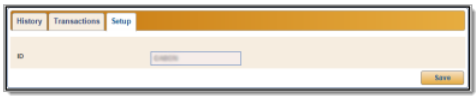
- Click the Setup tab.
- Check that your dealership’s RouteOne ID is entered and correct, and click Save.
The RouteOne Inbound and RouteOne F&I Log integrations are in development. Autosoft will provide additional information when these integrations are available for use.
Employee Setup
You can add usernames for each employee who is permitted to access RouteOne. Adding the username in the employee’s setup allows the employee to use the RouteOne single sign on feature. Instead of typing the username and password, the program will automatically pull the username from the employee’s file and use it to sign on to RouteOne.
- Click the Setup button in the blue bar at the top of the screen.
- Click Employees on the Setup menu within the left column.
- Select an employee from the list by clicking on his or her name.
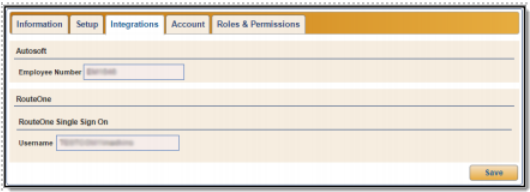
- Click the Integrations tab.
- Autosoft provides a unique single sign on username based on the employee’s FLEX F&I username. Check to see that it appears in the RouteOne section of the tab under RouteOne Single Sign On and click Save.
TIP: If an employee’s FLEX F&I login name is longer than 11 characters, it will not be appropriate for use as a RouteOne single sign on username. You will not be able to edit the single sign on username in the Integrations tab. However, you can edit the employee’s FLEX F&I login name in the Account tab so it is 11 or fewer characters and will work when used to create the RouteOne unique username. For directions on how to do this, see page 11 of this manual. If you alter an employee’s FLEX F&I login name, be sure to alert the employee to prevent any difficulties logging in.
Single Sign On Setup
FLEX F&I provides integration for the use of RouteOne single sign on functionality. RouteOne single sign on will allow your employees to quickly and easily access the RouteOne Website directly from FLEX F&I with the click of a mouse following an initial, one-time setup.
- Click the Admin link at the top right of the FLEX F&I Website.
- Click on Employees in the left column under the Dealership heading.
- Locate the employee you wish to setup with single sign on. Click on the employee’s name in the Employees list.
- The employee information populates in a separate box below the list. Click on the Integrations tab.
- If the RouteOne integration has been activated for your FLEX F&I account, you’ll see a section titled “RouteOne” under the Integrations tab. In the RouteOne section, you’ll see the RouteOne Single Sign On Username. Copy this username, which you’ll paste into RouteOne in future steps for the initial setup.

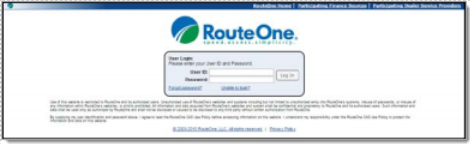
- Open another browser tab and type the RouteOne Website URL. Log in to RouteOne using the User ID and Password assigned to you by RouteOne.
TIP: Only users with Admin access in RouteOne will be able to configure users for single sign on functionality.
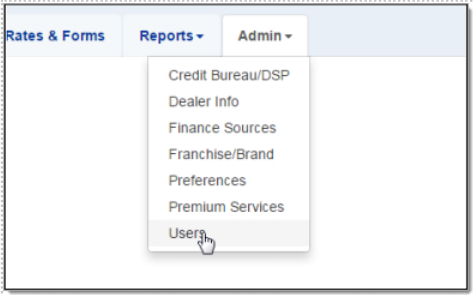
- Click on the Admin tab at the top of the RouteOne homepage and select Users from the drop-down menu. A list of your dealership employees with access to RouteOne will open.
- Select a user from the list and click the Edit button on that user’s line.
- Scroll down to the Captive IDs for this User section and paste the unique single sign on username into the Autosoft SSO – Autosoft User ID field.
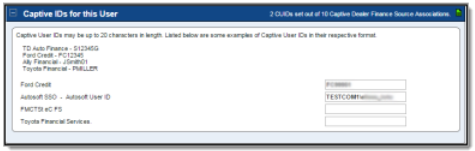
- Click the Save Information button at the bottom of the page.
- That user will receive an email notification at the email address entered in the User Information section on RouteOne. The email message will contain a Token ID number that the user will have to enter the first time he or she uses single sign on.
- Repeat steps 8 through 10 for all dealership employees who will need access to the RouteOne single sign on feature.
Single Sign On Activation
Once the dealership administrator has completed single sign on (SSO) setup for a RouteOne user, the user will receive an email from RouteOne containing a Token ID number he or she must use to activate the single sign on feature for their account.
- In FLEX F&I, navigate to an established deal in the Deals tab.
- Once in the deal, click Integrations in the left column.
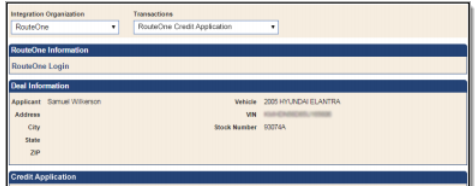
- Select RouteOne in the Integration Organization drop-down menu.
- Choose either RouteOne Credit Application or RouteOne eContract from the Transactions drop-down menu.
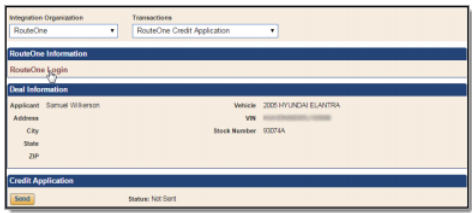
- Click the RouteOne Login link under RouteOne Information.
- The RouteOne login screen will open, and you will be prompted to enter the Token ID number that you received via email from RouteOne. You will only have to enter this information the very first time you use the single sign on functionality. After your initial use of single sign on, you will merely click the RouteOne Login link in the Integrations area of the FLEX F&I deal and will not have to enter any RouteOne login credentials.
- Once you are logged in to the RouteOne Website, review the deal information, make any necessary changes, and add any additional information as needed. The credit application and eContract are not complete until you finish submitting it through the RouteOne Website.
TIP: If the username in the employee’s file is incorrect, the login will fail, and you will be directed to a page indicating the page you requested was not found. If you see this page, you should verify the username in the employee’s file is correct. If the username is correct and you see this error page, you should contact RouteOne to identify the login issue.
Submitting Credit Applications
You will use the Integrations link on the deal menu to transfer the deal information. This process simply transfers the deal information to RouteOne. You must log on to the RouteOne Website or use the SSO to complete the application and to submit it.
- Create the deal.
- Click Integrations.
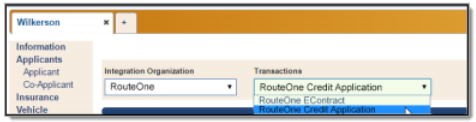
- Select RouteOne in the Integrations Organization list.
- Depending on whether you’re submitting a credit application or completed deal for eContracting, select RouteOne Credit Application or RouteOne eContract from the Transactions drop-down menu.
- Click Send.
- You will see a green Success message when the information has been sent, and the status will change from “Not Sent” to “Sent,” followed by the time stamp for the transfer. If the information contains errors, the status will display as “Rejected,” followed by the time stamp for the transfer, and the program will display an error message identifying the information that must be corrected. Correct the information and send the deal again.
Submitting Deals for E-Contracting
Dealerships employing Autosoft’s FLEX F&I have the ability to send a credit application from FLEX F&I to the RouteOne Website. At that time the user will submit the application to the lenders. Once a lender buys the contract, the F&I user will then finalize the deal in FLEX F&I, applying the lender information, adjusting the APR, selling back end products, etc. The following process assumes that the dealership has already fully desked the deal and is ready to submit the finalized deal to the RouteOne Contracts module for the processing of the e-contract.
- From the Deal screen in FLEX F&I, click Integrations in the left column.
- Select RouteOne from the Integration Organization drop-down menu.
- In the Transactions field, select RouteOne eContract from the menu.
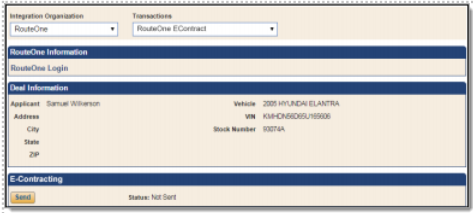
- In the e-Contracting section, click Send. The transaction will display as sent.
- Click RouteOne Login in the RouteOne Information section to connect to the RouteOne Website.
- Once on the RouteOne site, click Contracts and click on Contract Manager from the dropdown menu.
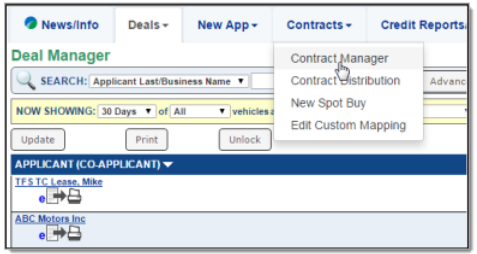
- The Contract Manager screen will open and display a list of deals you’ve submitted from FLEX F&I.
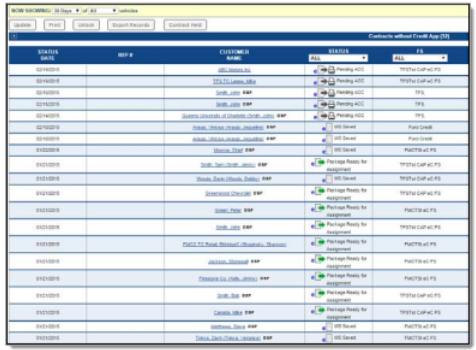
- Click on the contract you wish to process electronically.
Important: The first time you attempt to use this integration to create an e-contract, you will be prompted to complete DMS mapping. Because RouteOne may use different names for some contract fields than FLEX F&I or your dealership, DMS mapping allows you to match up your licensing fees and local charges with the appropriate fields in RouteOne’s e-contracting application. You will only need to do the DMS mapping once, and it will be applied to all future e-contracts you create with RouteOne. Once mapping is complete and defaults have been established, only users with Admin access can modify the default settings.
RouteOne will warn the user if a field from the FLEX F&I deal does not match any of the RouteOne e-contracting fields and ask that the user map the field. For fields that will be identical in every contract, such as fees, you can lock the field to ensure the data you map to it appears the same in every contract.
- The Contract Worksheet opens. The fields highlighted in yellow are required by RouteOne. The integration will auto-populate all the required fields with information from FLEX F&I to complete the e-contract.
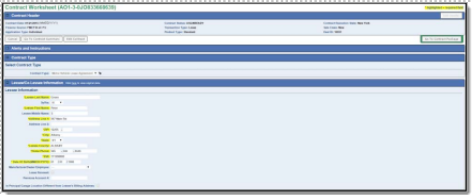
- Review the information to verify that the numbers are correct. If the e-contract payment does not match the FLEX F&I-calculated payment, be sure to enter the FLEX F&I payment on the Contract Worksheet screen and verify.

- Populate the e-contract and have the customer sign.
Reviewing the RouteOne Transactions Log
Users with administrative rights (those who can access the setup) can review the RouteOne transaction log. This allows you to review which deals were successfully transmitted and which deals did not go through. You can submit credit applications and deals for eContracting from the log as needed.
- Click the Admin link at the top of the screen.
- Click the Integrations tab.

- Click RouteOne in the list on the far left of the screen.
- The right side of the screen displays all the open deals under the History tab. If your dealership is using more than one RouteOne application (RouteOne Credit Application and RouteOne eContract), choose the appropriate application from the Transactions drop-down menu above the list to show log entries associated with that particular application.
- The Sent Date column identifies the date the deal was sent. The column displays “Not Sent” for deals that have not been submitted, or “Rejected” for deals that RouteOne did not accept.
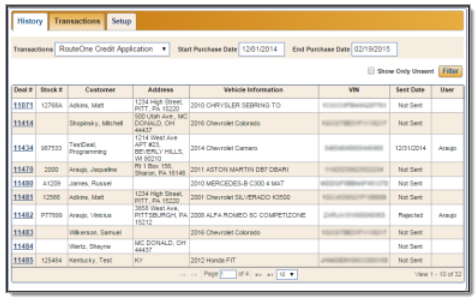
- You can filter the list using the Start Purchase Date and End Purchase Date options.
- To view only the deals that have not been sent to RouteOne, click to select the Show Only Unsent box and click Filter.
- Click a deal in the list to view a summary of the deal information. Clicking anywhere in the deal’s log listing will open the Deal Information summary on the current screen. However, clicking on the deal number in the Deal # column will take you to the Deal screen.
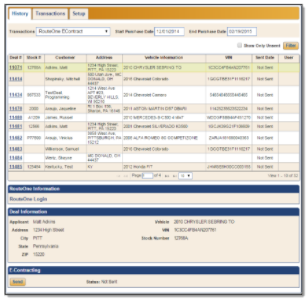
- You can click Send to submit the deal right from this screen.
ROUTEONE SUPPORT
Hours (EST)
Monday - Friday: 6:00am – Midnight
Saturday: 9am – 9pm
Can’t find what you need?
Try our search
