In This Guide:
Access and Administration
Mobile Point of Sale (MPS) Settings - Digital Retail Services
In this guide you will receive instructions about setting up your RouteOne Digital Retail Mobile Point of Sale (MPS) application.
Subscription to and configuration of Mobile Point of Sale (MPS) settings can be done on a desktop or tablet; installation of the app should be done on a tablet.
It may take up to 24 hours for any saved configuration setting changes to display.
What is RouteOne’s Digital Retail Mobile Point of Sale (MPS) app?
The Mobile Point of Sale App gives you the flexibility to work with your customers in any location: on the lot, in your showroom, in the F&I office, or at a tent sale. You can hand your customer a tablet with the easy-to-use app loaded, and they can complete a credit application on their own or guided by you.
The Mobile Point of Sale App captures credit application and related information on a tablet that connects directly to the RouteOne system, including the ability to eSign a credit application.
Users can apply for financing (all levels), lead information can be collected (Standard, Premium), and payment calls can be made (Premium). In addition, at the Premium subscription level, Mobile Point of Sale includes automated compliance functionality.
After subscribing to Digital Retail, you can download the app in the iTunes or Google Play store, and load it on your tablet after setting up your dealer ID on your device settings. Like Digital Retail’s online credit application, Mobile Point of Sale is configurable in Premium Services, allowing you to modify the logo, font, and design color as needed.
Step 1: Subscribe to Digital Retail Services
The Dealer System Administrator (DSA) can subscribe to RouteOne’s Digital Retail Services within the ‘Premium Services’ page.
In the ‘Admin’ tab, select ‘Premium Services’ from the dropdown. Click on ‘Digital Retail’ to expand the section. Complete the subscription process for Digital Retail. For more information about subscribing, click here to view our Subscribing to Digital Retail Services user guide.
Step 2: Customize the Mobile Point of Sale Application
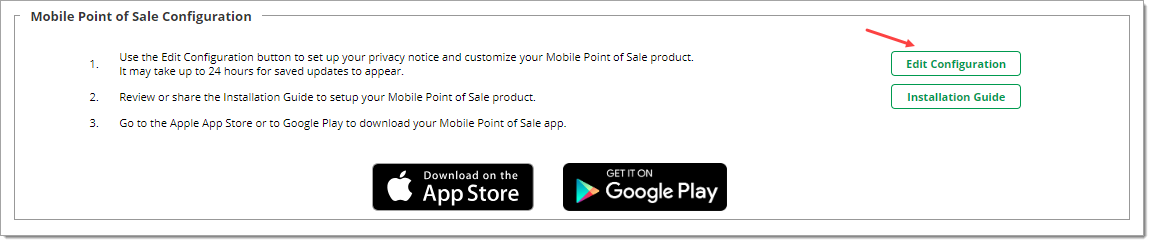
Once your Premium subscription is activated, your DSA will be able to customize the user experience with the ‘Mobile Point of Sale Configuration’ section. This is available in the Digital Retail section of the ‘Premium Services’ page.
In the ‘Admin’ tab, select the ‘Premium Services’ option, and click on ‘Digital Retail’ to expand the section. Scroll down to the ‘Mobile Point of Sale Configuration’ section, and click ‘Edit Configuration.’
Important Note: Setting up the MPS application is separate from the online credit application settings. For more information on customizing the online credit application, click here to view our user guide.
You will be directed to a page with your MPS configuration options.
The first time you set up MPS, it is recommended that you review the settings in each top tab, and each associated side tab.
You may choose to use the default settings or make changes based on your dealership preferences. It may take up to 24 hours for any saved configuration setting changes to display.
Click one of the ‘Save’ options to apply your settings.

The ‘Global Settings’ Tab
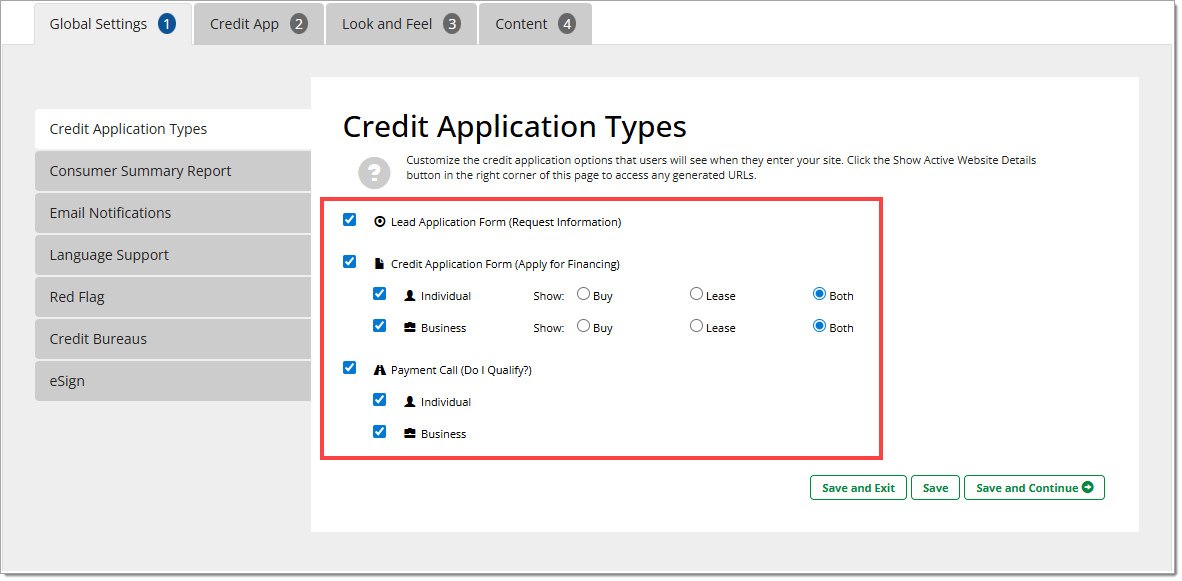
Credit Application Types
Within the ‘Credit Application Types’ tab, you can click to turn the following options on or off, in order to display or hide them from your users’ view in MPS:
- Lead Application Form (Request Information)
- Credit Application Form (Apply for Financing) for Individual or Business
- Payment Call (Do I Qualify?) for Individual or Business
Click one of the ‘Save’ options to apply your settings.
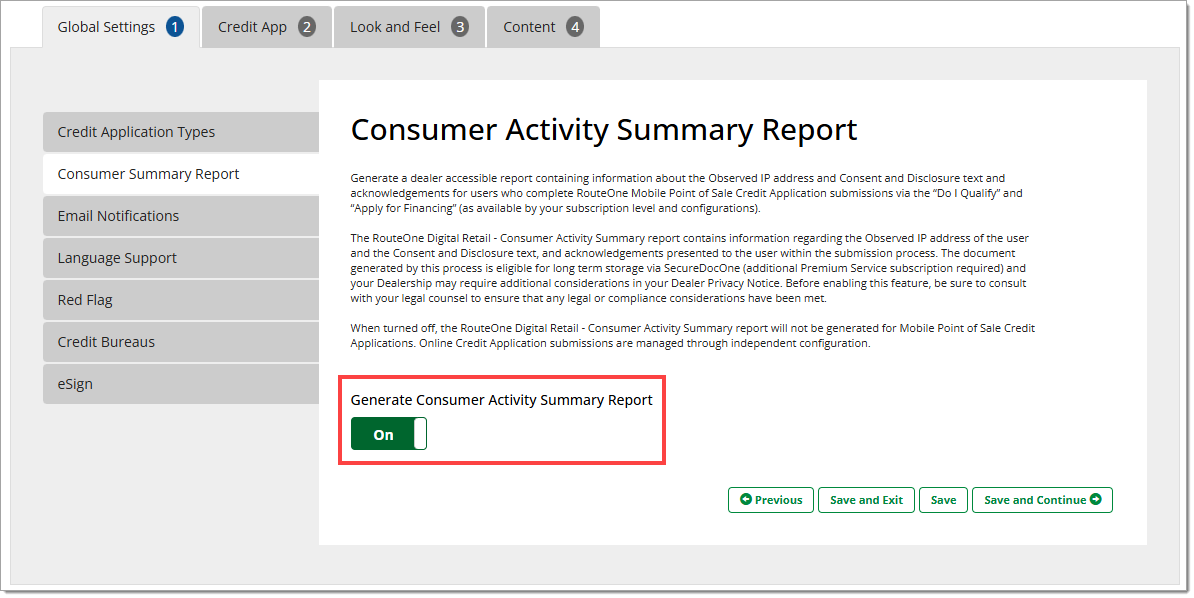
Consumer Summary Report
The setting on this page allows you to decide if a Consumer Activity Summary document is generated when a consumer completes the Online Credit Application process. This document contains the observed IP address of the user, and the Consent and Disclosure text as presented to the user in the Online Credit Application. The Consumer Activity Summary Report is periodically purged from RouteOne along with other generated documents and is no longer available following removal. For dealers who wish to keep this document for long term reference, this document is eligible for automatic archival storage via SecureDocOne (additional subscription required). For more information on subscribing to automatic archival storage, click here to visit our Subscribing to SecureDocOne user guide.
This setting specifically governs the Mobile Point of Sale. An independent setting is available for the Online Credit Application. For more information, click here to visit our Customizing the Online Credit Application user guide.
The nature and retention of this document may require updates to your Dealer Privacy Notice(s). Please be sure to consult with your legal counsel before enabling this capability.
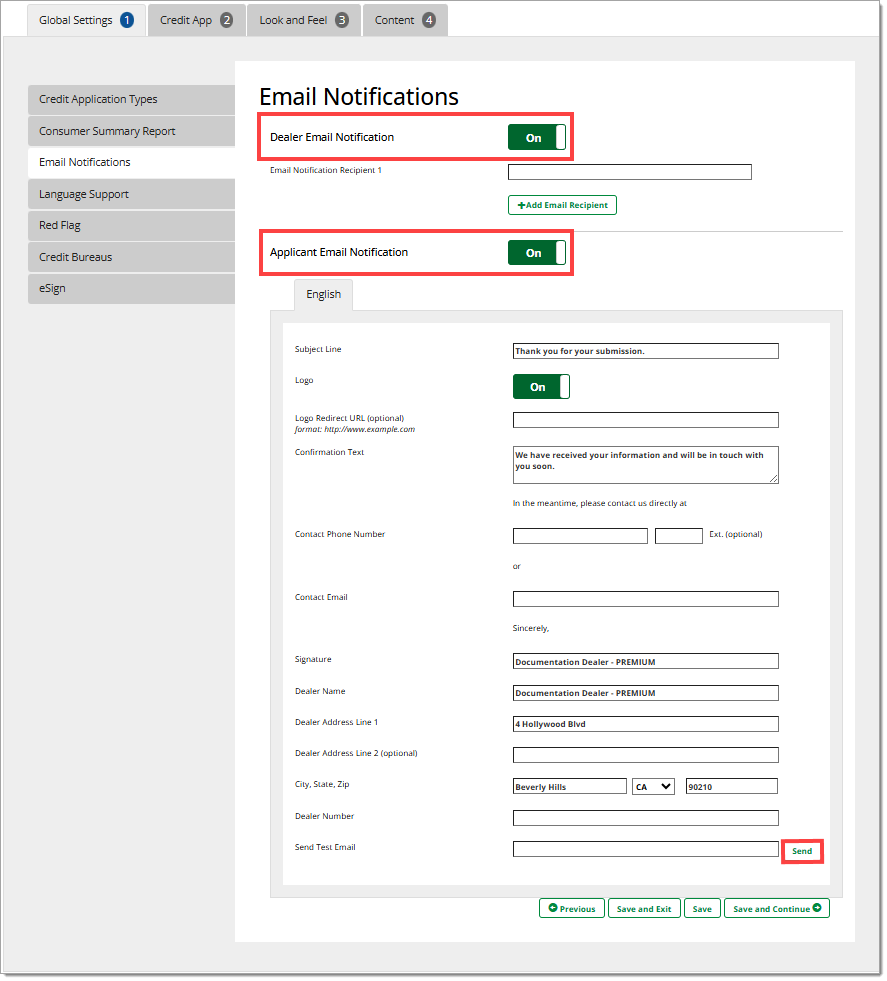
Email Notifications
On this tab, you can customize your email notifications to your dealership employees and customers from MPS.
Dealer Email Notification:
- Using the ‘On/Off’ toggle, you can choose to send notifications by email for MPS applications to your employees in your dealership.
- Specify the employee(s) using the ‘Email Notification Recipient’ field, and add additional employee emails by clicking ‘Add Email Recipient.’
Applicant Email Notification:
- Using the ‘On/Off’ toggle, you can choose to send application confirmations to customers who apply for financing through MPS.
- You can use the existing default template and language, or customize the subject line, confirmation text, and dealership contact information presented to the customer.
- You can also add your dealership logo, and support a web site redirect URL if the customer clicks the logo.
- You can preview the consumer-facing email by entering your email into the ‘Send Test Email’ field at the bottom of the page and clicking ‘Send.’
Click one of the ‘Save’ options to apply your settings.
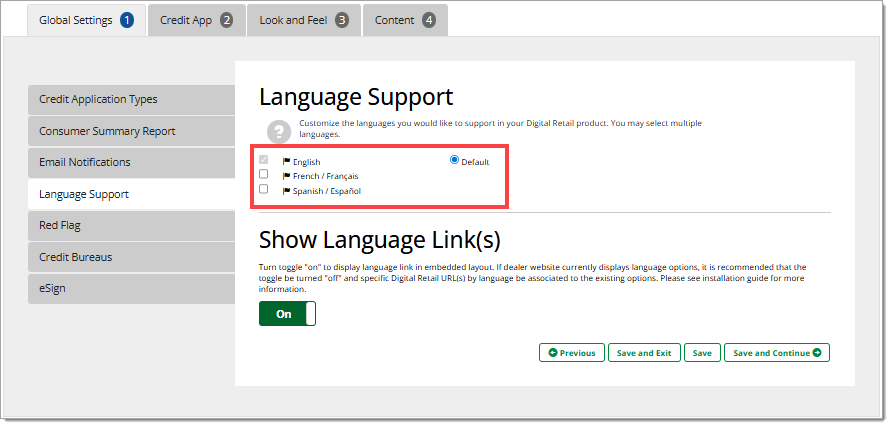
Language Support
Within the ‘Language Support’ tab, you can select the default language for your Digital Retail Product. English is automatically selected by default, but can be changed by selecting another language, and clicking the ‘Default’ radio button that appears next to the selected language.
You may also select which additional languages you want available within your Digital Retail Product.
The default language is English.
Click one of the ‘Save’ options to apply your settings.
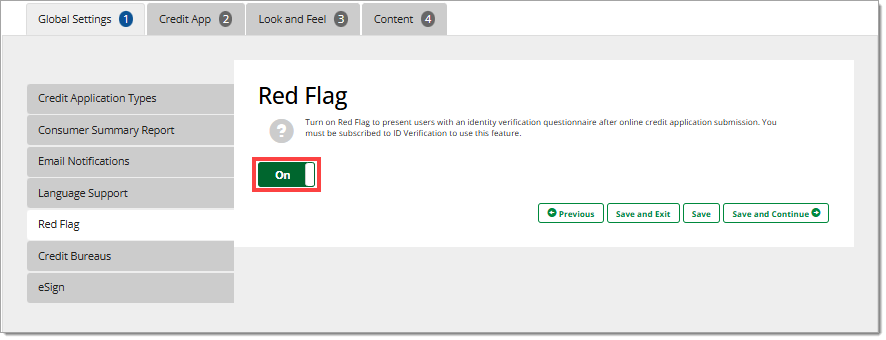
Red Flag
To present users with an identity verification questionnaire each time an online credit application is submitted, turn on the Red Flag option.
The user will see the questionnaire after they enter and review all of the data, and accept your dealership’s privacy notice.
You must be subscribed to ID Verification to use Red Flag. NCC is not supported with this functionality. For more information on subscribing to ID Verification, click here to view our Subscribing to IDOne user guides.
Click one of the ‘Save’ options to apply your settings.
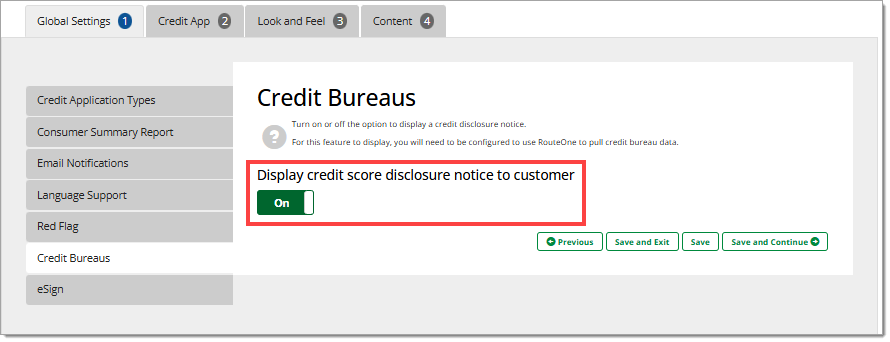
Credit Bureaus (Premium Only)
Turn on Credit Score Disclosure Notice (CSDN) to present the CSDN to users during their review of their online credit application.
This feature requires that you are configured to use RouteOne to pull credit bureau data, and that you have selected a preferred credit bureau.
Click one of the ‘Save’ options to apply your settings.
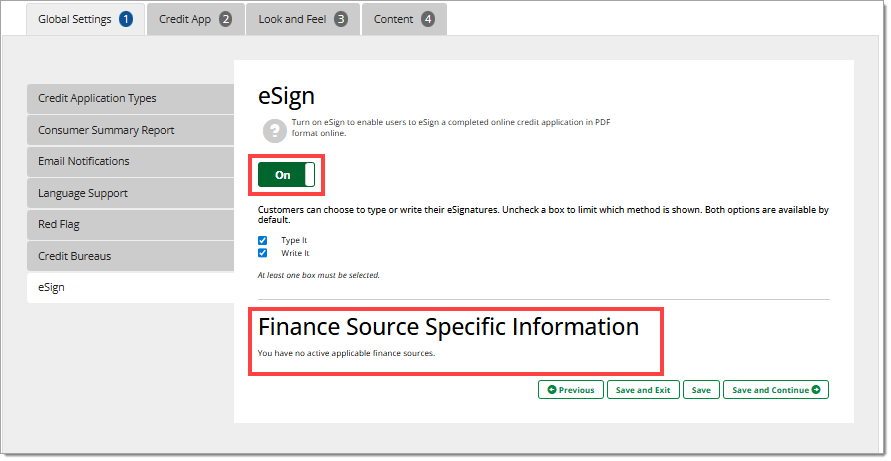
eSign (Premium Only)
Turn on ‘eSign’ to enable users to eSign a completed Online Credit Application in PDF format online.
The default signing method can be specified, but to support accessibility needs a keyboard signature option will always be available to consumers.
- On a desktop application, customers can use a mouse to sign or type their signature(s).
- On a tablet or mobile device, customers can use their fingertip or a stylus, or type to sign.
Finance Source-Specific Information: If your dealership is associated with finance sources that have finance source-specific information that requires additional signature(s), those finance sources will appear here.
If you would like to present the additional document(s) to your customers, you must select the finance source by checking the adjacent checkbox and then saving the selection.
If your dealership is not currently associated with finance sources that have finance source-specific information that requires additional signature(s), you will not see any selection options here.
Click one of the ‘Save’ options to apply your settings.
The ‘Credit App’ Tab
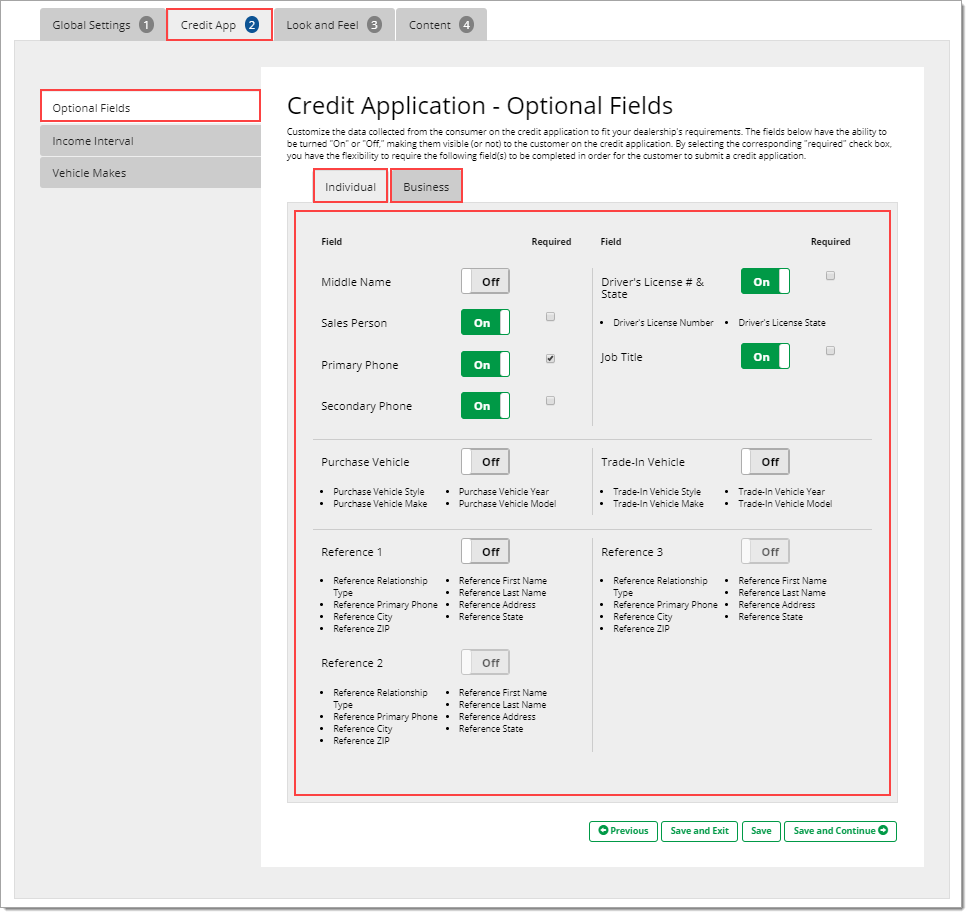
Optional Fields
Using the ‘On/Off’ toggle, you can choose to display or hide each of the displayed fields on the credit application from your customers’ view.
Selecting the corresponding ‘Required’ check box, will require the field to be completed in order for the customer to submit the credit application.
You can modify these fields for either the Individual or Business application.
If you want a change to affect both Individual and Business applications, you must edit the options in each corresponding tab.
Click one of the ‘Save’ options to apply your settings.
For dealers that have uploaded a California Consumer Privacy Act Notice at Collection, a link to the notice will appear below form fields for the applicant and co-applicant to review as necessary prior to submitting their personal information. Learn more about the California Consumer Privacy Act process with RouteOne.
Income Interval (Basic, Standard, Premium)
Use the Income Interval configuration section to customize how you would like to collect income information from your customers.
Check or uncheck boxes to select which value options your customer will see for ‘Income Interval’ and ‘Other Income Interval.’ Selections will apply for both the applicant and co-applicant.
You can also choose a default value option for ‘Income Interval,’ as well as ‘Other Income Interval.’
- For example, you can choose to only show monthly or yearly income, and then select monthly as the default selection.
- Alternatively, you can default to ‘Blank (nothing selected).’
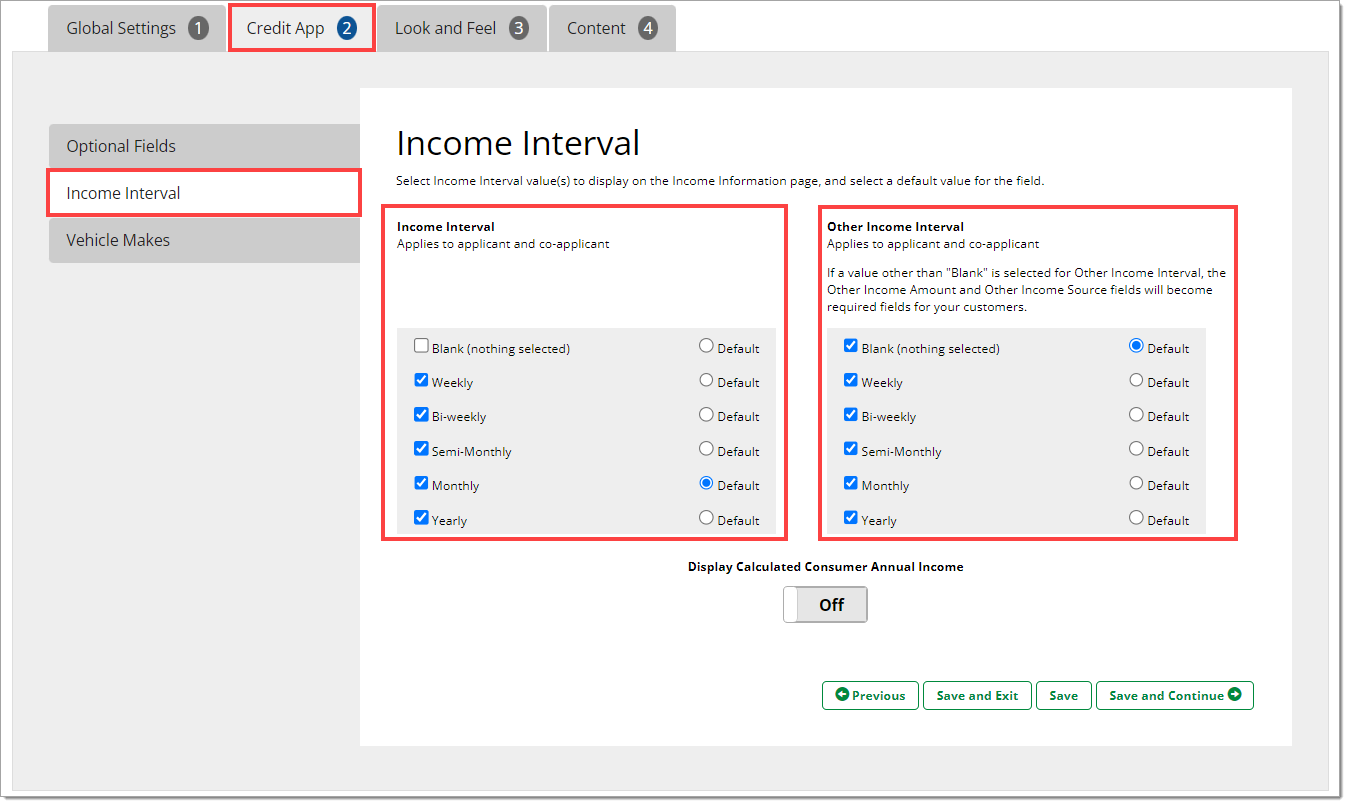
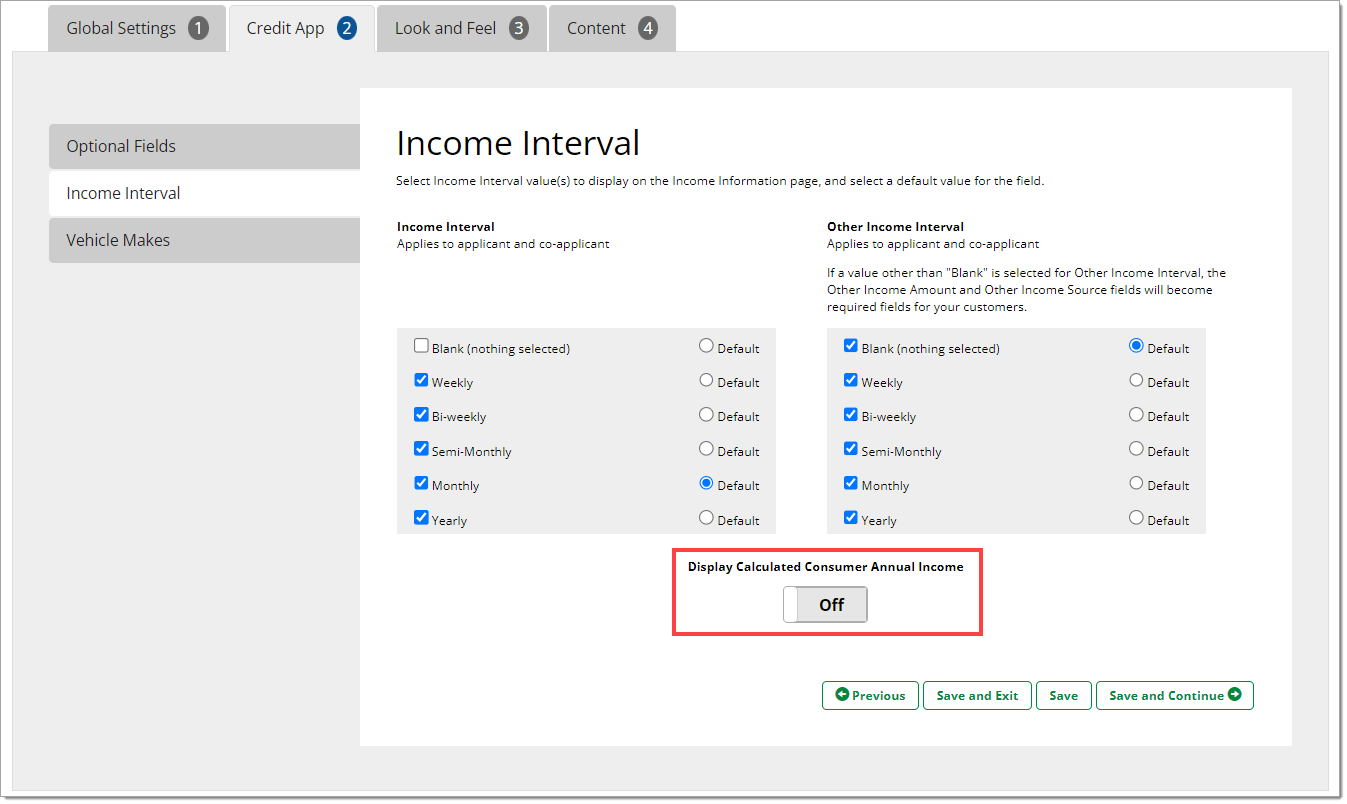
Configure the Display of a Calculated Annual Income. Enabling this option helps a consumer determine if their income data is accurately represented.
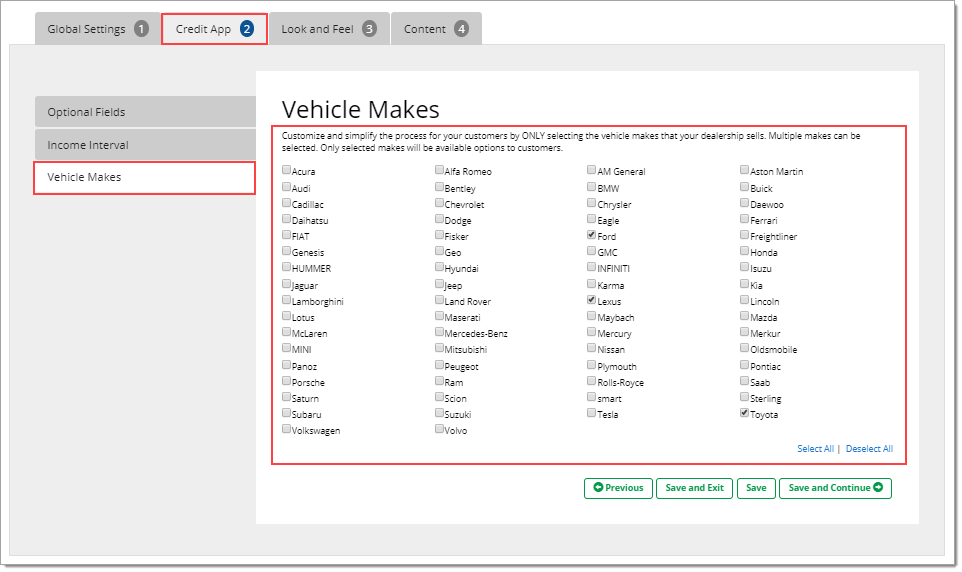
Vehicle Makes
Customize and simplify the process for your customers by using this feature to only select the vehicle makes that your dealership sells. Only the selected makes will be available options to customers.
Click one of the ‘Save’ options to apply your settings.
The ‘Look and Feel’ Tab
Logo
Upload your logo to brand your online credit application.
Your logo will appear in the upper left corner of your Mobile Point of Sale (MPS) credit application pages.
Click the ‘Choose File’ button to upload your logo.
The logo option must be turned on for it to be displayed. The logo must be 186 x 88 pixels, and smaller than 2 MB.
Click one of the ‘Save’ options to apply your settings.

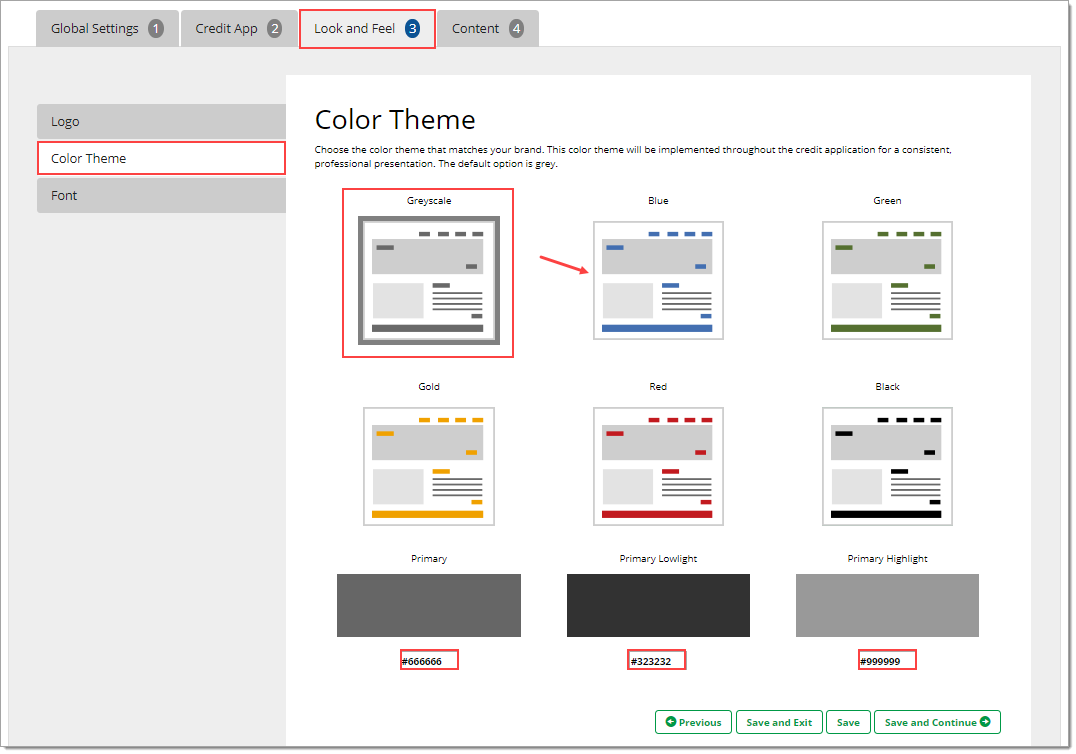
Color Theme
You can customize your color theme for the MPS credit application. Design elements, such as buttons, will be updated to the selected color. The default color option is grey.
To select a color, click the preferred color thumbnail.
You may also add your customized colors by typing in the HEX color code(s). Your selection will be highlighted with a border.
Click one of the ‘Save’ options to apply your settings.
Font
You can customize the font that is used in MPS to best match your website and brand.
To select a font, click on one of the four available fonts. Your selection will be highlighted in a green border.

You also have the option of selecting your own fonts or uploading a font file. If you would like to use this functionality, scroll down to the bottom of the page and click the ‘Use font file selection or upload’ radio button.
You will see options for customizing the Header, Body, and Input Labels text.
Make your selections or upload your files.
Click one of the ‘Save’ options to apply your settings.

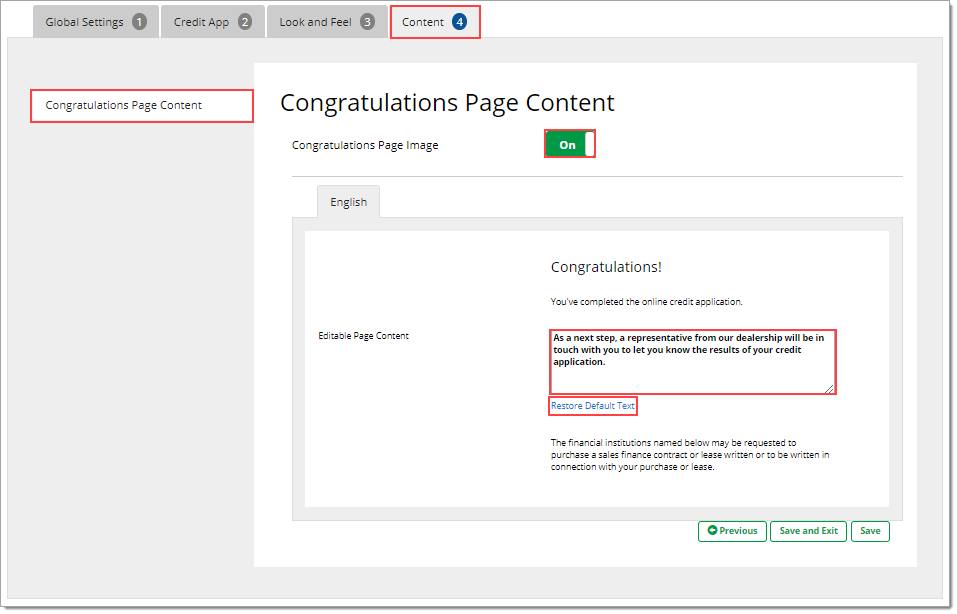
The ‘Content’ Tab
Congratulations Page Content
You can manage the content presented to your customer at the end of their financing application.
Using the ‘On/Off’ toggle, you can elect to display or hide the default image on the Congratulations page.
You can edit the default text on the page by entering in new content in the text field.
Clicking the ‘Restore Default Text’ link will overwrite any text changes and will restore the default text on the page.
Click one of the ‘Save’ options to apply your settings.
Additional Settings: Credit Bureau and Decisioning
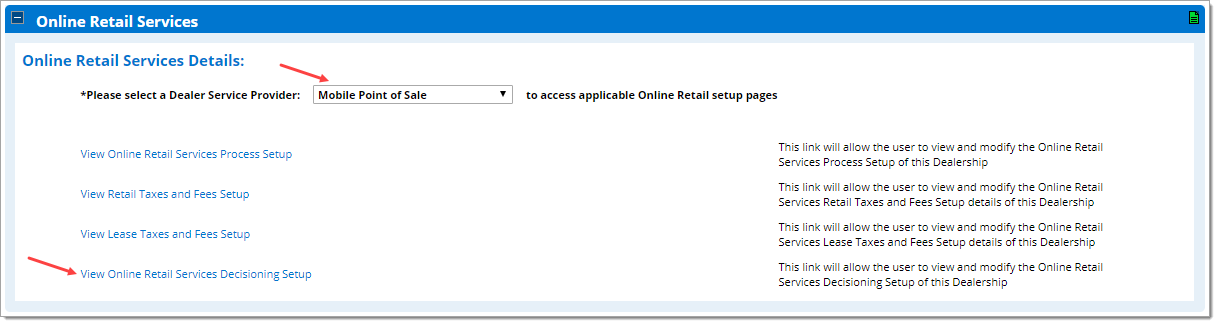
You can also customize the settings for Credit Bureau and Decisioning. Begin by clicking on the ‘Admin’ tab from the top navigation and selecting ‘Dealer Info’ from the dropdown.
Scroll down to the ‘Online Retail Services’ section. From the ‘Dealer Service Provider’ dropdown, select ‘Mobile Point of Sale.’
Click the ‘View Online Retail Services Decisioning Setup’ link.
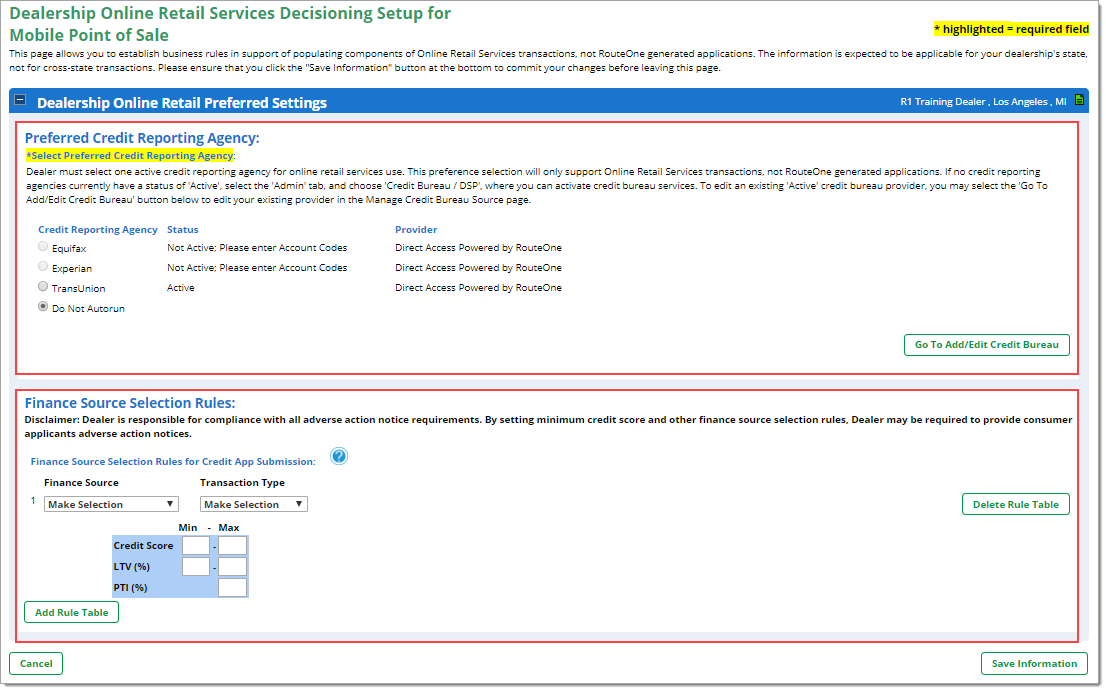
You will be navigated to the ‘Dealership Online Retail Preferred Settings’ page, where you can select your preferred credit bureau and set up finance source decisioning rules.
Digital Retail’s Red Flag tool in Mobile Point of Sale (MPS) Premium level is only compatible with TransUnion.
Click the ‘Save Information’ button to apply your settings.
Step 3: Download and Install the Mobile Point of Sale (MPS) Application
Use your tablet device to download and install the Mobile Point of Sale (MPS) application. To download MPS, you will need an Apple® ID or a Google account. If your dealership does not have an account, you will need to create one.
Digital Retail offers two options to download the MPS application:
- In the Apple App Store™ search for ‘RouteOne MPS.’
- In the Google Play™ store search for ‘RouteOne MPS.’
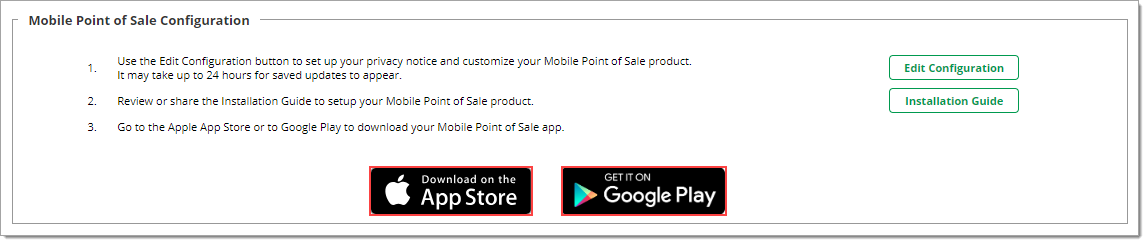
If you are in the RouteOne system, you can also access the Apple App Store™ or Google Play™ from the ‘Mobile Point of Sale Configuration’ section.
- Click on the ‘Admin’ tab from the top navigation, and select ‘Premium Services’ from the dropdown. Click on ‘Digital Retail’ to expand the section.
- Scroll down to the ‘Mobile Point of Sale Configuration’ section. You can click ‘Download on the App Store™’ or ‘Get it on Google Play™.’
Within the App Store or Google Play store, download and install the application.
Important: You will need to configure your MPS application settings on your tablet device before you open the MPS application. You will receive an error message if you open the MPS application before you configure your settings.
After downloading the mobile MPS application, you will need your RouteOne Dealer ID.
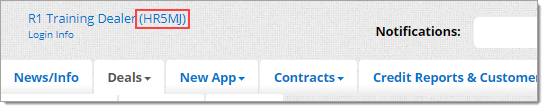
If you do not know your Dealer ID, log into the RouteOne system, and look for the five digit code next to your dealership’s name in the top left corner of the page.
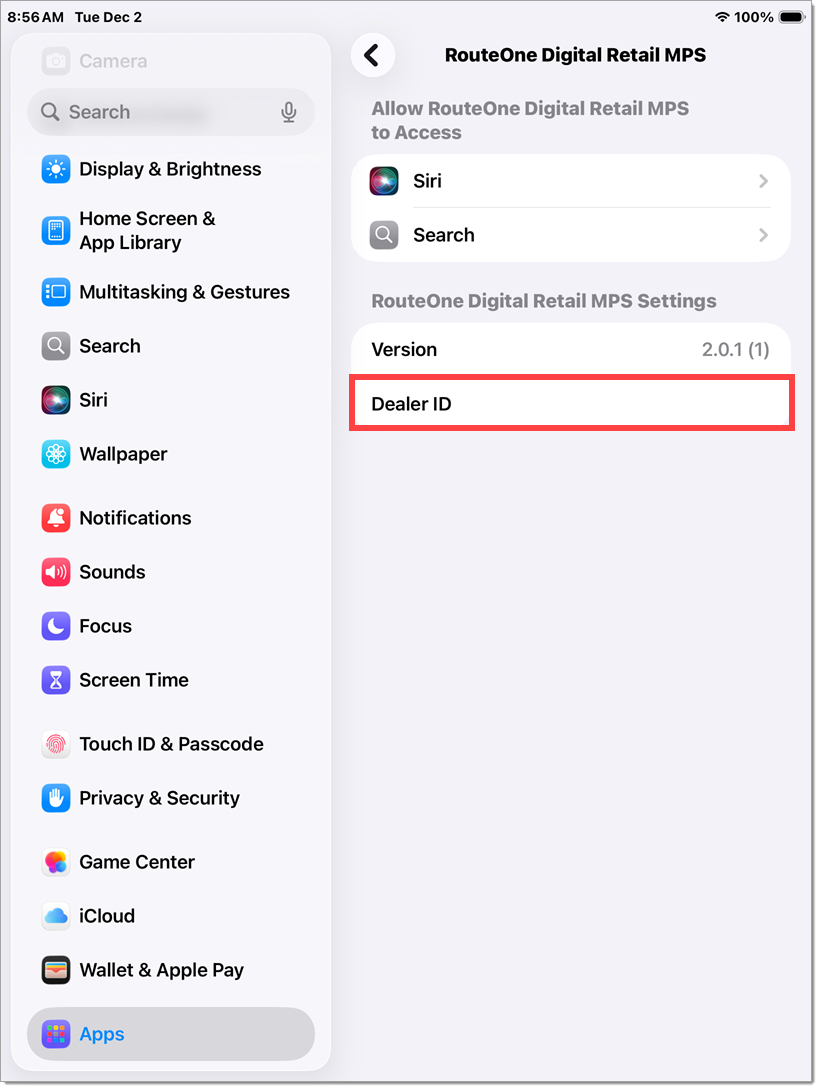
Within your tablet device, open ‘Settings,’ and click the ‘RouteOne MPS’ tab.
Enter your Dealer ID.
To confirm that your RouteOne Dealer ID saves, navigate off the page by tapping another tab, and then return to the ‘RouteOne MPS’ tab.
If you do not see RouteOne Mobile Point of Sale (MPS) in Settings, or if you cannot enter your Dealer ID, you may need to reboot the ‘Settings’ for your tablet device.
To do this, double tap the round button on your tablet, then swipe up to close the ‘Settings’ window.
Reopen the ‘Settings’ window. ‘RouteOne MPS’ should now be visible.
You should now be able to access the RouteOne MPS application.
Apple is a registered trademark of Apple Inc.
Google Play and the Google Play logo are trademarks of Google Inc.
ROUTEONE SUPPORT
Hours (EST)
Monday - Friday: 6:00am – Midnight
Saturday: 9am – 9pm
Can’t find what you need?
Try our search
