In This Guide:
Related Guides:
Menu
Managing Users in RouteOne Menu
Accessing the User Management Page
To access the User Management page, click on the ‘Users’ tab on the F&I Home Page and select the ‘User Management’ option.
On the User Management page, you can view a list of all created users, create new users, send activation emails, reset passwords, delete users, and edit the roles of existing users.
Adding Users
On the User Management page, click the ‘New User’ button above the user list.
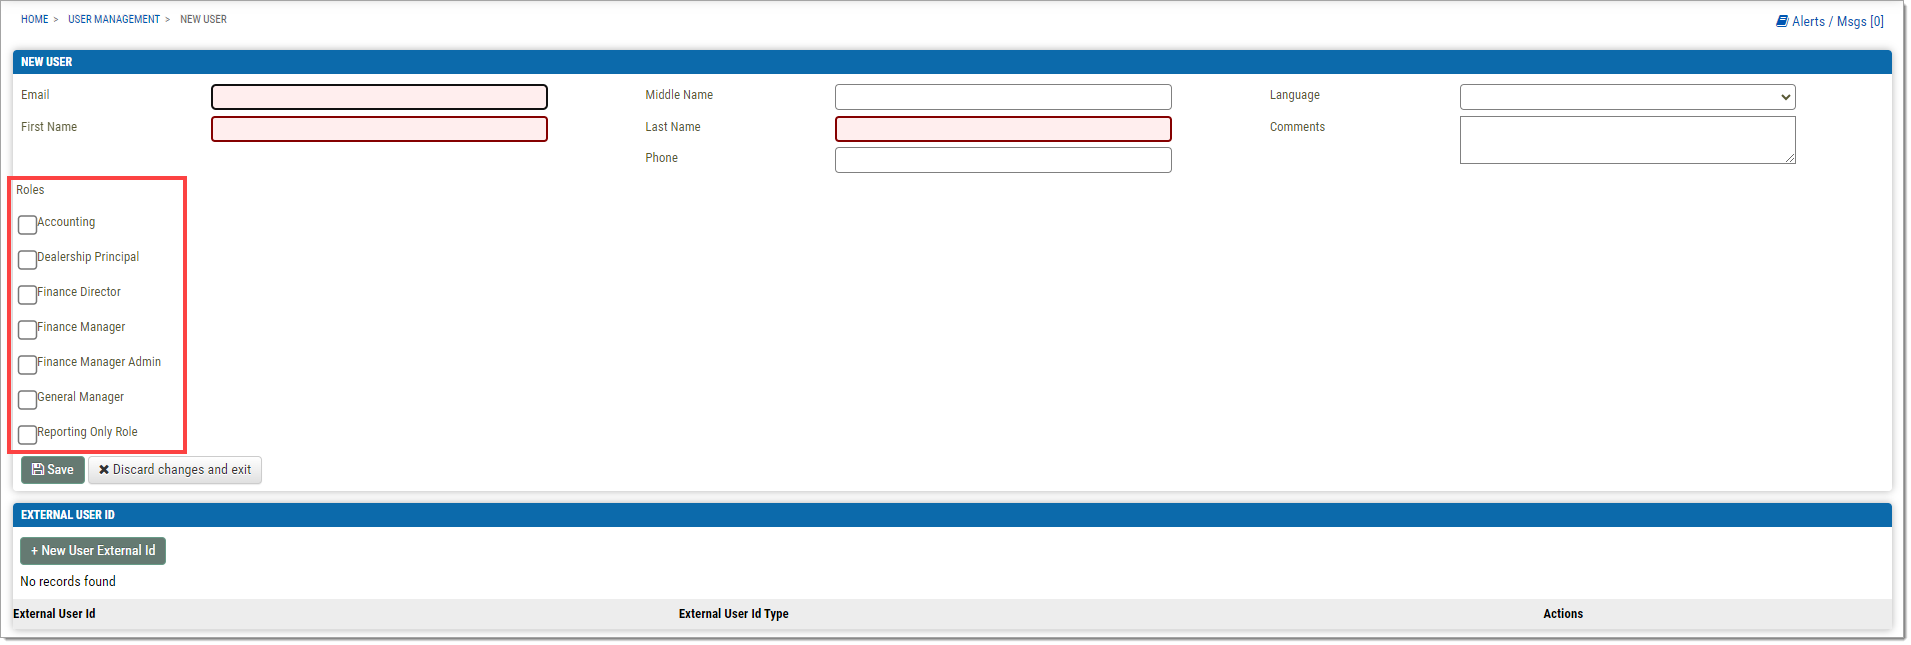
You will be directed to the New User page.
On the New User page, fill out the required fields, which are highlighted red. The email address provided must be valid. Additional fields may be filled out but are not required.
On this page, roles can be assigned to the user with the checkboxes for the available roles.
Roles are created by RouteOne for a dealership. A role can be a combination of any number of privileges and can be applied to any user in the dealership.
Click the ‘Save’ button.
The new user will be added to the user list on the User Management page, and they will receive an activation email at the provided address. Once the user confirms their account, they will be marked as ‘Active.’
Editing Users
Users can be edited from the User Management page by clicking on the ‘edit’ button.
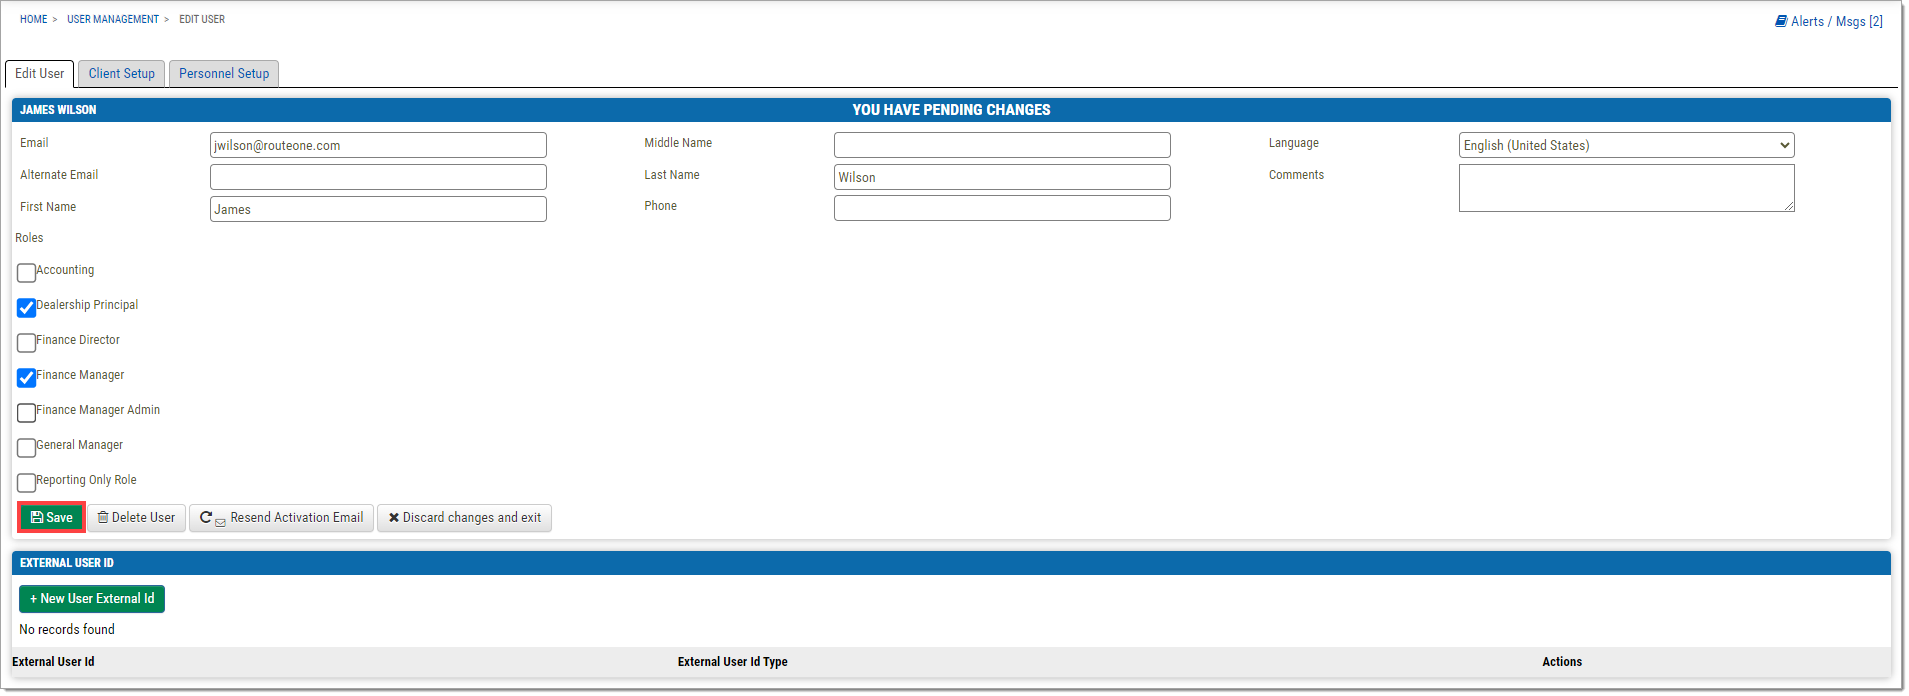
On the Edit User page, any information that was entered can be updated.
The email address must still be valid. The user will receive an email at the new address to confirm the change.
Roles can be adjusted using the checkboxes.
Click the ‘Save’ button.
To remove an existing user, click the ‘delete’ button.
To resend an activation email to an account that has not yet been activated, click the ‘resend activation’ button. The user will receive a new activation email to their listed email address.
Once a user’s account has been activated, the ‘resend activation’ button will turn into a ‘reset password’ button.
To reset a user’s password, click the ‘reset password’ button. The user will receive an email requesting a password reset to their listed email address.
Adding a RouteOne User ID to a Menu User
In order to enable Single-Sign On between RouteOne and Menu, the Menu user’s RouteOne User ID must appear as an ‘External User ID’ on their Menu user profile.
For more information on Single Sign-On, visit the Integrating RouteOne and Menu guide here.
To add and External User ID to a Menu user’s profile, go to the User Management page and click the ‘edit’ button for the corresponding user.
External User IDs can only be added by editing existing users, they cannot be added when creating a new user.
The user does not need to be activated/confirmed to add an External User ID.
Scroll to the bottom of the Edit User page. You will see the ‘External User ID’ section.
Click the ‘+New User External Id’ button.
The section will expand. In the ‘External User Id Type’ drop-down menu, select ‘RouteOne UID,’ then fill in the RouteOne User ID of that user in the ‘External User Id’ field.
For instructions on locating a user’s RouteOne User ID, visit the Using My RouteOne guide here.
Click the ‘save’ icon.
To cancel the process, click the ‘x’ icon.
The RouteOne User ID will now be associated with that Menu user.
To change the RouteOne User ID associated with the user, click the ‘edit’ icon and adjust the ID in the ‘External User Id’ field.
To remove the RouteOne User ID association from the Menu user entirely, click the ‘remove’ icon.
ROUTEONE SUPPORT
Hours (EST)
Monday - Friday: 6:00am – Midnight
Saturday: 9am – 9pm
Can’t find what you need?
Try our search


