In This Guide:
Related Guides:
Access and Administration
User Information and Permissions
About the ‘Users’ Page
The Dealership System Administrator (DSA) for your dealership will need to make any changes to user information and permissions.
- To locate the DSA for your dealership, click the ‘Gear’ icon in the upper right-hand corner of the screen. A pop-up window will appear, and your DSA will be listed at the top of the window. If the DSA position needs to be reassigned, contact RouteOne Support at 866.768. 8301.
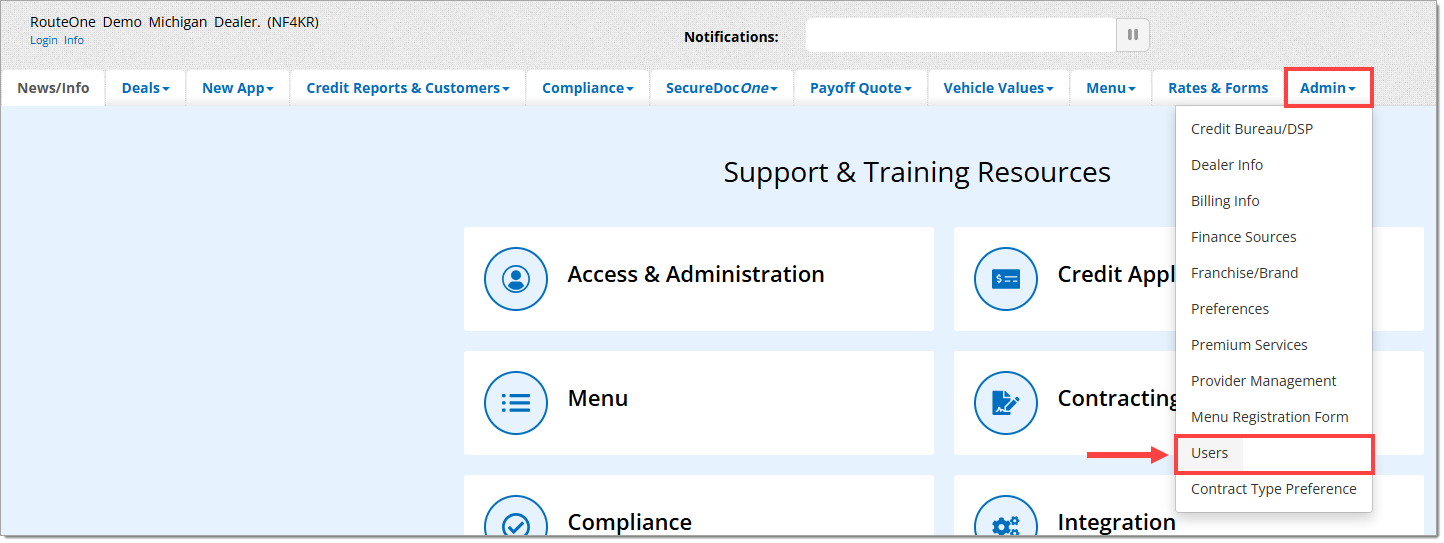
From the ‘Admin’ top navigation tab, select ‘Users’ from the dropdown menu to navigate to the ‘Users’ page.
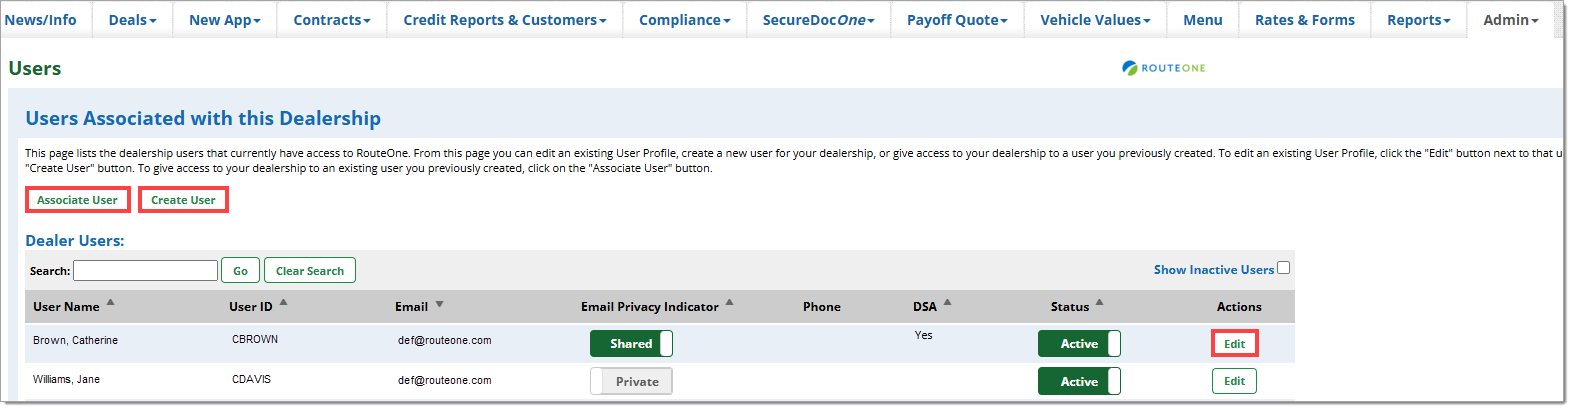
From here you will be able to see all users affiliated with your dealership and their current RouteOne permissions.
You can also create a new user, associate an existing user with your dealership, or edit an existing user.
Navigating the ‘Users’ Page
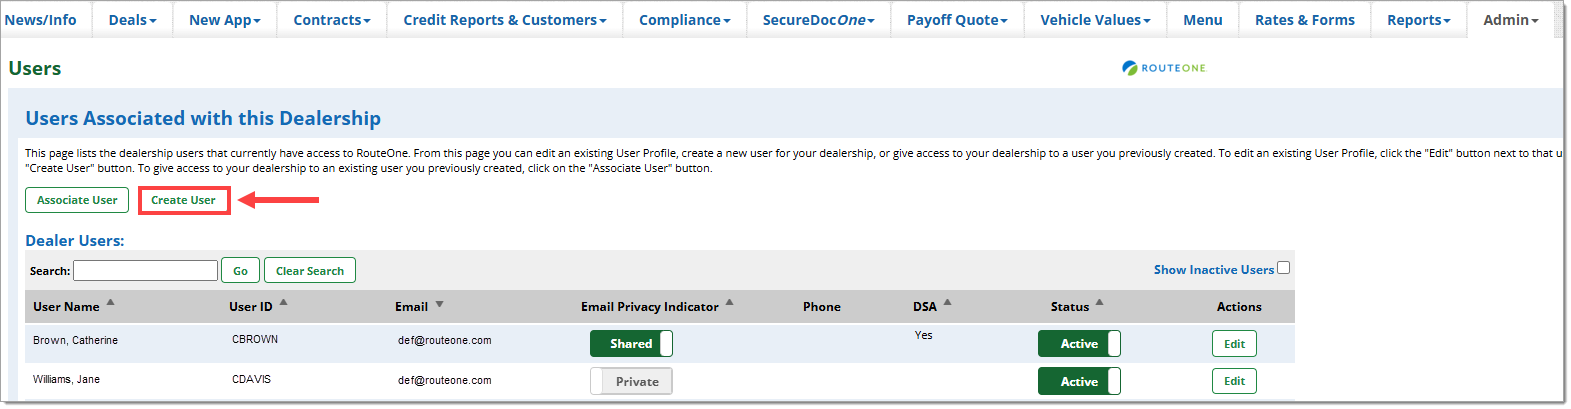
To show “Inactive” users along with “Active” users, click the ‘Show Inactive Users’ checkbox.
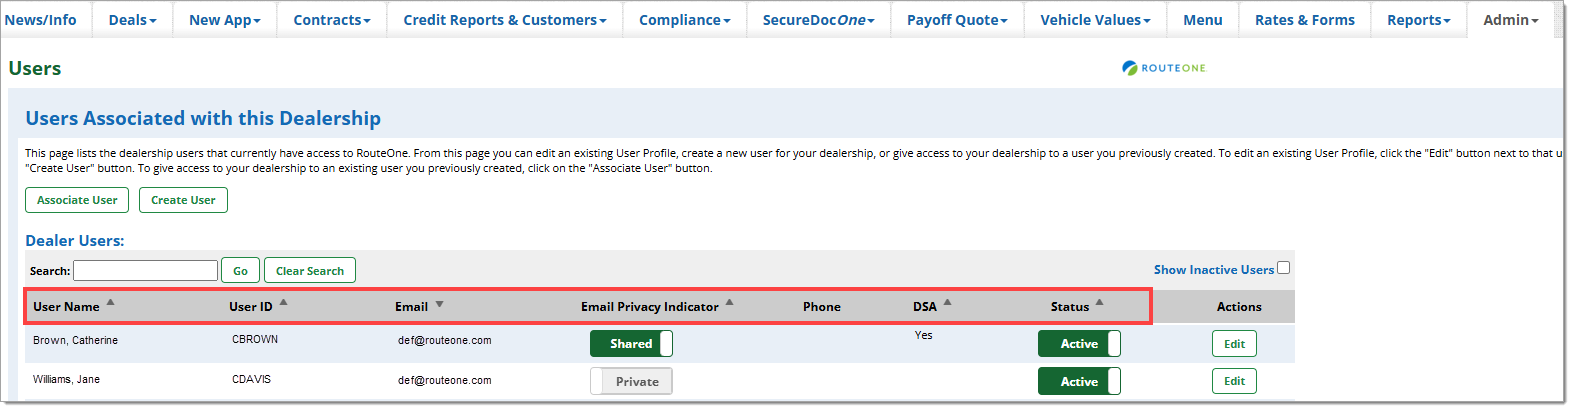
You can see at a glance a user’s Name, ID, Email, whether they have a “Shared” or “Private” email, Phone number, whether or not they are a DSA, and their Status (“Active”/”Inactive”).
To sort by a specific category, click on the respective column header. To reverse the order of the list, click the column header again.
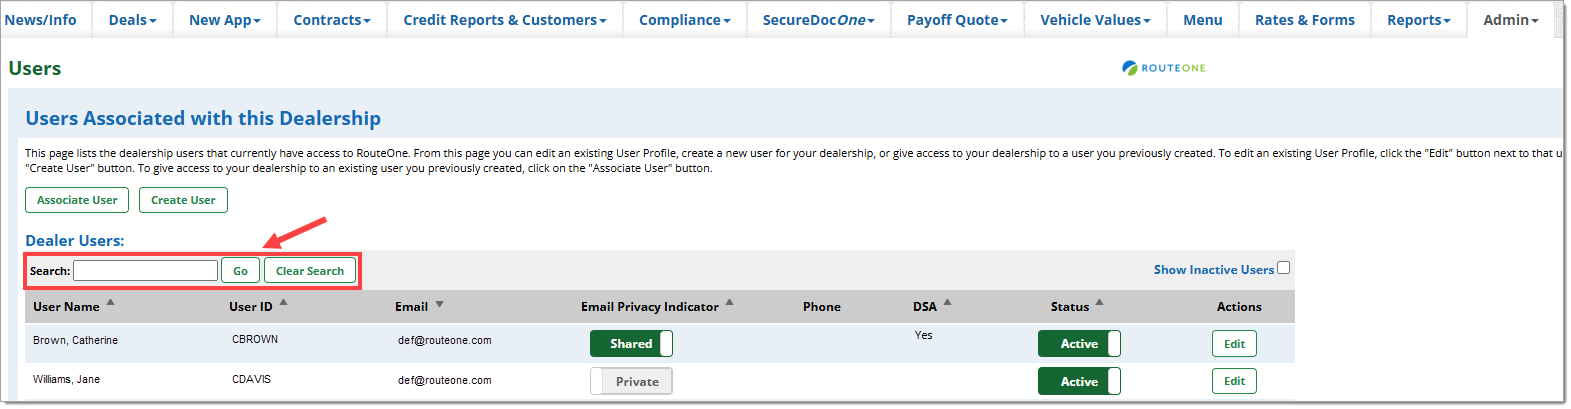
To search, use the ‘Search’ box above the Dealer Users list. You can search by name, user ID, or email.
Creating a New User
To create a new user, click the ‘Create User’ button on the ‘Users’ page. You will then be navigated to the ‘Create User’ page.
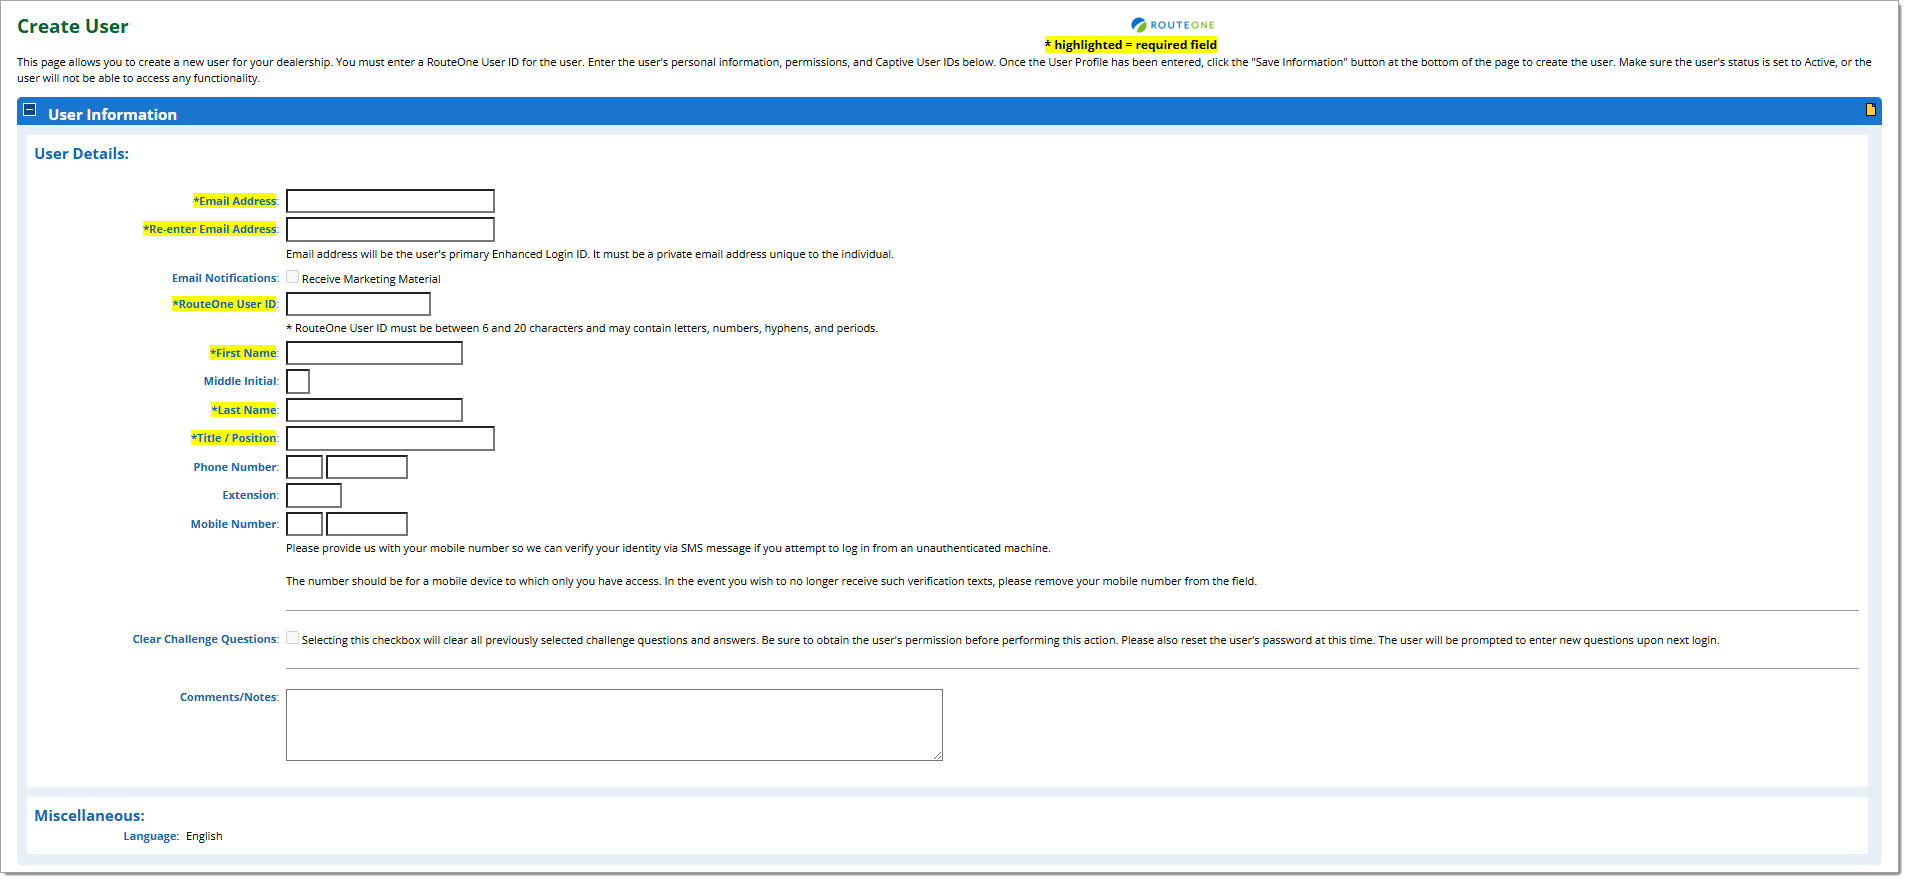
User Information
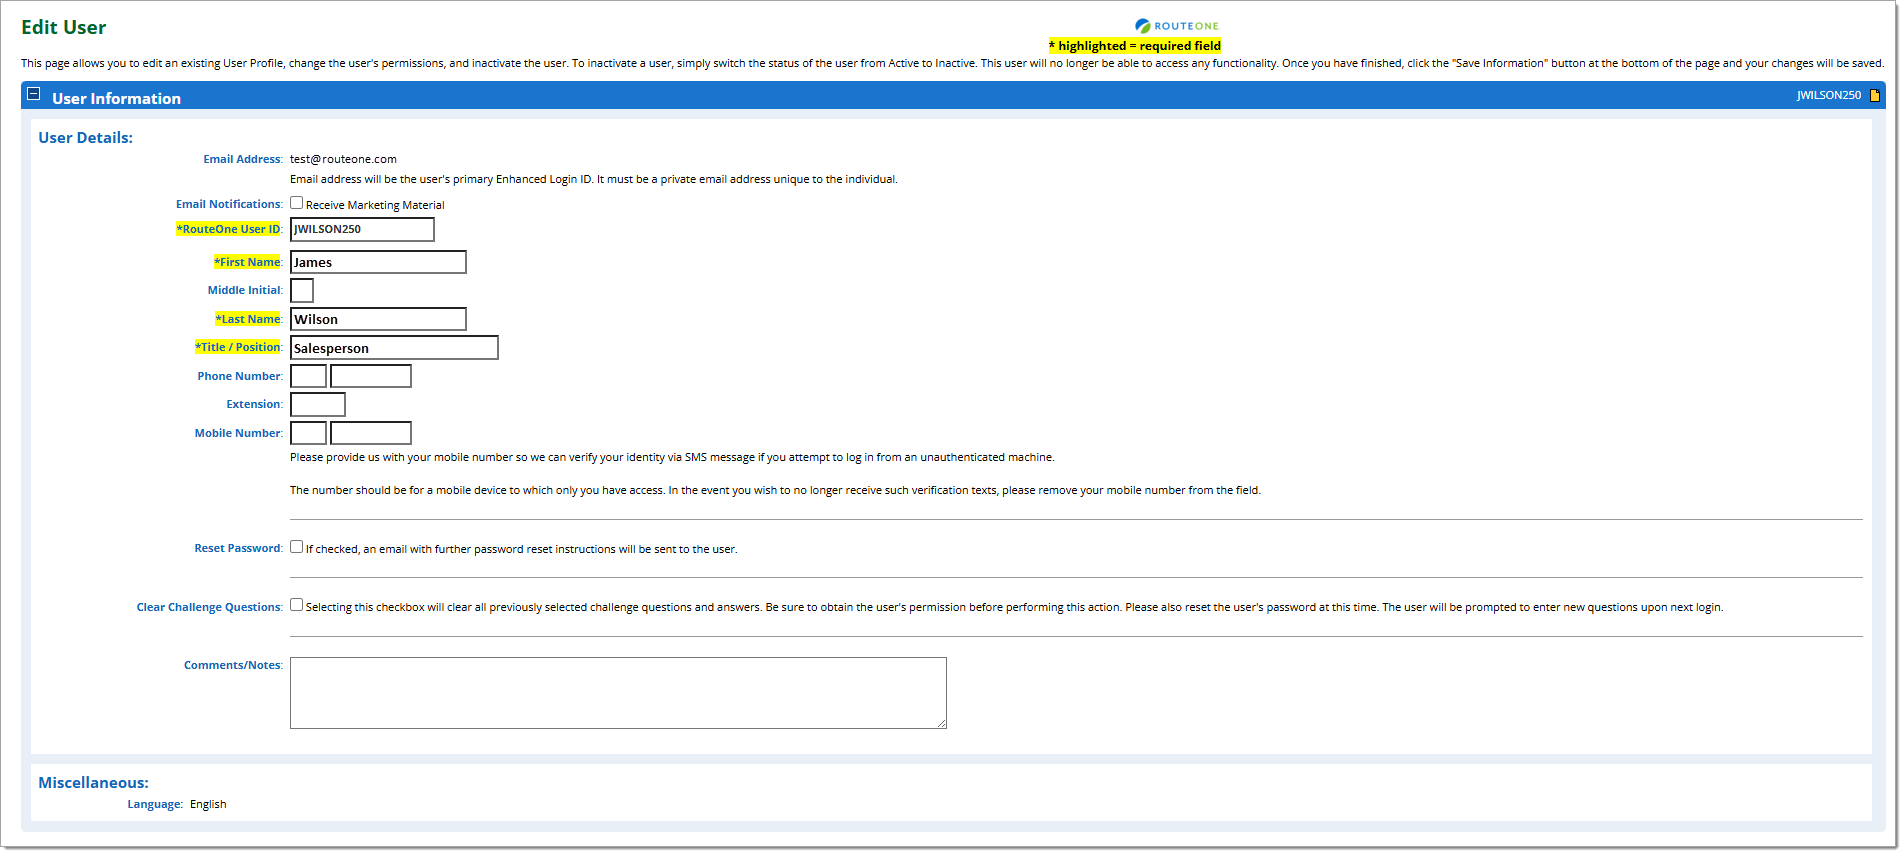
Input all the required information, which is noted by an asterisk ‘*’ and is highlighted in yellow.
Important Notes:
- The email address for the account must be a private email. It cannot be a shared email, as the token codes and temporary passwords may be inaccessible.
- After inputting all necessary information and permissions, remember to click the ‘Save Information’ button at the bottom of the page.
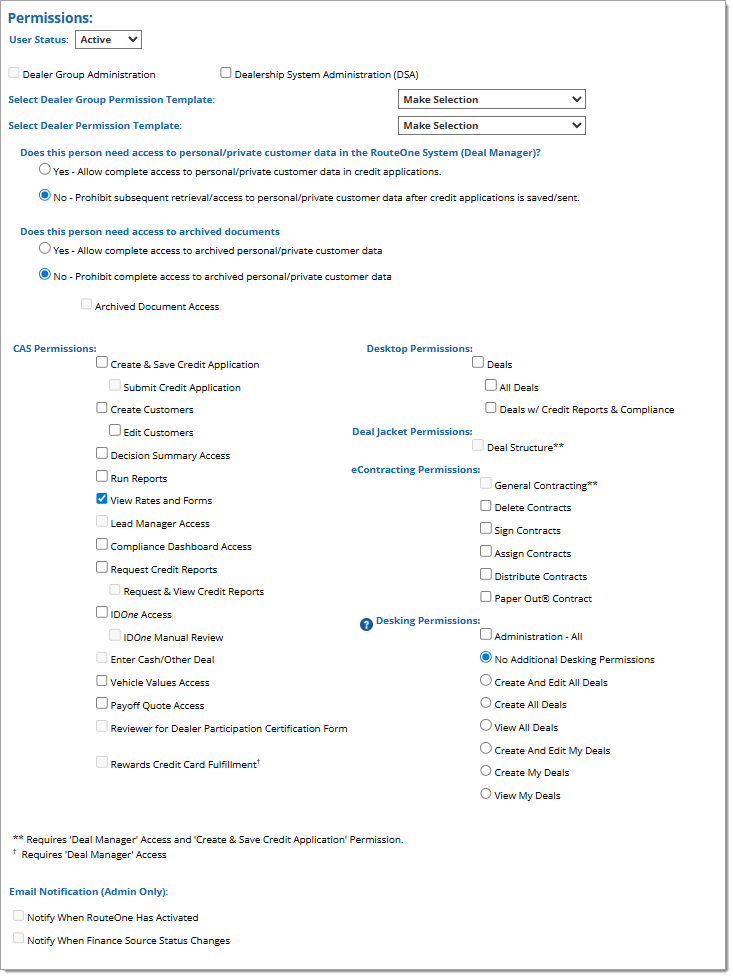
Permissions - Applying a User Permission Template
To apply a previously created permission template to the user, click on the ‘Select Dealer Permission Template’ dropdown menu and select the desired template.
Note: For more information on creating and managing user permission templates, click here to view the ‘Managing User Permission Templates’ user guide.
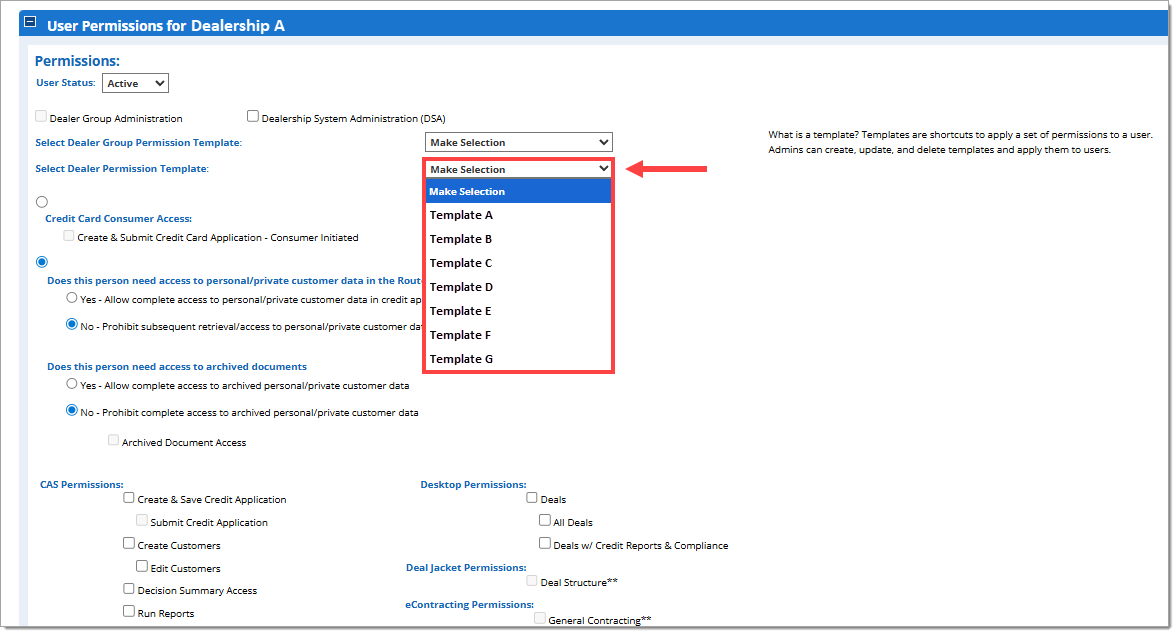
The permissions associated with the selected template will be applied.
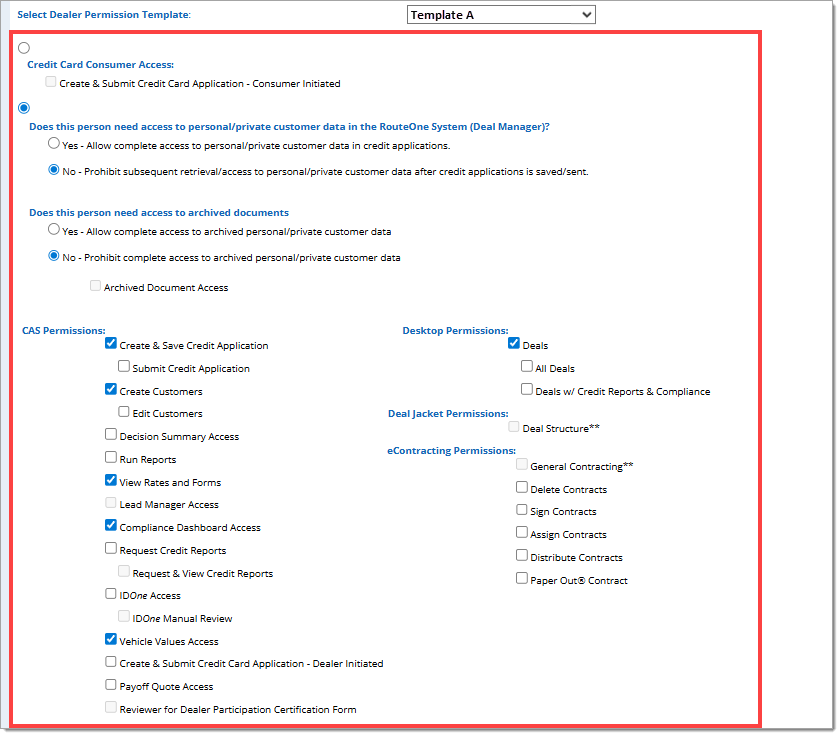
Click here to continue to the ‘Captive IDs’ section of the user creation process.
Permissions – Manually Applying Permissions
Use the checkboxes to assign the desired roles to the user.
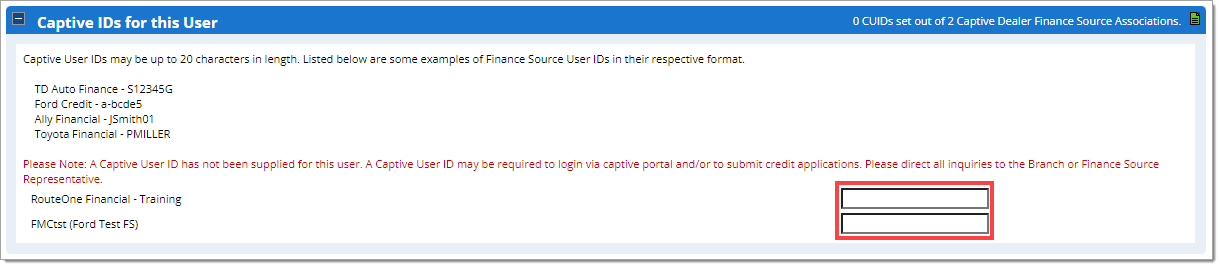
Captive IDs
If the user has a Captive ID, enter it in the ‘Captive IDs for this User’ section. This ID will be used to log into your Captive portal.
Third Party IDs
If the user has any third-party IDs, enter them in the ‘Third Party IDs for this User’ section.
This will enable the individual user to seamlessly access their third-party programs by allowing them to log into those programs from RouteOne.
For more information on Integrating RouteOne and RouteOne Menu, click here to view our user guide.

Saving and Contacting the New User
After inputting all necessary information and permissions, click the ‘Save Information’ button at the bottom of the page.

A screen will appear with the message ‘Dealer User Created Successfully!’ The user’s RouteOne User ID will also be noted in this message.
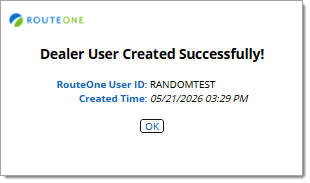
The new user will automatically be associated with your dealership and receive a welcome email from RouteOne.
Click here for information on Logging into RouteOne.
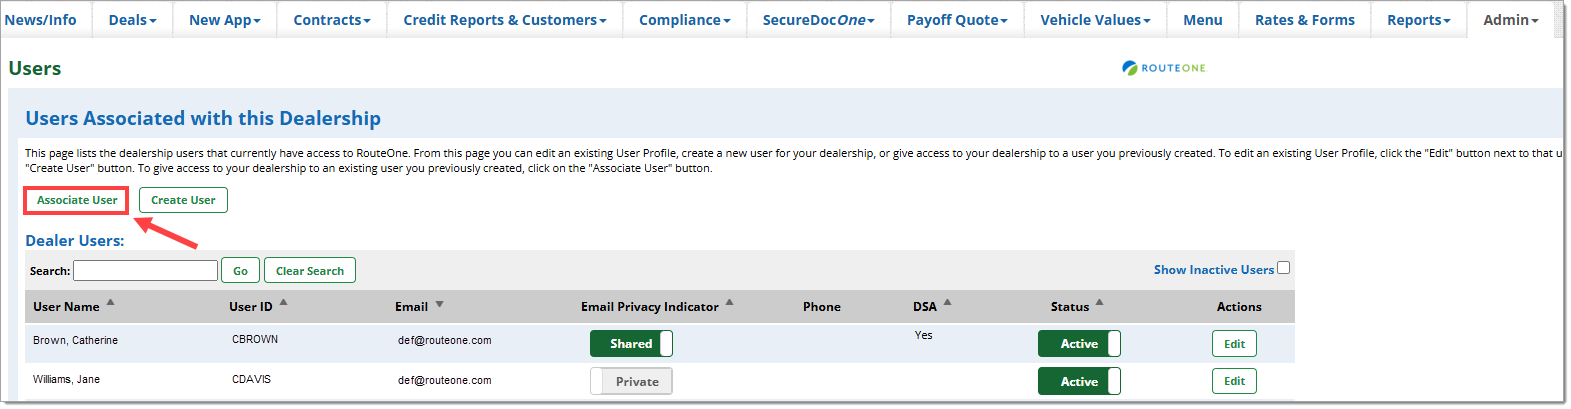
Associating a User with Your Dealership
Associating a user to a dealership gives that user access to that dealership. Individual permissions can be set for users at the dealership level. By default, a newly created user is automatically associated to the dealership in which they were created.
To associate an existing user to a dealership, navigate to the ‘Users’ page, then click ‘Associate User’.
On the Associate Users page, use the ‘Search By’ dropdown menu to select whether you would like to search by User Name, Email, User ID, or Captive ID. Input the information and click ‘Search.’

When you locate the user you would like to associate, click the ‘Select’ button under the ‘Actions’ column.

You will be navigated to the Edit User page for that user, where you can make changes to the information or permissions before associating the user.
For more information on editing a user, see the ‘Editing a User’ section of this guide below.
Click the ‘Save Information’ button at the bottom of the page to apply your changes.

Editing a User
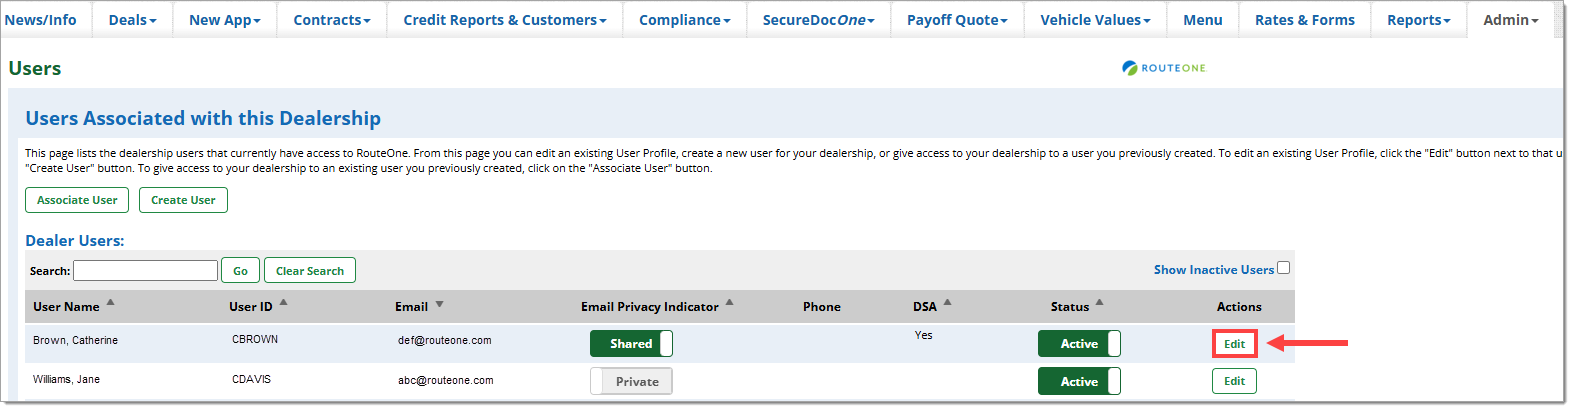
To edit an existing user, go to the ‘Users’ page and use the Search filters to locate the desired user. Click the ‘Edit’ button next to the user. You will be navigated to the ‘Edit User’ page.
From this page you can also edit the user’s password by completing the ‘New Password’ and ‘New Password Confirm’ fields.
Edit the desired information or permissions for the user. For detailed permissions information, click here to view our user guide.
Important: Remember to click the ‘Save Information’ button at the bottom of the page to apply your changes.
Deactivating a User
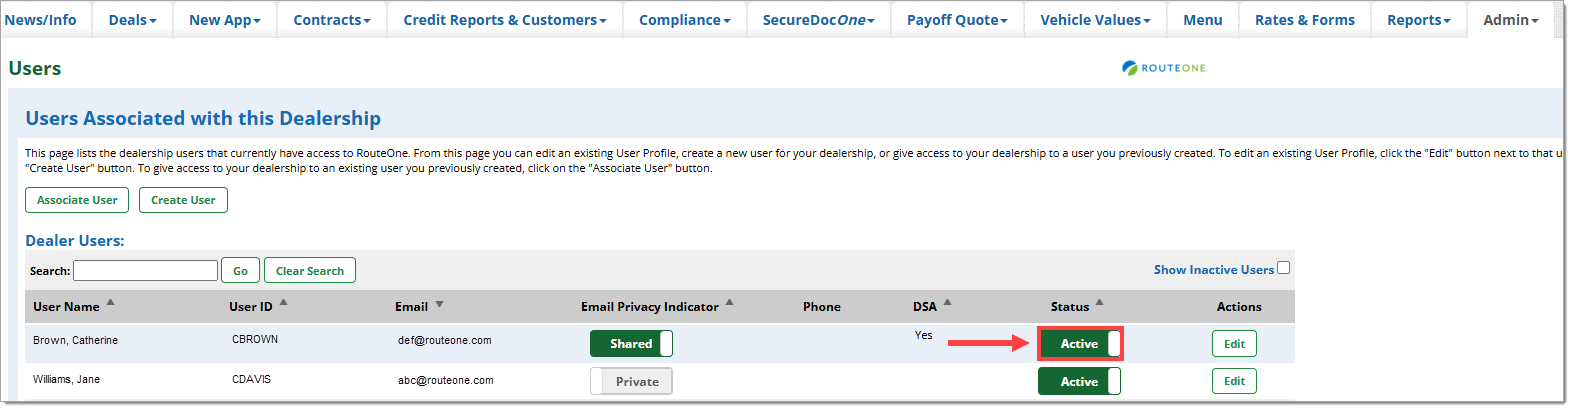
To deactivate a user, click the toggle under the ‘Status’ tab to switch them from “Active” to “Inactive.” The user will now only appear in the Dealer Users list if the ‘Show Inactive Users’ checkbox is checked.
ROUTEONE SUPPORT
Hours (EST)
Monday - Friday: 6:00am – Midnight
Saturday: 9am – 9pm
Can’t find what you need?
Try our search
